Introduction
These are my personal notes to prepare for the LFCS exam.
This book consists of a detailed guide for each topic in the official checklist of domains the candidates are requested to master in order to pass the exam.
These notes has been collected from a wide range of sources available on the web and partially re-elaborated by me, plus some additional topics of interest for a developer/sysadmin (still in progress): even if you are not interested in the certification at all (but curious about *nix systems), you may nevertheless find useful the guides in the first domain (Essential Commands) since they cover the very basic commands to work inside a bash shell.
Please, note that I took into consideration only Ubuntu (18.04/20.04) as exam environment. Things can be different in CentOS.

1. Essential Commands - 25%
- Log into local & remote graphical and text mode consoles
- Search for files
- Evaluate and compare the basic file system features and options
- Compare and manipulate file content
- Use input-output redirection
- Analyze text using basic regular expressions
- Archive, backup, compress, unpack, and uncompress files
- Create, delete, copy, and move files and directories
- Create and manage hard and soft links
- List, set, and change standard file permissions
- Read, and use system documentation
- Manage access to the root account
Log into local & remote graphical and text mode consoles
Console and terminal are closely related. Originally, they meant a piece of equipment through which you could interact with a computer: in the early days of unix, that meant a teleprinter-style device resembling a typewriter, sometimes called a teletypewriter, or tty in shorthand. The name terminal came from the electronic point of view, and the name console from the furniture point of view.
For a quick historical overview look here and here.
Long story short, in modern terminology:
- a terminal is in Unix a textual input/output handling device, but the term is more often used for pseudo-terminals (pts) that allows us to access and use the shell (e.g. terminal emulators Konsole on KDE)
- a console was originally a physical terminal device connected with Linux system on serial port via serial cable physically, but now by virtual console is meant an app which simulates a physical terminal (on Unix-like systems, such as Linux and FreeBSD, the console appears as several terminals (ttys) accessed via spacial keys combinations)
- a shell is a command line interpreter (e.g. bash) invoked when a user logs in, whose primary purpose is to start other programs.
To log into:
-
a local environment in GUI mode you must provide, when prompted, username and password
-
a local environment in text/console mode (tty), start your computer and immediately after the BIOS/UEFI splash screen, press and hold the
Shift(BIOS), or press theEsc(UEFI) key repeatedly, to access the GRUB menu. Once you see the GNU GRUB screen, with the first entry from the menu selected, press theekey. This allows you to edit the kernel parameters before booting. Look for the line that begins withlinux(use the Up / Down / Left / Right arrow keys to navigate);vmlinuzshould also be on the same line. At the end of this line (you can place the cursor using the arrow keys at the beginning of the line, then press theEndkey to move the cursor to the end of that line) add a space followed by the number3. Don't change anything else. This3represents the multi-user.target systemd target which is mapped to the old, now obsolete runlevel 2, 3 and 4 (used to start and stop groups of services). For example the old runlevel 5 is mapped to the systemd graphical.target and using this starts the graphical (GUI) target. After doing this, pressCtrl+xorF10to boot to console (text) mode. To reboot your system while in console mode, use the reboot command (sudo reboot now).
This is how the line beginning with "linux" looks like for Ubuntu 18.04 LTS:
linux /boot/vmlinuz-4.18.0-15-generic root=UUID=1438eb20-da3d-4880-bb3a-414e+++0a929 ro quiet splash $vt_handoff 3
-
a remote text environment as a full login session you can use ssh:
ssh -i <*rsa.pub> -p <9199> username@host -t "exec bash" -
a remote environment in GUI mode you can use
ssh -Xto enable X11 forwarding or a remote desktop client for a full graphical interface (by default, Ubuntu comes with Remmina remote desktop client with support for VNC and RDP protocols).
Once logged command w can be used to show who is logged and what they are doing:
[root@localhost ~]# w
23:41:16 up 2 min,  2 users,  load average: 0.02, 0.02, 0.01
USER     TTY      FROM             LOGIN@   IDLE   JCPU   PCPU WHAT
root     tty1                      23:40   60.00s  0.01s  0.01s -bash
root     pts/0    192.168.0.34     23:41    1.00s  0.02s  0.00s w
The first column shows which user is logged into system and the second one to which terminal. In the second column:
- for virtual consoles in terminal is showed
tty1,tty2etc. - for ssh remote sessions (pseudo-terminal salve) in terminal is showed
pts/0,pts/1etc. :0is for a X11 server namely used for graphical login sessions.
The usual method of command-line access in Ubuntu is to start a terminal (with Ctrl+t usually, or F12 if you are using a Guake-like drop-down terminal emulator, such as Yakuake on KDE), however sometimes it's useful to switch to the real console:
- use the
Ctrl-Alt-F1shortcut keys to switch to the first console. - to switch back to Desktop mode, use the
Ctrl-Alt-F7shortcut keys.
There are six consoles available. Each one is accessible with the shortcut keys Ctrl-Alt-F1 to Ctrl-Alt-F6.
Search for files
Find files with depth 3 and size above 2 mb:
find . -maxdepth 3 -type f -size +2M
Find files with permission 777 and remove them:
find /home/user -perm 777 -exec rm '{}' +
Using
-execwith a semicolon (eg. "find . -exec ls '{}' ;"), will execute the command separately for each argument passed, while using a plus sign instead (e.g "find . -exec ls '{}' +"), as many arguments as possible are passed to a single command: if the number of arguments exceeds the system's maximum command line length, the command will be called multiple times.
Find files based on how many times they have been accessed (-atime n) or modified (-mtime n) (with n = n*24 hours ago):
find /etc -iname "*.conf" -mtime -180 –print
To combine two conditions:
find . \( -name name1 -o -name name2 \)
To negate a condition:
find . \! -user owner
To search for a filename ignoring the case:
find . -iname name
Find all files with at least (- sign before g in this example) permission write for group:
find . -perm -g=w
Boolean conditions for searching by permission mode:
-perm mode: file's permission bits are exactly mode (octal or symbolic)-perm -mode: all of the permission bits mode are set for the file-perm /mode: any of the permission bits mode are set for the file.
Audit a system to find files with root SUID/SGID:
sudo find / -user root \( -perm 4000 -o -perm 2000 \) -print
Remove a file by inode:
find . -maxdepth 1 -type f -inum 7404301 -delete
Combine find and grep:
find . -name "*.md" -exec grep -Hni --color=always inode {} \;
Alternatively, you can use the locate command, which searches for a given pattern through a database file that is generated by the updatedb command. The found results are displayed on the screen, one per line.
During the installation of the mlocate package, a cron job is created that runs the updatedb command every 24 hours. This ensures the database is regularly updated. For more information about the cron job check the /etc/cron.daily/mlocate file.
The syntax for the locate command is as follows:
locate [OPTION] PATTERN
For example to search for a file named .bashrc you would type:
locate .bashrc
Compared to the more powerful find command that searches the file system, locate operates much faster but can search only for entries present in its cache.
File Globbing
File globbing is a feature provided by the UNIX/Linux shell to represent multiple filenames by using special characters called wildcards with a single file name. Long ago, in UNIX V6, there was a program /etc/glob that would expand wildcard patterns. Soon afterward this became a shell built-in.
A wildcard is essentially a symbol which may be used to substitute for one or more characters. Therefore, we can use wildcards for generating the appropriate combination of file names as per our requirement.
Use * to mean "every character": ls -l a*
Use ? for a single character: ls -l a?
Use square brackets to declare a set of characters: ls -l a[ab]
Wildcards can be combined: ls -l a[a-c]*
Use curly braces to consider any listed element: mkdir /etc/{public,private,protected}
! is used to exclude characters from the list that is specified within the square brackets: ls /lib[!x]*
Note: Beware that the syntax for excluding specific characters is slightly different with regex: you have to use the square brackets and the ^ (hat). For example, the pattern
[^abc]will match any single character except for the lettersa,b, orc.
Named character classes ([[:named:]]) are used inside brackets to represent an entire class of chars. Their interpretation depends on the LC_CTYPE locale. Some of them are listed below:
- ‘[:alnum:]', prints all those files having alphabets and digits, both lower and uppercases are considered.
- ‘[:alpha:]', prints all those files having alphabets only, both lower and uppercases are considered.
- ‘[:digit:]', prints all those files having digits.
- ‘[:lower:]', prints all those files having lower-case letters.
- ‘[:punct:]', prints all those files having punctuation characters, will search for ! ” # $ % & ‘ ( ) * + , – . / : ; < = > ? @ [ \ ] ^ _ ` { | } ~.
- ‘[:space:]', prints all those files having space characters.
- ‘[:upper:]', prints all those files having lower-case letters.
Evaluate and compare the basic file system features and options
Print out disk free space in a human readable format:
df -h
See which file system type each partition is:
df -T
See more details with file command about individual devices:
file -sL /dev/sda1
Or: sudo fdisk -l /dev/sda1
File system fatures:
- ext, "Extended Filesystem", old, deprecated
- ext2, no journaling, max file size 2TB, lower writes to disk = good for USB sticks etc
- ext3, journaling (journal, ordered, writeback), max file size 2TB; journaling, i.e. file changes and metadata are written to a journal before being committed; if a system crashes during an operation, the journal can be used to bring back the system files quicker with lower likeliness of corrupted files
- ext4, from 2008, supports up to 16TB file size, can turn off journaling optionally
- fat, from Microsoft, no journaling, max file size 4 GB
- tmpfs, temporary file system used on many Unix-like filesystems, mounted and structured like a disk-based filesystem, but resides in volatile memory space, similar to a RAM disk
- xfs, excels at parallel I/O, data consistency, and overall filesystem performance, well suited for real-time applications, due to a unique feature which allows it to maintain guaranteed data I/O bandwidth, originally created to support extremely large filesystems with sizes of up to 16 exabytes and file sizes of up to 8 exabytes
- btrfs, a copy-on-write filesystem for Linux aimed at implementing advanced features while focusing on fault tolerance, repair, and easy administration, although it has some features that make it unstable.
Compare and manipulate file content
Create a file: touch <filename>
Or: echo "you've got to hide your love away" > filename
Compare two files: diff <file1> <file2>
Compare two dirs: diff -ur <dir1> <dir2>
Report or remove repeated lines: uniq <filename>
Sort lines by reverse numeric order: ps aux | sort -k2 -r -n
Print second and third columns from file using comma as a field separator: cut -d ',' -f 2,3 <file.csv>
Replace comma with semicolon as field separator: tr ',' ';' < <file.csv>
Replace all consecutive occurrences of space with a single space: cat file | tr -s ' '
Print file with line numbers: nl -ba <filename>
Count lines in a file: wc -l <filename>
Identify the type of a file:
file <file>.csv
<file>.csv: CSV text
Display text both in character and octal format: od -bc <filename.txt>
Tip: Useful for debugging texts for unwanted chars or to visualize data encoded in a non-human readable format (e.g. a binary file).
Change file name (-n for dry-run): rename -n "s/cat/dog/g" cat.txt
Apply uniform spacing between words and sentencese: fmt -u <filename>
Merge file side by side: paste <file1> <file2>
Paginate a file for printing: pr <filename>
Join two files which have a common join field:
cat foodtypes.txt
>1 Protein
>2 Carbohydrate
>3 Fat

cat foods.txt
>1 Cheese
>2 Potato
>3 Butter

join foodtypes.txt foods.txt
>1 Protein Cheese
>2 Carbohydrate Potato
>3 Fat Butter
To join files using different fields, the -1 and -2 flags (or -j if it's the same char or position) options can be passed to join:
cat wine.txt
>Red Beaunes France
>White Reisling Germany
>Red Riocha Spain

cat reviews.txt
>Beaunes Great!
>Reisling Terrible!
>Riocha Meh

join -1 2 -2 1 wine.txt reviews.txt
>Beaunes Red France Great!
>Reisling White Germany Terrible!
>Riocha Red Spain Meh
Join expects that files will be sorted before joining, so you have to sort them if the lines are not in the right order:
join -1 2 -2 1 <(sort -k 2 wine.txt) <(sort reviews.txt)
Split a file into N files based on size of input: split -n <x> <filename>
Use expand or unexpand to convert from tabs to the (equivalent number of) spaces and viceversa.
To tabs N characters apart, instead of the default of 8: expand --tabs=<n> <filename>
Use input-output redirection
When bash starts it opens the three standard file descriptors (/dev/fd/*): stdin (file descriptor 0), stdout (file descriptor 1), and stderr (file descriptor 2). A file descriptor (fd) is a number which refers to an open file. Each process has its own private set of fds, but fds are inherited by child processes from the parent process.
File descriptors always point to some file (unless they're closed). Usually when bash starts all three file descriptors, stdin, stdout, and stderr, point to your terminal. The input is read from what you type in the terminal and both outputs are sent to the terminal.
In fact, an open terminal in a Unix-based operating system is usually itself a file, commonly stored in /dev/tty0. When a new session is opened in parallel with an existing one, the new terminal will be /dev/tty1 and so on. Therefore, initially the three file descriptor all point to the file representing the terminal in which they are executed.
Redirect the standard output of a command to a file: command >file
Writing command >file is the same as writing command 1>file. The number 1 stands for stdout, which is the file descriptor number for standard output.
Redirect the standard error of a command to a file: command 2>file
Redirect both standard output and standard error to a file: command &>file
This is bash's shortcut for quickly redirecting both streams to the same destination. There are several ways to redirect both streams to the same destination. You can redirect each stream one after another: command >file 2>&1
This is a much more common way to redirect both streams to a file. First stdout is redirected to file, and then stderr is duplicated to be the same as stdout. So both streams end up pointing to file.
Warning: This is not the same as writing:
command 2>&1 >file. The order of redirects matters in bash! This command redirects only the standard output to the file. The stderr will still be printed to the terminal.
Discard the standard output of a command: command > /dev/null
Similarly, by combining the previous one-liners, we can discard both stdout and stderr by doing: command >/dev/null 2>&1
Or just simply: command &>/dev/null
Redirect the contents of a file to the stdin of a command: grep [pattern] < [file]
Redirect a bunch of text to the stdin of a command with the here-document redirection operator <<EOF ('EOF' can be any placeholder of your choice):
grep 'ciao' <<EOF
hello
halo
ciao
EOF
This operator instructs bash to read the input from stdin until a line containing only 'EOF' is found. At this point bash passes the all the input read so far to the stdin of the command.
Redirect a single line of text to the stdin of a command: grep ciao <<< $'hello\nhalo\nciao'
Note:
$'[text]'allows to replace\nwith a newline before passing the whole string to the command,$"[text]"won't do it.
Note: This is equivalent to pipe the result of a command to the another one:
echo "some text here" | grep "a pattern"
Note: It's also possible to pass text instead of a file by means of 'process substitution':
find . | grep -f <(echo "somefile")
Send stdout and stderr of one process to stdin of another process: command1 |& command2
This works on bash versions starting 4.0. As the new features of bash 4.0 aren't widely used, the old, and more portable way to do the same is:
command1 2>&1 | command2
Use exec to manipulate channels over ranges of commands:
exec < file # STDIN has become file
exec > file # STDOUT has become file
You may wish to save STDIN and STDOUT to restore them later:
exec 7<&0 # saved STDIN as channel 7
exec 6>&1 # saved STDOUT as channel 6
If you want to log all output from a segment of a script, you can combine these together:
exec 6>&1       # saved STDOUT as channel 6
exec > LOGFILE  # all further output goes to LOGFILE
# put commands here
exec 1>&6       # restores STDOUT; output to console again
A more detailed explanation here.
Analyze text using basic regular expressions
A regular expression (shortened as regex) is a sequence of characters that specifies a search pattern. For an overview on regular expressions, look here. Here you can find an interactive tutorial to learn the basic of regex syntax.
Common regex characters:
| Symbol | Function |
|---|---|
. | matches any single character (except newlines, normally) |
\ | escape a special character (e.g. \. matches a literal dot) |
? | the preceding character may or may not be present (e.g. /hell?o/ would match hello or helo) |
* | any number of the preceding character is allowed (e.g. .* will match any single-line string, including an empty string, and gets used a lot) |
+ | one or more of the preceding character (.+ is the same as .* except that it won't match an empty string) |
| ` | ` |
() | group a section together, this can be useful for conditionals (`(a |
{} | specify how many of the preceding character (e.g. a{12} matches 12 as in a row) |
[] | match any character in this set. - defines ranges (e.g. [a-z] is any lowercase letter), ^ means "not" (e.g. [^,]+ match any number of non-commas in a row) |
^ | beginning of line |
$ | end of line |
The three major dialects every programmer should know are:
- basic regular expressions (BRE)
- extended regular expressions (ERE)
- Perl-compatible regular expressions (PCRE).
Essentials text stream processing tools to use in conjunction with regex patterns are:
- grep, filters its input against a pattern;
- sed, applies transformation rules to each line; and
- awk, manipulates an ad hoc database stored as text, e.g. CSV files.
1. grep
The grep tool can filter a file, line by line, against a pattern. By default, grep uses basic regular expressions (BRE). BRE differs syntactically in several key ways. Specifically, the operators {}, (), +, | and ? must be escaped with \.
Useful grep flags:
-v, inverts the match--color(==always), colors the matched text-F, interprets the pattern as a literal string-H,-h, prints (or doesn't print) the matched filename-i, matches case insensitively-l, prints names of files that match instead-n, prints the line number-w, forces the pattern to match an entire word-x, forces patterns to match the whole line.
The egrep tool is identical to grep, except that it uses extended regular expressions (actually, equivalent to grep -E). Extended regular expressions are identical to basic regular expressions, but the operators {}, (), +, | and ? should not be escaped.
PCREs can be used by means of the -P flag of grep. Perl has a richer and more predictable syntax than even the extended regular expressions syntax.
Tip: If you have a choice, always use Perl-style regex.
Examples:
# search for a string in one or more files
----------------------------------------
grep 'fred' /etc/passwd                             # search for lines containing 'fred' in /etc/passwd
grep fred /etc/passwd                               # quotes usually not when you don't use regex patterns
grep null *.scala                                   # search multiple files

# case-insensitive
----------------
grep -i joe users.txt                               # find joe, Joe, JOe, JOE, etc.

# regular expressions
-------------------
grep '^fred' /etc/passwd                            # find 'fred', but only at the start of a line
grep '[FG]oo' *                                     # find Foo or Goo in all files in the current dir
grep '[0-9][0-9][0-9]' *                            # find all lines in all files in the current dir with three numbers in a row

# display matching filenames, not lines
-------------------------------------
grep -l StartInterval *.plist                       # show all filenames containing the string 'StartInterval'

# show matching line numbers
--------------------------
grep -n we gettysburg-address.txt                   # show line numbers as well as the matching lines

# lines before and after grep match
---------------------------------
grep -B5 "the living" gettysburg-address.txt        # show all matches, and five lines before each match
grep -A10 "the living" gettysburg-address.txt       # show all matches, and ten lines after each match
grep -B5 -A5 "the living" gettysburg-address.txt    # five lines before and ten lines after

# invert the sense of matching
-------------------
grep -v fred /etc/passwd                            # find any line *not* containing 'fred'
grep -vi fred /etc/passwd                           # same thing, case-insensitive

# grep in a pipeline
------------------
ps aux | grep httpd                                 # all processes containing 'httpd'
ps aux | grep -i java                               # all processes containing 'java', ignoring case
ls -al | grep '^d'                                  # list all dirs in the current dir

# search for multiple patterns
----------------------------
egrep 'apple|banana|orange' *                       # search for multiple patterns, all files in current dir

# grep + find
-----------
find . -type f -exec grep -il 'foo' {} \;           # print all filenames of files under current dir containing 'foo', case-insensitive

# recursive grep search
---------------------
grep -rl 'null' .                                   # similar to the previous find command; does a recursive search
grep -ril 'null' /home/al/sarah /var/www            # search multiple dirs
egrep -ril 'aja|alvin' .                            # multiple patterns, recursive

# grep gzipped files
---------------
zgrep foo myfile.gz                                 # all lines containing the pattern 'foo'
zgrep 'GET /blog' access_log.gz                     # all lines containing 'GET /blog'
zgrep 'GET /blog' access_log.gz | less              # same thing, case-insensitive

# submatch backreferences to print out words that repeat themselves:
---------------
grep '^\(.*\)\1$' /usr/share/dict/words             # prints "beriberi, bonbon, cancan, ..."

# match text after a string, but excluding this string from the captured text (so called, "positive look-behind")
---------------
grep -P '(?<=name=)[ A-Za-z0-9]*' filename
For grep advanced features, look here.
2. sed
sed is a "stream editor", which reads a file line-by-line, conditionally applying a sequence of operations to each line and (possibly) printing the result.
By default, sed uses basic regular expression syntax. To use the (more comfortable) extended syntax, supply the flag -E.
Most sed programs consist of a single sed command: substitute (s). But a proper sed program is a sequence of sed commands. Most sed commands have one of three forms:
- operation, apply this operation to the current line
- address operation, apply this operation to the current line if at the specified address
- address1,address2 operation, apply this operation to the current line if between the specified addresses.
Useful operations:
{ operation1 ; ... ; operationN }, executes all of the specified operations, in order, on the given addresss/pattern/replacement/arguments, replaces instances of pattern with replacement according to the arguments in the current line (in the replacement,\nstands for the nth submatch, while&represents the entire match)b, branches to a label, and if none is specified, then sed skips to processing the next line (think of this as a break operation)y/from/to/, transliterates the characters in "from" to their corresponding character in "to"q, quits sedd, deletes the current linew, file writes the current line to the specified file.
Common arguments to the substitute operation:
- the most common argument to the substitute command is
g, which means "globally" replace all matches on the current line, instead of just the first n, tells sed to replace the nth match only, instead of the firstp, prints out the result if there is a substitutioni, ignores case during the matchw file, writes the current line to file.
Useful flags:
-nsuppresses automatic printing of each result; to print a result, use commandp.-f filenameuses the given file as the sed program.
Examples:
sed -n '1,13p;40p' <file>
sed '12q' <file>
sed -n '1,+4p' <file>
sed -n '1~5p' <file>   # "first~step" pattern matches a line every 5 lines starting from the first line
sed '1,3d' <file>   # deletes the first 3 lines from stdout (to overwrite the source file, use '-i' flag or '-i.bck' to backup the original file)
# do not use '-n' with (d), otherwise the original file wil be overriden with the empty stdout
sed '/pattern/d' <file> # delete all the lines matched by the given pattern
sed 's/up/down/' <file> # substitues the first occurence matched by the pattern on every line
sed 's/up/down/2' <file> # substitues only the second occurence on a line
sed -n 's/up/down/2p' <file>    # to see which lines would be modified
sed 's/^.*at/(&)/' <file>   # wraps the matched text into parentheses
sed -E 's/([A-Z][a-z]*), ([A-Z][a-z]*( [A-Z][a-z]*[.]?)?)/\2 \1/g' <file>  # use '\n' to reference the groups in the regex pattern
>Might, Matthew B.
>Matthew B. Might
3. awk
The awk command provides a more traditional programming language for text processing than sed. Those accustomed to seeing only hairy awk one-liners might not even realize that awk is a real programming language.
The major difference in philosophy between awk and sed is that awk is record-oriented rather than line-oriented. Each line of the input to awk is treated like a delimited record. The awk philosophy melds well with the Unix tradition of storing data in ad hoc line-oriented databases, e.g., /etc/passwd. The command line parameter -F regex sets the regular expression regex to be the field delimiter.
An awk program consists of pattern-action pairs: pattern { statements }, followed by an (optional) sequence of function definitions.
In fact, an action is optional, and a pattern by itself is equivalent to: pattern { print }. As each record is read, each pattern is checked in order, and if it matches, then the corresponding action is executed.
The form for function defintion is: function name(arg1,...,argN) { statements }
The patterns can have forms such as:
/regex/, which matches if the regex matches something on the lineexpression, which matches if expression is non-zero or non-nullpattern1, pattern2, a range pattern which matches all records (inclusive) between pattern1 and pattern2BEGIN, which matches before the first line is readEND, which matches after the last line is read.
Some implementations of awk, like gawk, provide additional patterns:
BEGINFILE, which matches before a new file is readENDFILE, which matches after a file is read.
A basic awk expression is either:
- a special variable (
$1orNF) - a regular variable (
foo) - a string literal (
"foobar") - a numeric constant (
3,3.1) - a regex constant (
/foo|bar/).
There are several special variables in AWK:
| Variable | Meaning |
|---|---|
| $0 | the entire text of the matched record |
| $n | the nth entry in the current record |
| FILENAME | name of current file |
| NR | number of records seen so far |
| FNR | number of records so far in this file |
| NF | number of fields in current record |
| FS | input field delimiter, defaults to whitespace |
| RS | record delimiter, defaults to newline |
| OFS | output field delimiter, defaults to space |
| ORS | output record delimiter, defaults to newline |
awk is a small language, with only a handful of forms for statements.
The man page lists all of them:
- if (expression) statement [ else statement ]
- while (expression) statement
- for (expression; expression; expression) statement
- for (var in array) statement
- do statement while (expression)
- break
- continue
- { [ statement ... ] }
- expression
- print [ expression-list ] [ > expression ]
- printf format [ , expression-list ] [ > expression ]
- return [ expression ]
- next
- nextfile
- delete array[expression]
- delete array
- exit [ expression ]
The most common statement is print, which is equivalent to print $0.
Useful flags:
-f filename, uses the provided file as the awk program-F regex, sets the input field separator-v var=value, sets a global variable (multiple-vflags are allowed).
Examples:
ps aux | awk '{print $1}'   # prints the first column
ps aux | awk '{printf("%-40s %s\n", $2, $11)}' # prints the first column with a 40 chars right-padding
ps aux | awk '/firefox/' # filters records by regex pattern
ps aux | awk '$2==1645'  # filters records by field comparison
ps aux | awk '$2 > 2100'    # filters records by numeric comparison
ps aux | awk '/firefox/ && $2 > 2100' # combines a regex pattern with a math operator
ps aux | awk 'BEGIN {printf("%-26s %s\n", "Command", "CPU")} $3>10 {print $11, $3}' # adds a header before processing any data
ps aux | awk '{printf("%s %4.0f MB\n", $11, $6/1024)}'  # controls scale and rounds up
ps aux | awk 'BEGIN {sum=0} /firefox/ {sum+=$6} END {printf("Total memory consumed by Firefox: %.0f MB\n", sum/1024)}'  # sums field values in a column
ps aux | awk 'BEGIN {i=1; while (i<6) {print "Square of", i, "is", i*i; ++i}}'  # to use a while loop
Archive, backup, compress, unpack, and uncompress files
The idea of “archiving” data generally means backing it up and saving it to a secure location, often in a compressed format. An “archive” on a Linux server in general has a slightly different meaning. Usually it refers to a tar file.
Historically, data from servers was often backed up onto tape archives, which are magnetic tape devices that can be used to store sequential data. This is still the preferred backup method for some industries. In order to do this efficiently, the tar program was created so that you can address and manipulate many files in a filesystem, with intact permissions and metadata, as one file. You can then extract a file or the entire filesystem from the archive.
Basically, a tar file (or a tarball) is a file format that creates a convenient way to distribute, store, back up, and manipulate groups of related files. Tar is normally used with a compression tool such as gzip, bzip2, or xz to produce a compressed tarball.
gzip is the oldest compression tool and provides the least compression, while bzip2 provides improved compression. In addition, xz is the newest but (usually) provides the best compression. This advantage comes at a price: the time it takes to complete the operation, and system resources used during the process. Normally, tar files compressed with these utilities have .gz, .bz2, or .xz extensions, respectively.
| Long option | Abbreviation | Description |
|---|---|---|
| –create | c | Creates a tar archive |
| –concatenate | A | Appends tar files to an archive |
| –append | r | Appends files to the end of an archive |
| –update | u | Appends files newer than copy in archive |
| –diff or –compare | d | Find differences between archive and file system |
| –file [archive] | f | Use archive file or device archive |
| –list | t | Lists the contents of a tarball |
| –extract or –get | x | Extracts files from an archive |
| –directory [dir] | C | Changes to directory dir before performing operations |
| –same-permissions | p | Preserves original permissions |
| –verbose | v | Lists all files read or extracted. When this flag is used along with –list, the file sizes, ownership, and time stamps are displayed. |
| –verify | W | Verifies the archive after writing it |
| –exclude [file] | — | Excludes file from the archive |
| –exclude=pattern | X | Exclude files, given as a pattern |
| –gzip or –gunzip | z | Processes an archive through gzip |
| –bzip2 | j | Processes an archive through bzip2 |
| –xz | J | Processes an archive through xz |
List the contents of a tarball : tar tvf [tarball]
Update or append operations cannot be applied to compressed files directly:
gzip -d <myfiles.tar.gz>
tar --delete --file <myfiles.tar> <file4>       # deletes the file inside the tarball
tar --update --file <myfiles.tar> <file4>       # adds the updated file
gzip myfiles.tar
Exclude files from backup depending on file type (e.g. mpeg):
tar X <(for i in $DIR/*; do file $i | grep -i mpeg; if [ $? -eq 0 ]; then echo $i; fi; done) -cjf backupfile.tar.bz2 $DIR/*
Restore backups preserving permissions: tar xjf backupfile.tar.bz2 --directory user_restore --same-permissions
Only store files newer than a given date (i.e. differential backup): tar --create --newer '2011-12-1' -vf backup1.tar /var/tmp
Note: If [date] starts with
/or.it is taken to be a filename and the ctime of that file is used as the date.
Note: A differential backup backs up only the files that changed since the last full back. Incremental backups also back up only the changed data, but they only back up the data that has changed since the last backup — be it a full or incremental backup.
Note: Each instance of
--verboseon the command line increases the verbosity level by one, so if you need more details on the output, specify it twice.
To create incremental backups:
mkdir data
echo "File1 Data" > data/file1
echo "File2 Data" > data/file2
tar --create --listed-incremental=data.snar --verbose --verbose --file=data.tar data
>tar: data: Directory is new
>drwxrwxr-x ubuntu/ubuntu     0 2018-04-03 14:00 data/
>-rw-rw-r-- ubuntu/ubuntu     5 2018-04-03 14:00 data/file1
>-rw-rw-r-- ubuntu/ubuntu     5 2018-04-03 14:00 data/file2

echo "File3 Data" > data/file3
tar --create --listed-incremental=data.snar --verbose --verbose --file=data1.tar data
>drwxrwxr-x ubuntu/ubuntu     0 2018-04-03 14:41 data/
>-rw-rw-r-- ubuntu/ubuntu    11 2018-04-03 14:41 data/file3

echo "more data" >> data/file2
tar --create --listed-incremental=data.snar --verbose --verbose --file=data2.tar data
>drwxrwxr-x ubuntu/ubuntu     0 2018-04-03 14:41 data/
>-rw-rw-r-- ubuntu/ubuntu    15 2018-04-03 14:47 data/file2

rm data/file1
tar --create --listed-incremental=data.snar --verbose --verbose --file=data3.tar data
>drwxrwxr-x ubuntu/ubuntu     0 2018-04-03 14:55 data/

tar --list --verbose --verbose --listed-incremental=data.snar --file=data3.tar
>drwxrwxr-x ubuntu/ubuntu    15 2018-04-03 14:55 data/
>N file2
>N file3

# restore the dir one backup at a time

tar --extract --verbose --verbose --listed-incremental=/dev/null --file=data.tar
>drwxrwxr-x ubuntu/ubuntu    15 2018-04-03 14:00 data/
>-rw-rw-r-- ubuntu/ubuntu     5 2018-04-03 14:00 data/file1
>-rw-rw-r-- ubuntu/ubuntu     5 2018-04-03 14:00 data/file2
cat data/file1 data/file2
>File1 Data
>File2 Data

tar --extract --verbose --verbose --listed-incremental=/dev/null --file=data1.tar
>drwxrwxr-x ubuntu/ubuntu    22 2018-04-03 14:41 data/
>-rw-rw-r-- ubuntu/ubuntu    11 2018-04-03 14:41 data/file3

tar --extract --verbose --verbose --listed-incremental=/dev/null --file=data2.tar
>drwxrwxr-x ubuntu/ubuntu    22 2018-04-03 14:41 data/
>-rw-rw-r-- ubuntu/ubuntu    15 2018-04-03 14:47 data/file2
cat data/file2
>File2 Data
>more data

tar --extract --verbose --verbose --listed-incremental=/dev/null --file=data3.tar
>drwxrwxr-x ubuntu/ubuntu    15 2018-04-03 14:55 data/
>tar: Deleting ‘data/file1'

# the dir is now up-to-date to the last backup
Note: Each backup uses the same meta file (.sar) but its own archive.
rsync is a fast and versatile command-line utility for synchronizing files and directories between two locations over a remote shell, or from/to a remote rsync daemon. It provides fast incremental file transfer by transferring only the differences between the source and the destination. It finds files that need to be transferred using a "quick check" algorithm (by default) that looks for files that have changed in size or in last-modified time.
sync can be used for mirroring data, incremental backups, copying files between systems, and as a replacement for scp, sftp, and cp commands.
rsync provides a number of options that control how the command behaves. The most widely used options are:
-a,--archive, archive mode, equivalent to-rlptgoD, this option tells rsync to syncs directories recursively, transfer special and block devices, preserve symbolic links, modification times, groups, ownership, and permissions-n,--dry-run, perform a trial run with no changes made-z,--compress, this option forces rsync to compresses the data as it is sent to the destination machine
Tip: Use this option only if the connection to the remote machine is slow.
-P, equivalent to--partial --progress, when this option is used, rsync shows a progress bar during the transfer and keeps the partially transferred files.
Tip: Useful when transferring large files over slow or unstable network connections.
--delete, when this option is used, rsync deletes extraneous files from the destination location, it is useful for mirroring-q,--quiet, use this option if you want to suppress non-error messages-e, this option allows you to choose a different remote shell, by default, rsync is configured to use ssh.
Basic Rsync Usage
The most basic use case of rsync is to copy a single file from one to another local location: rsync -a /opt/filename.zip /tmp/
Note: The user running the command must have read permissions on the source location and write permissions on the destination.
Omitting the filename from the destination location copies the file with the current name. If you want to save the file under a different name, specify the new name on the destination part: rsync -a /opt/filename.zip /tmp/newfilename.zip
The real power of rsync comes when synchronizing directories. The example below shows how to create a local backup of website files:
rsync -a /var/www/domain.com/public_html/ /var/www/domain.com/public_html_backup/
Note: If the destination directory doesn't exist, rsync will create it.
Note: It is worth mentioning that rsync gives different treatment to the source directories with a trailing slash (
/). If the source directory has a trailing slash, the command will copy only the directory contents to the destination directory. When the trailing slash is omitted, rsync copies the source directory inside the destination directory.
Using rsync to sync data from/to a remote machine
When using rsync to transfer data remotely, it must be installed on both the source and the destination machine. The new versions of rsync are configured to use SSH as default remote shell.
In the following example, we are transferring a directory from a local to a remote machine:
rsync -a /opt/media/ remote_user@remote_host_or_ip:/opt/media/
Note: If we run the command again, we will get a shorter output, because no changes have been made. This illustrates rsync's ability to use modification times to determine if changes have been made.
To transfer data from a remote to a local machine, use the remote location as a source:
rsync -a remote_user@remote_host_or_ip:/opt/media/ /opt/media/
If SSH on the remote host is listening on a port other than the default 22, specify the port using the -e option:
rsync -a -e "ssh -p 2322" /opt/media/ remote_user@remote_host_or_ip:/opt/media/
When transferring large amounts of data it is recommended to run the rsync command inside a screen session or to use the -P option:
rsync -a -P remote_user@remote_host_or_ip:/opt/media/ /opt/media/
Exclude Files and Directories
There are two options to exclude files and directories. The first option is to use the --exclude argument and specify the files and directories you want to exclude on the command line. When excluding files or directories, you need to use their relative paths to the source location.
In the following example shows how exclude the node_modules and tmp directories:
rsync -a --exclude=node_modules --exclude=tmp /src_directory/ /dst_directory/
The second option is to use the --exclude-from option and specify the files and directories you want to exclude in a file:
rsync -a --exclude-from='/exclude-file.txt' /src_directory/ /dst_directory/
The content of /exclude-file.txt can be something like:
node_modules
tmp
To make a full raw device backup: sudo dd if=/dev/sda of=/dev/sdb1 bs=64K conv=noerror,sync status=progress
To create a compressed image: sudo dd if=/dev/sda conv=sync,noerror bs=64K | gzip -c > /PATH/TO/DRIVE/backup_image.img.gz
To restore it: gunzip -c /PATH/TO/DRIVE/backup_image.img.gz | dd of=/dev/sda
Create, delete, copy, and move files and directories
Basic commands: mkdir, rm, touch, cp and mv.
Move back to your previous directory (- is converted to $OLDPWD): cd -
Create multiple files in a dir at once: touch /path/to/dir/{a,f,g}.md
Or, to create them with names in a linear sequence: touch /path/to/dir/{a..g}.md
To recursively remove a dir and its content without being prompted: rm -rf /home/user/somedir
To list directories themselves, not their contents: ll -d /home/user/somedir
Create and manage hard and soft links
A file is a named collection of related data that appears to the user as a single, contiguous block of information and that is retained in storage.
Whereas users identify files by their names, Unix-like operating systems identify them by their inodes. An inode is a data structure that stores everything about a file apart from its name and actual content. A filename in a Unix-like operating system is just an entry in an inode table. Inode numbers are unique per filesystem, which means that an inode with a same number can exist on another filesystem in the same computer.
Note: Saying that "on a UNIX system, everything is a file; if something is not a file, it is a process" is just an acceptable generalization.
There are two types of links in UNIX-like systems:
- hard links: you can think a hard link as an additional name for an existing file. Hard links are associating two or more file names with the same inode. You can create one or more hard links for a single file. Hard links cannot be created for directories and files on a different filesystem or partition.
- soft links: a soft link is something like a shortcut in Windows. It is an indirect pointer to a file or directory. Unlike a hard link, a symbolic link can point to a file or a directory on a different filesystem or partition.
In case you delete a file, the hard link will survive while the soft link will be broken.
To create a hard link: ln source target
To create a soft link: ln -s source target
To overwrite the destination path of the symlink, use the -f (--force) option: ln -sf source target
To delete/remove symbolic links use either the rm or unlink: unlink symlink_to_remove
To find all hardlinks in a folder:
find /some/dir -type f -links +1 -printf '%i %n %p\n'
>129978 2 ./book.pdf
>129978 2 ./hard-linked-book.pdf
If the other file in the same dir, this will be apparent since they have the same inode. Otherwise, this command will only show all regular files that have more than one link (name) to them, not telling you which names are linked to the same file, for that you could use -samefile or -inum, e.g.: find -samefile "$somefile"
List, set, and change standard file permissions
To see user standard (UGO) permissions use ls -l. Permissions are in the 1st column. Each file/directory has an owner and is associated to a group: the former is in the 3rd columns, the latter in the 4th.
The permissions for each file/directory are given for each of this category:
- owner (u)
- group (g)
- others (o) (all other users that are not the owner and are not member of group).
For each category the following permissions can be set:
| Name | String value | Octal Value |
|---|---|---|
| read | r | 4 |
| write | w | 2 |
| exec | x | 1 |
The right that each permission provide are different and depends if target is a file or a directory:
| Permission | File | Directory |
|---|---|---|
| read | read | list |
| write | modify | create/delete |
| exec | run | cd |
Note: When the exec bit is set for other (also said the "world"), the file will be executed with the identity of the user who is executing the command (his user ID and group ID).
There are two modes for declare permissions using chmod command:
- absolute mode, uses numbers for each permission, that must be added if more than a permission is set:
chmod 760 file
# owner: granted read, write and exec
# group: granted read and write
# other: no permissions set
- relative mode:
chmod +x file   # adds exec to owner, group and other
chmod g+w file  #adds write to group
chmod o-rw file #remove read and write to others
There are other special permissions that can be granted to file/directories:
| Permission | File | Directory |
|---|---|---|
| suid (4, -s/-S) | run as user owner | subfiles inherit user of parent dir, while subdirs inherit suid |
| sgid (2, -s/-S) | run as group owner | subfiles inherit group of parent dir, while subdirs inherit sgid |
| sticky bit (1, -t/-T) | N/A | files inside dir can be deleted only by the owner |
Note: Since the special bits appear in the third position as exec bit, "-uppercase" means only the special bit is active, whereas "-lowercase" means that both special bit and exec bit are set.
Special bits can be set with:
- absolute mode:
chmod 4760 file
- relative mode:
chmod u+s file  # sets suid
chmod g+s file  # sets guid
chmod +t dir    # sets sticky bit
Note: When a file with setuid is executed, the resulting process will assume the effective user ID given to the owner: if the owner is root, this could represents a potential security risk (privilege escalation). It is a good practice to monitor a system for any suspicious usages of the setuid bits to gain superuser privileges:
find / -user root -perm -4000 -exec ls -ldb {} \;
Note: Linux ignores the setuid bit on all interpreted executables for security reasons. If we want our shell script to have the setuid permission, we can use the sudo command to gain privileges of the owner of the script file.
Read, and use system documentation
To learn more about system utilities, you can use:
man <command>, to read man pages (UNIX way of distributiing documentation) stored in /usr/share/man and /usr/local/share/maninfo <command>, similarly (GNU project meant to replace man)help <command>, for shel built-in commands only.
You can use the apropos command (for example, with a keyword such as "partition") to find commands related to something:
apropos partition
Note: This equivalent to:
man -k <keyword>
Note: Man pages are grouped into sections (
man man-pages) and the section number can be passed to man command:
man 1 passwd    # display passwd command doc
man 5 passwd    # display passwd file format doc
Use this simple script to quickly find what a command argument stands for:
#!/bin/bash
# Usage: mans <command> <arg>
# e.g. mans cp -R

CMD=$1
OP=$2

if [[ -z "$1" || -z "$2" ]]; then
    echo "No arguments supplied: you mast pass an entry in the man and an option"
    exit 1
fi

echo $(man ${CMD} | awk '/^ *-*'${OP}'[ |,]+.*$/,/^$/{print}')
exit 0
Manage access to the root account
By default Ubuntu does not set up a root password during installation and therefore you don't get the facility to log in as root. However, this does not mean that the root account doesn't exist in Ubuntu or that it can't be completely accessed. Instead you are given the ability to execute tasks with superuser privileges using the sudo command.
To access the root user account run one of the following commands and enter your normal-user password:
sudo -i         # run the shell specified by the target user's password database entry as a login shell
sudo su         # substitute user staying in the previous dir
sudo su -       # land on substituted user's home
sudo su root    # redundant, since root is the default account
You can change root password as shown below:
sudo passwd root
>Enter new UNIX password:
>Retype new UNIX password:
>passwd: password updated successfully
If you wish to disable root account login, run the command below to set the password to expire: sudo passwd -l root
2. Operation of Running Systems - 20%
- Boot, reboot, and shut down a system safely
- Boot or change system into different operating modes
- Install, configure and troubleshoot bootloaders
- Diagnose and manage processes
- Locate and analyze system log files
- Schedule tasks to run at a set date and time (./cron, anacron, at)
- Verify completion of scheduled jobs
- Update software to provide required functionality and security
- Verify the integrity and availability of resources
- Verify the integrity and availability of key processes
- Change kernel runtime parameters, persistent and non-persistent
- Use scripting to automate system maintenance tasks
- Manage the startup process and services
- List and identify SELinux/AppArmor file and process contexts
- Manage software
- Identify the component of a Linux distribution that a file belongs to
Boot, reboot, and shut down a system safely
The poweroff, shutdown (-h) now, and halt -p commands all do the same thing as halt alone, while additionally sending an ACPI command to signal the power supply unit to disconnect the main power.
Generally, one uses the shutdown command for system administration of multiuser shell servers, becaus it allows to specify a time delay and a warning message before shutdown or reboot happens: sudo shutdown -r +30 "Planned software upgrades"
To reboot the system immediately: sudo reboot
Note: The
rebootcommand, on its own, is basically a shortcut toshutdown -r now.
On most modern Linux distributions, systemd is the init system, so both rebooting and powering down can be performed through the systemd user interface, systemctl. The systemctl command accepts, among many other options, halt (halts disk activity but does not cut power) reboot (halts disk activity and sends a reset signal to the motherboard) and poweroff (halts disk acitivity, and then cut power). These commands are mostly equivalent to starting the target file of the same name. For instance, to trigger a reboot: sudo systemctl start reboot.target. Or, simply: sudo systemctl reboot
The telinit command is the front-end to your init system.
Note: Since the concept of SysV runlevels is obsolete the runlevel requests will be transparently translated into systemd unit activation requests.
To power off your computer by sending it into runlevel 0: sudo telinit 0
To reboot using the same method: sudo telinit 6
Apply brute force
There's a provision in the Linux kernel for system requests (Sysrq on most keyboards). You can communicate directly with this subsystem using key combinations, ideally regardless of what state your computer is in; it gets complex on some keyboards because the Sysrq key can be a special function key that requires a different key to access (such as Fn on many laptops).
An option less likely to fail is using echo to insert information into /proc, manually. First, make sure that the Sysrq system is enabled:
sudo echo 1 > /proc/sys/kernel/sysrq
To reboot, you can use either Alt+Sysrq+B or type:
sudo echo b > /proc/sysrq-trigger
This method is not a graceful way to reboot your machine on a regular basis, but it gets the job done in a pinch.
The magic SysRq key is often used to recover from a frozen state, or to reboot a computer without corrupting the filesystem, especially when switching to a terminal window (Ctrl+Alt+F2) is not possible. In this case, use the following steps to perform a reboot:
- Press Alt+SysRq+R to get the keyboard
- If pressing Ctrl+Alt+F2 before failed, try it again now.
- Press Alt+SysRq+E to term all processes.
- Press Alt+SysRq+I to kill all processes.
- Press Alt+SysRq+S to sync your disks.
- Wait for OK or Done message. If you don't see a message, look at your HDD light to see if Sync made a difference.
- Press Alt+SysRq+U to umount all disk drives.
- Wait for OK or Done message. If you don't see a message, in 15-30 seconds, assume disks are unmounted (or that an unmount is not posssible) and proceed.
- Press Alt+SysRq+B to reboot.
The Letters used spell REISUB - use the mnemonic Reboot Even If System Utterly Broken.
The final option is, of course, the power button on your computer's physical exterior. Modern PCs have ACPI buttons, which just send the shutdown request to the kernel. If the ACPI daemon is listening and correctly configured, it can signal init and perform a clean shutdown.
If ACPI doesn't work, you will need to cut off electrical power. This is done through a hard switch (generally labeled reset), possibly using the same button as before but holding it pressed for 5 or so seconds. Taking out the battery (on laptops) and physically disconnecting all power cables is, of course, the only method guaranteed to work. (Make sure no other method listed above works. Even as a last resort, unplugging your computer while it is running is still not recommended.)
Resetting without shutting down can cause problems with the file system. To try and fix this problem, fsck will be run when you next boot up, and journaling filesystems will attempt to complete or rollback files which were changing.
Keyboard schortcuts may vary depending on the desktop environment. On KDE, you can use these schortcuts to leave you computer:
Ctrl+Alt+L, lock screenCtrl+Alt+Del, leaveCtrl+Alt+Shift+Del, logout without confirmationCtrl+Alt+Shift+Page Down, shut down without confirmationCtrl+Alt+Shift+Page Up, reboot without confirmation
For other shortcuts available on KDE, look here.
Boot or change system into different operating modes
On modern systemd-based systems, targets are special unit files that describe a system state or synchronization point. Like other units, the files that define targets can be identified by their suffix, which in this case is .target. Targets do not do much themselves, but are instead used to group other units together. These can be used in order to bring the system to certain states, much like other init systems use runlevels.
To find the default target for your system, type: systemctl get-default
If you wish to set a different default target, you can use the set-default: sudo systemctl set-default graphical.target
You can get a list of the available targets on your system by typing: systemctl list-unit-files --type=target
It is possible to start all of the units associated with a target and stop all units that are not part of the dependency tree. This is similar to changing the runlevel in other init systems: sudo systemctl isolate multi-user.target
You may wish to take a look at the dependencies of the target you are isolating before performing this procedure to ensure that you are not stopping vital services: systemctl list-dependencies multi-user.target
There are targets defined for important events like powering off or rebooting. However, systemctl also has some shortcuts that add a bit of additional functionality.
For instance, to put the system into rescue (i.e. single-user) mode, you can just use the rescue command instead of isolate rescue.target: sudo systemctl rescue
This will provide the additional functionality of alerting all logged in users about the event.
To change target at boot time:
- during boot press ESC/F2 right after the BIOS logo disappears
- the grub menu prompt will be showed
- choose the entry corrisponding to your system
- type 'e' to edit the boot loader configuration
- navigate to your prefered Linux kernel line and append either
rescueorsystemd.unit=emergency.target
Note: The changes are not persistent.
Note: In this modality disk is mounted read only, to remount it read/write, after boot execute:
mount -o remount,rw /.
- then press either Ctrl-x or F10 to boot with the modified entry and the system will enter the rescue mode.
Note: The rescue mode is equivalent to single user mode in Linux distributions that uses SysV as the default service manager. In rescue mode, all local filesystems will be mounted, only some important services will be started. However, no normal services (E.g network services) won't be started. The rescue mode is helpful in situations where the system can't boot normally. Also, we can perform some important rescue operations, such as reset root password, in rescue mode. In contrast to the rescue mode, nothing is started in the emergency mode. No services are started, no mount points are mounted, no sockets are established, nothing. All you will have is just a raw shell. Emergency mode is suitable for debugging purposes.
For a "visual" guidance on the topic, look here.
Install, configure and troubleshoot bootloaders
The Linux boot process from the time you press the power button of your computer until you get a fully-functional system follows this high-level sequence:
- A process known as POST (Power-On Self Test) performs an overall check on the hardware components of your computer
- When POST completes, it passes the control over to the boot loader, which in turn loads the Linux kernel in memory (along with initramfs) and executes it. The most used boot loader in Linux is the GRand Unified Boot loader, or GRUB for short
- The kernel checks and accesses the hardware, and then runs the initial process (mostly known by its generic name init) which in turn completes the system boot by starting services.
Two major GRUB versions (v1, sometimes called GRUB Legacy, and v2) can be found in modern systems, although most distributions use v2 by default in their latest versions. Only Red Hat Enterprise Linux 6 and its derivatives still use v1 today.
Regardless of the GRUB version, a boot loader allows the user to:
- modify the way the system behaves by specifying different kernels to use,
- choose between alternate operating systems to boot, and
- add or edit configuration stanzas to change boot options, among other things.
When the system boots you are presented with the GRUB menu if you repeatedly press ESC. Initially, you are prompted to choose between alternate kernels (by default, the system will boot using the latest kernel) and are allowed to enter a GRUB command line (with c) or edit the boot options (by pressing the e key).
The GRUB v2 configuration is read on boot from /boot/grub/grub.cfg or /boot/grub2/grub.cfg, whereas /boot/grub/grub.conf or /boot/grub/menu.lst are used in v1. These files are NOT to be edited by hand, but are modified based on the contents of /etc/default/grub and the files found inside /etc/grub.d.
If you're interested specifically in the options available for /etc/default/grub, you can invoke the configuration section directly:
info -f grub -n 'Simple configuration'
When multiple operating systems or kernels are installed in the same machine, GRUB_DEFAULT requires an integer value that indicates which OS or kernel entry in the GRUB initial screen should be selected to boot by default. The list of entries can be viewed using the following command:
awk -F\' '$1=="menuentry " {print $2}' /boot/grub/grub.cfg
One final GRUB configuration variable that is of special interest is GRUB_CMDLINE_LINUX, which is used to pass options to the kernel. The options that can be passed through GRUB to the kernel are well documented in man 7 kernel-command-line and in man 7 bootparam.
To bring the system to single-user mode to perform maintenance tasks, you can append the word single to GRUB_CMDLINE_LINUX and rebooting.
After editing /etc/defalt/grub, you will need to run update-grub (Ubuntu) afterwards, to update grub.cfg (otherwise, changes will be lost upon boot).
Fixing the GRUB
If you install a second operating system or if your GRUB configuration file gets corrupted due to a human error, there are ways you can get your system back on its feet and be able to boot again.
In the initial screen, press c to get a GRUB command line (remember that you can also press e to edit the default boot options), and use help to bring the available commands in the GRUB prompt.
Use ls to list the installed devices and filesystems. Find the drive containg the grub to boot Linux and there use other high level tools to repair the configuration file or reinstall GRUB altogether if it is needed:
ls (hd0,msdos1)/
Once sure that GRUB resides in a certain partition (e.g. hd0,msdos1), tell GRUB where to find its configuration file and then instruct it to attempt to launch its menu:
set prefix=(hd0,msdos1)/grub2
set root=(hd0,msdos1)
insmod normal
normal
Then in the GRUB menu, choose an entry and press Enter to boot using it. Once the system has booted you can issue the grub2-install /dev/sdX command (change sdX with the device you want to install GRUB on). This will rewrite the MBR information to point to the current installation and rewrite some GRUB 2 files (which are already working). Since it isn't done during execution of the previous command, running sudo update-grub after the install will ensure GRUB 2's menu is up-to-date.
Other more complex scenarios are documented, along with their suggested fixes, in the Ubuntu GRUB2 Troubleshooting guide.
Diagnose and manage processes
Processes
ps: reports a snapshot of the current processes
ps # processes of which I'm owner

ps aux # all processes
It will print:
user, user owning the processpid, process ID of the process (it is set when process start, this means that implicitly provides info on starting order of processes)%cpu, the CPU time used divided by the time the process has been running%mem, ratio of the process's resident set size to the physical memory on the machineVSZ(virtual memory), virtual memory usage of entire process (in KiB)RSS(resident memory), resident set size, the non-swapped physical memory that a task has used (in KiB)tty, terminal the process is running on (?means that isn't attached to a tty)stat, process statestart, starting time or date of the processtime, cumulative CPU timecommand, command with all its arguments (those within[ ]are system processes or kernel thread)
Examples:
ps -eo pid,ppid,cmd,%cpu,%mem --sort=-%cpu
where:
-e, shows same result of-A-o, specifies columns to show--sort, sorts by provided parameter
ps -e -o pid,args --forest # the last arg shows a graphical view of processes tree
In /proc/[pid] there is a numerical subdirectory for each running process; the subdirectory is named by the process ID. The subdirectory /proc/[pid]/fd contains one entry for each file which the process has open, named by its file descriptor, and which is a symbolic link to the actual file. Thus, 0 is standard input, 1 standard output, 2 standard error, and so on.
Lists open files associated with process id of pid: lsof -p pid
Find a parent PID (PPID) from a child's process ID (PID): pstree -s -p <PID>
Background processes
Suffix command with & executes a process in background:
sleep 600 &
jobs    # lists processes in background
>[1]+  Running                 sleep 600 &
kill %1 # kills by job number
>[1]+  Terminated              sleep 600
To return a process in foreground: fg <PID>
Process priority
List "nice" value of processes: ps -e -o pid,nice,command
Niceness (NI) value is a user-space concept, while priority (PR) is the process's actual priority that use by Linux kernel. In a Linux system priorities are 0 to 139 in which 0 to 99 for real time and 100 to 139 for users. Nice value range is -20 to +19 where -20 is highest, 0 default and +19 is lowest. A negative nice value means higher priority, whereas a positive nice value means lower priority.The exact relation between nice value and priority is:
PR = 20 + NI
so, the value of PR = 20 + (-20 to +19) is 0 to 39 that maps 100 to 139.
Note: Only root can assign negative values.
Execute a command in background with a given nice value to be added to the current one: nice -n <value> <command> &
Note: In case you want to associate a negative nice value to the process, then you'll have to use double hyphen:
nice --10 wall <<end
System reboots in 5 minutes for Ubuntu Linux kernel update!
Save all your work!!!
-- Sysadmin
end
Riassign priority to a process: renice -n <value> <pid>
Signals
Send a SIGTERM (15) signal to process: kill <pid>
Send a SIGKILL signal to process: kill -9 <pid>
Send a signal that correspond to number to process: kill -<number> <pid>
List all available signal and corresponding number: kill -l
Kill all child processes: pkill -P <ppid>
Kill all processes whose name matches a regex pattern: pkill -9 <pattern>
Kill by exact name (safer than pkill), unless -r is specified: killall <name>
Locate and analyze system log files
In Linux, logs come from different sources, mainly:
-
systemd journal: most Linux distros have systemd to manage services (like SSH above), systemd catches the output of these services (i.e., logs like the one above) and writes them to the journal, the journal is written in a binary format, so you'll use
journalctlto explore it, like:journalctl >-- Logs begin at Tue 2021-01-05 15:47:18 CET, end at Sat 2021-04-03 10:14:41 CEST. -- >Jan 05 15:47:18 user@hostname kernel: microcode: microcode updated early to revision 0xd6, date = 2020-04-27 >Jan 05 15:47:18 user@hostname kernel: Linux version 5.4.0-59-generic (buildd@lcy01-amd64-028) (gcc version 9.3.0 (Ubuntu 9.3.0-17ubuntu1~20.>04)) #65-Ubuntu SMP Thu Dec 10 12> >Jan 05 15:47:18 user@hostname kernel: Command line: BOOT_IMAGE=/boot/vmlinuz-5.4.0-59-generic root=UUID=1c568adb-6778-42a6-93e0-a3cab4f81e8f ro quiet splash vt.handoff=7 -
syslog: when there's no systemd, processes like SSH can write to a UNIX socket (e.g., /dev/log) in the syslog message format. A syslog daemon (e.g., rsyslog) then picks the message, parses it and writes it to various destinations. By default, it writes to files in /var/log
-
the Linux kernel writes its own logs to a ring buffer. Systemd or the syslog daemon can read logs from this buffer, then write to the journal or flat files (typically /var/log/kern.log). You can also see kernel logs directly via dmesg:
dmesg -T >... >[Tue May 5 08:41:31 2020] EXT4-fs (sda1): mounted filesystem with ordered data mode. Opts: (null) >... -
application logs: non-system applications tend to write to /var/log as well.
These sources can interact with each other: journald can forward all its messages to syslog. Applications can write to syslog or the journal.
Typically, you'll find Linux server logs in the /var/log directory and sub-directory. This is where syslog daemons are normally configured to write. It's also where most applications (e.g Apache httpd) write by default. For systemd journal, the default location is /var/log/journal, but you can't view the files directly because they're binary.
If your Linux distro uses systemd (and most modern distros do), then all your system logs are in the journal. To inspect the journal for logs related to a given unit, type: journalctl -eu <unit-name>
By default, journalctl pages data through less, but if you want to filter through grep you'll need to disable paging: journalctl --no-pager | grep "ufw"
If your distribution writes to local files via syslog, you can view them with standard text processing tools: grep "error" /var/log/syslog | tail. /var/log/syslog is the “catch-all” log file of rsyslod and contains much everything /var/log/messages used to contain in previous versions of Ubuntu, as this line from /etc/rsyslog.conf suggests: *.* /var/log/syslog. Each entry in this configuration file consists of two fields, the selector and the action. Each log message is associated with an application subsystem (called “facility” in the documentation) and each message is also associated with a priority level.
Some distributions have both: journald is set up to forward to syslog. This is done by setting ForwardToSyslog=Yes in /etc/systemd/journald.conf.
Kernel logs go by default to /var/log/dmesg and /var/log/kern.log.
To wait for new messages from the kernel ring buffer: dmesg -w
A neat utility to place messages into the System Log arbitrarily is the logger tool: logger "Hello World"
To send instead messages to the systemd journal: echo 'hello' | systemd-cat [-t <someapp>] [-p <logging-level>]
Show only the most recent journal entries, and continuously print new entries as they are appended to the journal: journalctl -f
To learn more about journactl options to view and manipulate systemd logs, look here.
Schedule tasks to run at a set date and time
To run tasks at a specific time in the future different services are available:
atspecifies a one-time task that runs at a certain timecroncan schedule tasks on a repetitive basis, such as daily, weekly, or monthlyanacroncan be used to execute commands periodically, with a frequency specified in days, but unlike cron, it does not assume that the machine is running continuously.
Cron
The crond daemon is the background service that enables cron functionality.
The cron service checks for files in the /var/spool/cron and /etc/cron.d directories and the /etc/anacrontab file. The contents of these files define cron jobs that are to be run at various intervals. The individual user cron files are located in /var/spool/cron, and system services and applications generally add cron job files in the /etc/cron.d directory.
The cron utility runs based on commands specified in a cron table (crontab). Each user, including root, can have a cron file. These files don't exist by default, but can be created in the /var/spool/cron directory using the crontab -e command that's also used to edit a cron file:
SHELL=/bin/bash
MAILTO=root@example.com
PATH=/bin:/sbin:/usr/bin:/usr/sbin:/usr/local/bin:/usr/local/sbin

# For details see man 4 crontabs

# Example of job definition:
# .---------------- minute (0 - 59)
# |  .------------- hour (0 - 23)
# |  |  .---------- day of month (1 - 31)
# |  |  |  .------- month (1 - 12) OR jan,feb,mar,apr ...
# |  |  |  |  .---- day of week (0 - 6) (Sunday=0 or 7) OR sun,mon,tue,wed,thu,fri,sat
# |  |  |  |  |
# *  *  *  *  * user-name  command to be executed

# backup using the rsbu program to the internal 4TB HDD and then 4TB external
01 01 * * * /usr/local/bin/rsbu -vbd1 ; /usr/local/bin/rsbu -vbd2

# Set the hardware clock to keep it in sync with the more accurate system clock
03 05 * * * /sbin/hwclock --systohc

# Perform monthly updates on the first of the month
# 25 04 1 * * /usr/bin/dnf -y update
The first three lines in the code above set up a default environment. The environment must be set to whatever is necessary for a given user because cron does not provide an environment of any kind.
Warning: If no user is specified, the job is run as the user that owns the crontab file, root in the case of the root crontab.
To prevent possible misuse, you can control access to the crontab command by using two files in the /etc/cron.d directory: cron.deny and cron.allow. These files permit only specified users to perform crontab command tasks such as creating, editing, displaying, or removing their own crontab files.
The cron.deny and cron.allow files consist of a list of user names, one user name per line.
These access control files work together as follows:
- if cron.allow exists, only the users who are listed in this file can create, edit, display, or remove crontab files
- if cron.allow does not exist, all users can submit crontab files, except for users who are listed in cron.deny
- if neither cron.allow nor cron.deny exists, superuser privileges are required to run the crontab command.
Anacron
The anacron program performs the same function as crond, but it adds the ability to run jobs that were skipped, such as if the computer was off or otherwise unable to run the job for one or more cycles. The anacron program provides some easy options for running regularly scheduled tasks. Just install your scripts in the /etc/cron.[hourly|daily|weekly|monthly] directories, depending how frequently they need to be run (but see below tip). Alternatively, specify the job to run in /etc/anacrontab as you would do with the crontab but with anacron-specific syntax (see below).
anacron itself doesn't run as a service/daemon, but as a cron job: /etc/cron.d/anacron. So cron is running and checking if anacron is present for the daily, weekly and monthly tasks (it would be duplication of effort to have both running preriod-fixed tasks), but not for the hourly tasks. cron runs the hourly tasks.
So, actually anacron uses a variety of methods to run:
- if the system is running systemd, it uses a systemd timer (in the Debian package, you'll see it in /lib/systemd/system/anacron.timer)
- if the system isn't running systemd, it uses a system cron job (in /etc/cron.d/anacron)
- in all cases it runs daily, weekly and monthly cron jobs (in /etc/cron.{daily,weekly,monthly}/0anacron)
- it also runs at boot (from /etc/init.d/anacron or its systemd unit).
anacron will check if a job has been executed within the specified period in the period field. If not, it executes the command specified in the command field after waiting the number of minutes specified in the delay field. Once the job has been executed, it records the date in a timestamp file in the /var/spool/anacron directory with the name specified in the job-id field:
cat /var/spool/anacron/bck.weekly
>20210328
To quickly check if anacron jobs are really executed, you can force immediately their execution: anacron -f -n
Note: The specified delay times in each line help prevent these jobs from overlapping themselves and other cron jobs.
Tip: Instead of placing whole bash programs in the cron.X directories, just install them in the
/usr/local/bindirectory, which will allow you to run them easily from the command line. Then, add a symlink in the appropriate cron directory, such as/etc/cron.daily.
Examples of job definition syntax:
Every minute of every day:
# m h dom mon dow command
* * * * * /home/user/command.sh
# or
0-59 0-23 0-31 0-12 0-7 /home/user/command.sh
Every 15 minutes of every day:
# m h dom mon dow command
*/15 * * * * /home/user/command.sh
# or
0-59/15 * * * * /home/user/command.sh
# or
0,15,30,45 * * * * /home/user/command.sh
Note: The division expressions must result in a remainder of zero for the job to run.
Every 5 minutes of the 2 am hour starting at 2:03:
# m h dom mon dow command
03-59/5 02 * * * /home/user/command.sh
# This runs at 2:03, 2:08, 2:13, 2:18, 2:23, and so on until 2:58
Every day at midnight:
# m h dom mon dow command
0 0 * * * /home/user/command.sh
# or
0 0 * * 0-7 /home/user/command.sh
Twice a day:
# m h dom mon dow command
0 */12 * * * /home/user/command.sh
# or
# m h dom mon dow command
0 0-23/12 * * * /home/user/command.sh
# or
0 0,12 * * * /home/user/command.sh
Every weekday at 2 am:
# m h dom mon dow command
0 02 * * 1-5 /home/user/command.sh
Weekends at 2 am:
# m h dom mon dow command
0 02 * * 6,7 /home/user/command.sh
# or
0 02 * * 6-7 /home/user/command.sh
Once a month on the 15th at 2 am:
# m h dom mon dow command
0 02 15 * * /home/user/command.sh
Every 2 days at 2 am:
# m h dom mon dow command
0 02 */2 * * /home/user/command.sh
Every 2 months at 2 am on the 1st:
# m h dom mon dow command
0 02 1 */2 * /home/user/command.sh
Shortcuts
The are shortcuts which can be used to replace the five fields usually used to specify times. The @ character is used to identify shortcuts to cron. The list below, taken from the crontab(5) man page, shows the shortcuts with their equivalent meanings.
@reboot: run once after reboot@yearly: run once a year, i.e.0 0 1 1 *@annually: run once a year, i.e.0 0 1 1 *@monthly: run once a month, i.e.0 0 1 * *@weekly: run once a week, i.e.0 0 * * 0@daily: run once a day, i.e.0 0 * * *@hourly: run once an hour, i.e.0 * * * *
These shortcuts can be used in any of the crontab files.
At
at is an interactive command-line utility that allows you to schedule commands to be executed at a particular time. Jobs created with at are executed only once.
The at command takes the date and time (runtime) when you want to execute the job as a command-line parameter, and the command to be executed from the standard input.
Let's create a job that will be executed at 9:00 am: at 09:00
Once you hit Enter, you'll be presented with the at command prompt that most often starts with at>. You also see a warning that tells you the shell in which the command will run:
warning: commands will be executed using /bin/sh
at>
Enter one or more command you want to execute: tar -xf /home/linuxize/file.tar.gz
When you're done entering the commands, press Ctrl-D to exit the prompt and save the job:
at> <EOT>
job 4 at Tue May  5 09:00:00 2020
The command will display the job number and the execution time and date.
There are also other ways to pass the command you want to run, besides entering the command in the at prompt. One way is to use echo and pipe the command to at:
echo "command_to_be_run" | at 09:00
The at utility accepts a wide range of time specifications. You can specify time, date, and increment from the current time:
-
time: to specify a time, use the
HH:MMorHHMMform. To indicate a 12-hour time format, useamorpmafter the time (e.g.at 1pm + 2 days). You can also use strings likenow,midnight,noon, orteatime(16:00). If the specified time is passed, the job will be executed the next day. -
date: the command allows you to schedule job execution on a given date. The date can be specified using the month name followed by the day and an optional year. You can use strings, such as
today,tomorrow, or weekday. The date can be also indicated using theMMDD[CC]YY,MM/DD/[CC]YY,DD.MM.[CC]YYor[CC]YY-MM-DDformats (e.g.at 12:30 102120). -
increment: at also accepts increments in the
now + count time-unitformat, wherecountis a number andtime-unitcan be one of the following strings:minutes,hours,days, orweeks(e.g.at sunday +10 minutes).
Time, date and increment can be combined.
Alternatively, use a here document or pass a file with -f.
To list the user's pending jobs run the atq or at -l command: atq
To remove a pending job invoke the atrm or at -r command followed by the job number: atrm 9
Verify completion of scheduled jobs
First, check the status of the cron service to ensure it is currently running: sudo systemctl status cron
Check if rsyslogd is logging cron jobs execution in its own file:
cat /etc/rsyslog.d/50-default.conf | grep cron
>#cron.*                         /var/log/cron.log
If this line is commentd as above, the cron logs are on the syslog dump file.
crond (unless configured otherwise, as said above) will send a log message to syslog every time it invokes a scheduled job. The simplest way to verify that cron tried to run the job is to simply examine the logs: grep -E "(ana)*cron" /var/log/syslog
Note: If you have a mail transfer agent — such as Sendmail — installed and properly configured on your server, you can send the output of cron tasks to the email address associated with your Linux user profile. You can also manually specify an email address by providing a MAILTO setting at the top of the crontab.
For anacron, you can force the execution of the scheduled jobs: sudo anacron -f -n, and then examining the logs: tail -f /var/log/syslog. The timestamp for each job is stored in /var/spool/anacron.
Update software to provide required functionality and security
Update the system in one line: sudo apt update && sudo apt upgrade -y && sudo apt autoremove -y
The command dist-upgrade does a little trickier work the just upgrade, handling upgrades which may have been held back by the latter. It is usually run before upgrading Ubuntu to a new LTS version by executing sudo do-release-upgrade.
Verify the integrity and availability of resources
Display amount of free and used memory in the system:
free -h
Report virtual memory statistics:
vmstat 1 5
Report Central Processing Unit (CPU) statistics and input/output statistics for devices and partitions:
iostat 1 2
Display a periodically updated table of I/O usage:
sudo iotop
Collect, report and save system activity information in a binary file:
sar 2 5 -o report.file
Find which process lock a file:
less .vimrc
# put in background (ctrl+Z)
fuser .vimrc
.vimrc:              28135
or:
lsof | grep .vimrc
See currently used swap areas:
cat /proc/swaps
Examine filesystem capacity and usage:
df -hT
Find what is eating up disk space:
sudo du -x -d1 -h / | sort -h
Note: The flag -h makes
sortcommand to compare numbers in human readable format.
See if a piece of hardware is detected:
lspci
or:
lsusb
Find open ports on your machine:
sudo netstat -nlptu
Find laptop battery charge state and percentage:
upower -i $(upower -e | grep _BAT) | grep -P "(state|percentage)"
Verify the integrity and availability of key processes
Analyze boot time with regard to single processes:
systemd-analyze blame
List process sorted per cpu usage in descending order:
ps aux --sort=-pcpu | head
List processes in tree format:
ps -e --forest
Displays a dynamic real-time view of a running processes and threads:
top
List process table sorted by an arbitrary column:
ps aux | sort -n -k 3 | head
Get a visual description of process ancestry or multi-threaded applications:
pstree -aAp <pid>
Find the process ID of a running process:
pidof <process>
Intercept and log the system calls:
strace -Ff -tt <program> <arg> 2>&1 | tee strace-<program>.log
Use -p for an already running process.
Change kernel runtime parameters, persistent and non-persistent
The latest specification of the Filesystem Hierarchy Standard indicates that /proc represents the default method for handling process and system information as well as other kernel and memory information. Particularly, /proc/sys is where you can find all the information about devices, drivers, and some kernel features.
If you want to view the complete list of Kernel parameters, just type:
sysctl -a
It's possible to view the value of a particular Linux kernel parameter using either sysctl followed by the name of the parameter or reading the associated file:
sysctl dev.cdrom.autoclose
cat /proc/sys/dev/cdrom/autoclose
sysctl net.ipv4.ip_forward
cat /proc/sys/net/ipv4/ip_forward
To set the value for a kernel parameter we can use sysctl, but using the -w option and followed by the parameter's name, the equal sign, and the desired value.
Another method consists of using echo to overwrite the file associated with the parameter. In other words, the following methods are equivalent to disable the packet forwarding functionality in our system (which, by the way, should be the default value when a box is not supposed to pass traffic between networks):
echo 0 > /proc/sys/net/ipv4/ip_forward
sysctl -w net.ipv4.ip_forward=0
It is important to note that kernel parameters that are set using sysctl will only be enforced during the current session and will disappear when the system is rebooted. To set these values permanently, edit /etc/sysctl.conf with the desired values. For example, to disable packet forwarding in /etc/sysctl.conf make sure this line appears in the file:
net.ipv4.ip_forward=0
Then run following command to apply the changes to the running configuration.
sysctl -p
Other examples of important kernel runtime parameters are:
-
fs.file-maxspecifies the maximum number of file handles the kernel can allocate for the system. Depending on the intended use of your system (web / database / file server, to name a few examples), you may want to change this value to meet the system's needs. Otherwise, you will receive a “Too many open files” error message at best, and may prevent the operating system to boot at the worst. If due to an innocent mistake you find yourself in this last situation, boot in single user mode and edit /etc/sysctl.conf as instructed earlier. To set the same restriction on a per-user basis, useulimit. -
kernel.sysrqis used to enable the SysRq key in your keyboard (also known as the print screen key) so as to allow certain key combinations to invoke emergency actions when the system has become unresponsive. The default value (16) indicates that the system will honor the Alt+SysRq+key combination and perform the actions listed in the sysrq.c documentation found in kernel.org (where key is one letter in the b-z range). For example, Alt+SysRq+b will reboot the system forcefully (use this as a last resort if your server is unresponsive).
Warning: Do not attempt to press this key combination on a virtual machine because it may force your host system to reboot!
- when set to 1,
net.ipv4.icmp_echo_ignore_allwill ignore ping requests and drop them at the kernel level.
A better and easier way to set individual runtime parameters is using .conf files inside /etc/sysctl.d, grouping them by categories.
For example, instead of setting net.ipv4.ip_forward=0 and net.ipv4.icmp_echo_ignore_all=1 in /etc/sysctl.conf, we can create a new file named net.conf inside /etc/sysctl.d:
echo "net.ipv4.ip_forward=0" > /etc/sysctl.d/net.conf
echo "net.ipv4.icmp_echo_ignore_all=1" >> /etc/sysctl.d/net.conf
Again, type sysctl -p toreload permanent configuration. Alternatively, reboot the system.
Use scripting to automate system maintenance tasks
A bash shell script:
- begins with a shebang (
#!/bin/bash) which tells the operating system which interpreter to use to parse the rest of the file - contains a series of commands or/and typical constructs of imperative programming
- is usually associated with the
.shextension - must be executable:
chmod +x <file>.sh - can be executed by typing:
./<file>.sh
To learn more about bash, have a look at the bash refresher in this repo.
Manage the startup process and services
To start a service by typing: sudo systemctl start <unit>.service
To stop it: sudo systemctl stop <unit>.service
To restart the service, we can type: sudo systemctl restart <unit>.service
To attempt to reload the service without interrupting normal functionality, we can type: sudo systemctl reload <unit>.service
Note: "Loading" means parsing the unit's configuration and keeping it in memory.
To enable a service to start automatically at boot, type: sudo systemctl enable <unit>.service
This will create a symbolic link from the system's copy of the service file (usually in /lib/systemd/system or /etc/systemd/system) into the location on disk where systemd looks for autostart files (usually /etc/systemd/system/some_target.target.wants).
Note: To enable and start a service, use:
sudo systemctl enable --now <unit>.service
If you wish to disable the service again, type: sudo systemctl disable <unit>.service
To get all of the unit files that systemd has listed as “active”, type: systemctl list-units
Note: You can actually leave off the list-units as this is the default systemctl behavior.
To list all of the units that systemd has loaded or attempted to load into memory, including those that are not currently active, add the --all switch:
systemctl list-units --all
To list all of the units installed on the system, including those that systemd has not tried to load into memory, type: systemctl list-unit-files
To see only active service units, we can use: systemctl list-units --type=service
To show whether the unit is active, information about the process, and the latest journal entries: systemctl status <unit>.service
A unit file contains the parameters that systemd uses to manage and run a unit. To see the full contents of a unit file (and the ovverriding files, if any), type:
systemctl cat <unit>.service
To see the dependency tree of a unit (which units systemd will attempt to activate when starting the unit), type:
systemctl list-dependencies <unit>.service
This will show the dependent units, with target units recursively expanded. To expand all dependent units recursively, pass the --all flag:
systemctl list-dependencies --all <unit>.service
Finally, to see the low-level details of the unit's settings on the system, you can use the show option:
systemctl show <unit>.service
To add a unit file snippet, which can be used to append or override settings in the default unit file, simply call the edit option on the unit:
sudo systemctl edit <unit>.service
This will be a blank file that can be used to override or add directives to the unit definition. A directory will be created within the /etc/systemd/system directory which contains the name of the unit with .d appended. For instance, for the nginx.service, a directory called nginx.service.d will be created. Within this directory, a snippet will be created called override.conf. When the unit is loaded, systemd will, in memory, merge the override snippet with the full unit file. The snippet's directives will take precedence over those found in the original unit file (usually found somewhere in /lib/systemd/system).
If you prefer to modify the entire content of the unit file instead of creating a snippet, pass the --full flag:
sudo systemctl edit --full <unit>.service
After modifying a unit file, you should reload the systemd process itself to pick up your changes:
sudo systemctl daemon-reload
systemd also has the ability to mark a unit as completely unstartable, automatically or manually, by linking it to /dev/null. This is called masking the unit, and is possible with the mask command: sudo systemctl mask nginx.service
Use unmask to undo the masking.
The files that define how systemd will handle a unit can be found in many different locations, each of which have different priorities and implications.
The system's copy of unit files are generally kept in the /lib/systemd/system directory. When software installs unit files on the system, this is the location where they are placed by default. You should not edit files in this directory. Instead you should override the file, if necessary, using another unit file location which will supersede the file in this location. The best location to do so is within the /etc/systemd/system directory. Unit files found in this directory location take precedence over any of the other locations on the filesystem. If you need to modify the system's copy of a unit file, putting a replacement in this directory is the safest and most flexible way to do this. If you wish to override only specific directives from the system's unit file, you can actually provide unit file snippets within a subdirectory. These will append or modify the directives of the system's copy, allowing you to specify only the options you want to change. The correct way to do this is to create a directory named after the unit file with .d appended on the end. So for a unit called example.service, a subdirectory called example.service.d could be created. Within this directory a file ending with .conf can be used to override or extend the attributes of the system's unit file. There is also a location for run-time unit definitions at /run/systemd/system. Unit files found in this directory have a priority landing between those in /etc/systemd/system and /lib/systemd/system. The systemd process itself uses this location for dynamically created unit files created at runtime. This directory can be used to change the system's unit behavior for the duration of the session. All changes made in this directory will be lost when the server is rebooted.
To learn more about unit files, look here.
List and identify SELinux/AppArmor file and process contexts
1. SELinux
Security-Enhanced Linux (SELinux) is a Linux kernel security module that provides a mechanism for supporting access control security policies, including mandatory access controls, which restricts ability of processes to access or perform other operations on system objects (files, dirs, network ports, etc). Mostly used in CentOS.
Modes: enforcing, permissive (i.e. logging mode), disabled.
To install it on Ubuntu:
sudo apt install policycoreutils selinux-utils selinux-basics
sudo selinux-activate
sudo selinux-config-enforcing
sudo reboot
# The relabelling will be triggered after you reboot your system. When finished the system will reboot one more time automatically
sestatus
To disable SELinux open up the /etc/selinux/config configuration file and change the following line:
#SELINUX=enforcing
SELINUX=disabled
Another way of permanently disabling the SELinux is to edit the kernel boot parameters. Edit the grub configuration at boot and add the selinux=0 option to the kernel options.
Get current mode: getenforce
Set current mode (non-persistent): setenforce [Enforcing|Permissive|1|0]
Note:
1is for enforcing,0is for permissive mode.
To set a mode persistently, manually edit /etc/selinux/config and set the SELINUX variable to either enforcing, permissive, or disabled in order to achieve persistence across reboots.
To get SELinux man pages:
yum install selinux-policy-devel
mandb                                                               # update man pages database
apropos selinux                                                     # see man pages
See security context for file/dir and processes:
ls -lZ <dir>
> drwxrwxr-x. vagrant vagrant unconfined_u:object_r:user_home_t:s0 cheat
ps auZ
Check audit logs for SELinux related files:
cat /var/log/audit/audit.log | grep AVC | tail -f
Note: SELinux log messages include the word “AVC” so that they might be easily identified from other messages.
Main commands: semanage and sepolicy.
Get SELinux policy:
sepolicy -a                                                         # see all policies with descriptions
getsebool -a                                                        # see state of all policies
Change file SELinux security context:
chcon -t etc_t somefile                                             # set type TYPE in the target security context
chcon --reference RFILE file                                        # use RFILE's security context rather than specifying a CONTEXT value
Use getselbool and setselbool to configure SEL policy behaviour at runtime without rewriting the policy itself.
Two classic cases where we will most likely have to deal with SELinux are:
- changing the default port where a daemon listens on
- setting the DocumentRoot directive for a virtual host outside of /var/www/html.
If you tried to change the default ssh port to 9999, taking a look at /var/log/audit/audit.log, you would see that sshd can be prevented from starting on port 9999 by SELinux because that is a reserved port for the JBoss Management service.To modify the existing SELinux rule and assign that port to SSH instead:
semanage port -l | grep ssh                                         # find ssh policy
semanage port -m -t ssh_port_t -p tcp 9999                          # -m for modiy, -a for add, -d for delete
If you need to set up a Apache virtual host using a directory other than /var/www/html as DocumentRoot. Apache will refuse to serve the content because the index.html has been labeled with the default_t SELinux type, which Apache can't access. To add apache read-only access to dir:
semanage fcontext -a -t httpd_sys_content_t "/custom_dir(/.*)?"     #  -a add, -t type
restorecon -R -v /custom_dir                                        # remember to run restorecon after you set the file context
2. AppArmor
AppArmor (AA) is a Linux kernel security module that allows the system administrator to restrict programs' capabilities with per-program profiles. Profiles can allow capabilities like network access, raw socket access, and the permission to read, write, or execute files on matching paths. AppArmor is installed and loaded by default in Ubuntu.
The optional apparmor-utils package contains command line utilities that you can use to change the AppArmor execution mode, find the status of a profile, create new profiles, etc: sudo apt-get install apparmor-utils
Programs can run in:
- encforce mode (default)
- complain mode.
The /etc/apparmor.d directory is where the AppArmor profiles are located. It can be used to manipulate the mode of all profiles. The files are named after the full path to the executable they profile replacing the “/” with “.”. For example /etc/apparmor.d/bin.ping is the AppArmor profile for the /bin/ping command. There are two main type of rules used in profiles:
- path entries: detail which files an application can access in the file system
- capability entries: determine what privileges a confined process is allowed to use.
It comes with a list of utilities whose name always starts with "aa-".
Find out if AppArmor is enabled (returns Y if true):
cat /sys/module/apparmor/parameters/enabled
To view the current status of AppArmor profiles: sudo apparmor_status
Put a profile in complain mode: sudo aa-complain </path/to/bin>
Put a profile in enforce mode: sudo aa-enforce </path/to/bin>
Enter the following to place all profiles into complain mode: sudo aa-complain /etc/apparmor.d/*
You can generate a profile for a program while it is running, AA will scan /var/log/syslog for errors:
aa-genprof <executable>
# once done, reload the policies
sudo systemctl reload apparmor
When the program is misbehaving, audit messages are sent to the log files. The program aa-logprof can be used to scan log files for AppArmor audit messages, review them and update the profiles. From a terminal: sudo aa-logprof
List all loaded AppArmor profiles for applications and processes and detail their status (enforced, complain, unconfined):
sudo aa-status
List running executables which are currently confined by an AppArmor profile:
ps auxZ | grep -v '^unconfined'
List of processes with tcp or udp ports that do not have AppArmor profiles loaded:
sudo aa-unconfined
To reload a currently loaded profile after modifying it to have the changes take effect:
sudo apparmor_parser -r /etc/apparmor.d/profile.name
To disable one profile:
sudo ln -s /etc/apparmor.d/profile.name /etc/apparmor.d/disable/
sudo apparmor_parser -R /etc/apparmor.d/profile.name
To re-enable a disabled profile remove the symbolic link to the profile in /etc/apparmor.d/disable/, then load the profile using the -a option:
sudo rm /etc/apparmor.d/disable/profile.name
cat /etc/apparmor.d/profile.name | sudo apparmor_parser -a
The AppArmor Linux Security Modules (LSM) must be enabled from the linux kernel command line in the bootloader:
sudo mkdir -p /etc/default/grub.d
echo 'GRUB_CMDLINE_LINUX_DEFAULT="$GRUB_CMDLINE_LINUX_DEFAULT apparmor=1 security=apparmor"' | sudo tee /etc/default/grub.d/apparmor.cfg
sudo update-grub
sudo reboot
If AppArmor must be disabled (e.g. to use SELinux instead), users can:
sudo systemctl disable --now apparmor
To disable AppArmor at the kernel level:
sudo mkdir -p /etc/default/grub.d
echo 'GRUB_CMDLINE_LINUX_DEFAULT="$GRUB_CMDLINE_LINUX_DEFAULT apparmor=0"' | sudo tee /etc/default/grub.d/apparmor.cfg
sudo update-grub
sudo reboot
AppArmor is enabled by default. If you used the above procedures, to disable it, you can re-enable it by:
- ensuring that AppArmor is not disabled in /etc/default/grub if using Ubuntu kernels, or if using non-Ubuntu kernels, that /etc/default/grub has apparmor=1 and security=apparmor
- ensuring that the apparmor package is installed
- enabling the systemd unit:
sudo systemctl enable --now apparmor
Manage software
apt is a high-level command-line utility for installing, updating, removing, and otherwise managing deb packages on Ubuntu, Debian, and related Linux distributions. It combines the most frequently used commands from the apt-get and apt-cache tools with different default values of some options.
Note: Prefer using apt-get and apt-cache in your shell scripts as they are backward compatible between the different versions and have more options and features.
The first command updates the APT package index which is essentially a database of available packages from the repositories defined in the /etc/apt/sources.list file and in the /etc/apt/sources.list.d directory.
In addition to the officially supported package repositories available for Ubuntu, there exist additional community-maintained repositories which add thousands more packages for potential installation. Many other package sources are available, sometimes even offering only one package, as in the case of package sources provided by the developer of a single application.
Warning: Two of the most popular are the universe and multiverse repositories. Packages in the multiverse repository often have licensing issues that prevent them from being distributed with a free operating system, and they may be illegal in your locality. Be advised that neither the universe or multiverse repositories contain officially supported packages. In particular, there may not be security updates for these packages. By default, the universe and multiverse repositories are enabled but if you would like to disable them edit /etc/apt/sources.list and comment the lines containing these repositories' names.
Actions of the apt command, such as installation and removal of packages, are logged in the /var/log/dpkg.log log file.
Installing packages is as simple as running the following command: sudo apt install <package>
To remove the package including all configuration files: sudo remove --purge install <package>
To list all available packages use the following command (optionally, only the installed or upgradable ones): sudo apt list (--installed/--upgradeable)
To retrieve information about a given package, use the show command: sudo apt show <package>
To prevent updating a specific package: sudo apt-mark hold <package>
To remove the hold: sudo apt-mark unhold <package>
Show all packages on hold: sudo apt-mark showhold
To add an APT repository to either /etc/apt/sources.list or to a separate file in the /etc/apt/sources.list.d directory (e.g. MongoDB):
# first import the repository public key
sudo apt-key adv --keyserver hkp://keyserver.ubuntu.com:80 --recv 9DA31620334BD75D9DCB49F368818C72E52529D4
# add the MongoDB repository using the command below
sudo add-apt-repository 'deb [arch=amd64] https://repo.mongodb.org/apt/ubuntu bionic/mongodb-org/4.0 multiverse'
# you can now install any of the packages from the newly enabled repository
sudo apt install mongodb-org
For example, to add the a PPA repo (e.g. Jonathon F's PPA which provides FFmpeg version 4.x) you would run:
sudo add-apt-repository ppa:jonathonf/ffmpeg-4`
# the PPA repository public key will be automatically downloaded and registered
# once the PPA is added to your system you can install the repository packages
sudo apt install ffmpeg
If for any reasons you want to remove a previously enabled repository, use the --remove option: sudo add-apt-repository --remove 'deb [arch=amd64] https://repo.mongodb.org/apt/ubuntu bionic/mongodb-org/4.0 multiverse'
If you want to have more control over how your sources are organized you can manually edit the /etc/apt/sources.list file and add the apt repository line to the file, and then manually import the public repository key to your system with apt-key.
dpkg is a low-level package manager for Debian-based systems. It can install, remove, and build packages, but unlike other package management systems, it cannot automatically download and install packages or their dependencies. apt and aptitude are newer, and layer additional features on top of dpkg.
To list all packages in the system's package database, including all packages, installed and uninstalled, from a terminal prompt type:
dpkg -l
Depending on the number of packages on your system, this can generate a large amount of output. Pipe the output through grep to see if a specific package is installed: dpkg -l | grep <package-name-or-regex>
To list the files installed by a package, enter:
dpkg -L <package>
If you are not sure which package installed a file, dpkg -S may be able to tell you. For example:
dpkg -S /etc/host.conf
base-files: /etc/host.conf
Note: Many files are automatically generated during the package install process, and even though they are on the filesystem, dpkg -S may not know which package they belong to.
You can install a local .deb file by entering: sudo dpkg -i <package>_<version>-<revision-num>_<arch>.deb
Note: For historical reasons, the 64-bit x86 architecture is called "amd64", while the 32-bit version is named "i386".
Uninstalling a package can be accomplished by: sudo dpkg -r <package> # -P instead removes also config files
Warning: Uninstalling packages using dpkg, in most cases, is NOT recommended. It is better to use a package manager that handles dependencies to ensure that the system is in a consistent state. For example, using dpkg -r zip will remove the zip package, but any packages that depend on it will still be installed and may no longer function correctly.
Installing a package from source is the old-school approach of managing software. A source package provide you with all of the necessary files to compile or otherwise, build the desired piece of software. It consists, in its simplest form, of three files:
- the upstream tarball with
.tar.gzending - a description file with
.dsc ending.It contains the name of the package, both, in its filename as well as content - a tarball, with any changes made to upstream source, plus all the files created for the Debian package (ending with
.debian.tar.gzor a.diff.gz)
To install a debian package from source:
- download the sources (or download it manually):
apt source <package>
Note: You need a deb-src entry in your /etc/apt/sources.list file, like:
deb-src http://http.us.debian.org/debian unstable main
- install the dependecies for the package:
apt build-dep <package> - go into the extracted source directory and then build the package:
dpkg-buildpackage -rfakeroot -b -uc -us
# or
debuild -b -uc -us
# or
apt source --compile
- install the .deb file:
dpkg -i <deb-file> - if you see a error message caused by missing deependencies, type:
apt install -f
Identify the component of a Linux distribution that a file belongs to
In any DEB-based systems, you can find the package that provides a certain file using apt-file tool. If you just installed apt-file, the system-wide cache might be empty. You need to run 'apt-file update' as root to update the cache. You can also run 'apt-file update' as normal user to use a cache in the user's home directory.
And, then search for the packages that contains a specific file, say alisp.h, with command (for repository packages, either installed or not installed):
apt-file find <alisp.h> # *find* is an alias for *search*
apt-file may also be used to list all the files included in a package:
apt-file list <packagename>
If you already have the file, and just wanted to know which package it belongs to, you can use dpkg command as shown below (only for installed DEB packages - from any source):
dpkg -S $(which <alisp.h>)
If you already know the package name, you can quickly look up the files that are installed by a Debian package:
dpkg -L <packagename>
3. User and Group Management - 10%
- Create, delete, and modify local user accounts
- Create, delete, and modify local groups and group memberships
- Manage system-wide environment profiles
- Manage template user environment
- Configure user resource limits
- Manage user privileges
- Configure PAM
Create, delete, and modify local user accounts
Add a User
In Ubuntu, there are two command-line tools that you can use to create a new user account:
useradd, a low-level utilityadduser, a script written in Perl that acts as a friendly interactive frontend foruseradd.
Adding a new user is quick and easy, simply invoke adduser <username> command followed by the username and aswer all the questions when propted.
When invoked, useradd creates a new user account according to the options specified on the command line and the default values set in the /etc/default/useradd file. useradd also reads the content of the /etc/login.defs file. This file contains configuration for the shadow password suite such as password expiration policy, ranges of user IDs used when creating system and regular users, and more.
To create a user modifying some default values:
sudo useradd -s /usr/bin/zsh -d "/home/students/moose" -m -k /etc/skel -c "Bullwinkle J Moose" bmoose
To be able to log in as the newly created user, you need to set the user password. To do that run the passwd command followed by the username:
sudo passwd <username>
You to specify a list of supplementary groups which the user will be a member of with the -G (--groups) option:
sudo useradd -g users -G wheel,developers <username>
You can check the user groups by typing:
id username
>uid=1002(username) gid=100(users) groups=100(users),10(wheel),993(docker)
To define a time at which the new user accounts will expire, use the -e (--expiredate) option. This is useful for creating temporary accounts.
Note: The date must be specified using the YYYY-MM-DD format.
For example to create a new user account named username with an expiry time set to January 22 2019 you would run:
sudo useradd -e 2019-01-22 <username>
Use the chage command to verify the user account expiry date:
sudo chage -l <username>
The default useradd options can be viewed and changed using the -D, --defaults option, or by manually editing the values in the /etc/default/useradd file.
To view the current default options type:
useradd -D
>GROUP=100
>HOME=/home
>INACTIVE=-1
>EXPIRE=
>SHELL=/bin/sh
>SKEL=/etc/skel
>CREATE_MAIL_SPOOL=no
Let's say you want to change the default login shell from /bin/sh to /bin/bash. To do that, specify the new shell as shown below:
sudo useradd -D -s /bin/bash
sudo useradd -D | grep -i shell
>SHELL=/bin/bash
Modify a User
To modify a user, you can use the usermod command which allows you to specify the same set of flags as useradd.
To add a user to a group: sudo usermod -aG dialout <username>
Note: In general (for the GUI, or for already running processes, etc.), the user will need to log out and log back in to see their new group added. For the current shell session, you can use newgrp:
newgrp <groupname>. This command adds the group to the current shell session.
Although not very often, sometimes you may want to change the name of an existing user. The -l option is used to change the username:
sudo usermod -l <new-username> <username>
To set the min and max number of days between password changes: sudo chage -m 14 -M 30 <username>
Block a user
To force immediate expiration of a user account: sudo chage -d 0 <username>
To disable the expiration of an account, set an empty expiry date: sudo usermod -e "" <username>
The -L option allows you to lock a user account: sudo usermod -L <username>
The commands will insert an exclamation point (!) mark in front of the encrypted password. When the password field in the /etc/shadow file contains an exclamation point, the user will not be able to login to the system using password authentication. Other login methods, like key-based authentication (SSH Login) or switching to the user (su) are still allowed. If you want to lock the account and disable all login methods, you also need to set the expiration date to 1. The following examples shows how to lock a user: sudo usermod -L -e 1 <username>
To unlock a user, run usermod with the -U option: usermod -U <username>
If your system also encounters some problem(s) and you are forced to put it down to fix the problem(s), create the /etc/nologin file to disallow user logins and notify users: if a user attempts to log in to a system where this file exists, the contents of the nologin file is displayed, and the user login is terminated. Superuser logins are not affected.
To block a specific user from accessing a shell: chsh -s /bin/nologin <username>
Note: A user could still log on to the system via programs such as ftp that do not necessarily require a shell to connect to a system.
Use a restricted shell to limit what a user can do:
# assign to the the user rbash as login shell
sudo useradd <username> -s /bin/rbash
sudo passwd <username>
sudo mkdir -p /home/<username>/bin

# restrict the path to a bin dir in his home
sudo <username> /home/<username>/.bash_profile
echo "PATH=$HOME/bin" > /home/<username>/.bash_profile
sudo chown root:root /home/<username>/.bash_profile
sudo chmod 755 /home/<username>/.bash_profile

# copy into bin the only commands you want the user to access to
sudo ln -s /bin/ls /home/<username>/bin
sudo ln -s /bin/top /home/<username>/bin
sudo ln -s /bin/uptime /home/<username>/bin
sudo ln -s /bin/pinky /home/<username>/bin
Note: On some distributions, rbash may not exist, so just create it as a symlink to bash: sudo ln -s /bin/bash /bin/rbash
Remove a User
In Ubuntu, you can use two commands to delete a user account: userdel and its interactive frontend deluser.
To delete the user and its home directory and mail spool: sudo userdel -r <username>
If the user you want to remove is still logged in, or if there are running processes that belong to this user, the userdel command does not allow to remove the user.
In this situation, it is recommended to log out the user and kill all user's running processes with the killall command:
sudo killall -u <username>
Once done, you can remove the user.
Another option is to use the -f (--force) option that tells userdel to forcefully remove the user account, even if the user is still logged in or if there are running processes that belong to the user: userdel -f <username>
Create, delete, and modify local groups and group memberships
Use the groupadd command to add a new group: groupadd [options] group_name
To creaste a system group with the give GID: $ sudo groupadd -r -g 215 staff
Note: By convention, UIDs and GUIDs in the range 0-999 are reserved to system users and groups.
Note: On many Linux systems, the USERGROUPS_ENAB variable in /etc/login.defs controls whether commands like useradd or userdel automatically add or delete an associated personal group.
Use the groupmod command to modify an existing group: groupmod [options] group_name
Use groupdel to delete the group. You can remove a group even if there are users in the group: groupdel group_name
Note: You can not remove the primary group of an existing user. You must remove the user before removing the group.
Use the gpasswd command to administer the groups: gpasswd [options] group_name
To add user test in group student: gpasswd -a test student
The groups command displays the group the user belongs to:
groups <username>
><username> : oinstall dba asm asmdba oper
grep <username> /etc/group
>oinstall:x:5004:<username>
>dba:x:5005:<username>
>asm:x:5006:<username>
>asmdba:x:5007:<username>
>oper:x:5008:<username>
The newgroup command executes a new shell and changes a user's real group information:
id
>uid=5004(<username>) gid=5004(oinstall) groups=5004(oinstall),5005(dba) ...

ps
>   PID TTY          TIME CMD
>106591 pts/0    00:00:00 bash
>106672 pts/0    00:00:00 ps

newgrp dba
# the gis is changed
id
>uid=5004(<username>) gid=5005(dba) groups=5005(dba),5004(oinstall) ...

# also note that a new shell has been executed
ps
>   PID TTY          TIME CMD
>106591 pts/0    00:00:00 bash
>106231 pts/0    00:00:00 bash
>106672 pts/0    00:00:00 ps
Note: You can only change your real group name to a group that you are member of.
Manage system-wide environment profiles
In order to set a value to an existing environment variable, we use an assignment expression. For instance, to set the value of the "LANG" variable to "he_IL.UTF-8", we use the following command: LANG=he_IL.UTF-8
If we use an assignment expression for a variable that doesn't exist, the shell will create a shell variable, which is similar to an environment variable but does not influence the behaviour of other applications.
A shell variable can be exported to become an environment variable with the export command. To create the "EDITOR" environment variable and assign the value "nano" to it, you can do:
EDITOR=nano
export EDITOR
Note: Use 'export -f FUN', to make a function available to all child processes.
The bash shell provides a shortcut for creating environment variables. The previous example could be performed with the following single command:
export EDITOR=nano
The printenv command prints the names and values of all currently defined environment variables: printenv
Note: This command is equivalent to 'export -p' and 'env', while 'set' prints all shell variables and functions.
To examine the value of a particular variable, we can specify its name to the printenv command: printenv TERM
Another way to achieve that is to use the dollar sign ($), as used in the following example: echo $TERM
The dollar sign can actually be used to combine the values of environment variables in many shell commands. For example, the following command can be used to list the contents of the "Desktop" directory within the current user's home directory: ls $HOME/Desktop
For the sake of completeness: If you want to print the names and values also of the non-exported shell variables, i.e. not only the environment variables, this is one way: ( set -o posix ; set ) | less
The source command reads and executes commands from the file specified as its argument in the current shell environment. It is useful to load functions, variables, and configuration files into shell scripts.
Session-wide environment variables
A suitable file for environment variable settings that should affect just a particular user (rather than the system as a whole) is ~/.profile.
Shell config files such as ~/.bashrc, ~/.bash_profile, and ~/.bash_login are often suggested for setting environment variables.
Warning: While this may work on Bash shells for programs started from the shell, variables set in those files are not available by default to programs started from the graphical environment in a desktop session.
System-wide environment variables
A suitable file for environment variable settings that affect the system as a whole (rather than just a particular user) is /etc/environment. An alternative is to create a file for the purpose in the /etc/profile.d directory.
The /etc/environment file is specifically meant for system-wide environment variable settings. It is not a script file, but rather consists of assignment expressions, one per line: FOO=bar
Warning: Variable expansion does not work in /etc/environment.
iles with the .sh extension in the /etc/profile.d directory get executed whenever a bash login shell is entered (e.g. when logging in from the console or over ssh), as well as by the DisplayManager when the desktop session loads.
You can for instance create the file /etc/profile.d/myenvvars.sh and set variables like this:
export JAVA_HOME=/usr/lib/jvm/jdk1.7.0
export PATH=$PATH:$JAVA_HOME/bin
While /etc/profile is often suggested for setting environment variables system-wide, it is a configuration file of the base-files package, so it's not appropriate to edit that file directly. Use a file in /etc/profile.d instead.
/etc/default/locale is specifically meant for system-wide locale environment variable settings. It's written to by the installer and when you use Language Support to set the language or regional formats system-wide. On a desktop system there is normally no reason to edit this file manually.
The /etc/security/pam_env.conf file specifies the environment variables to be set, unset or modified by pam_env(8). When someone logs in, this file is read and the environment variables are set according.
Note: Any variables added to these locations will not be reflected when invoking them with a sudo command, as sudo has a default policy of resetting the Environment and setting a secure path (this behavior is defined in /etc/sudoers). As a workaround, you can use "sudo su" that will provide a shell with root privileges but retaining any modified PATH variables. Alternatively you can setup sudo not to reset certain environment variables by adding some explicit environment settings to keep in /etc/sudoers: Defaults env_keep += "http_proxy SOMEOTHERVARIABLES ANOTHERVARIABLE ETC"
Manage template user environment
The /etc/skel directory contains files and directories that are automatically copied over to a new user's when it is created from useradd command:
ll /etc/skel/
>total 48K
>drwxr-xr-x   3 root root 4.0K Jul 31  2020 ./
>drwxr-xr-x 156 root root  12K Mar 26 21:44 ../
>-rw-r--r--   1 root root  220 Feb 25  2020 .bash_logout
>-rw-r--r--   1 root root 3.7K Feb 25  2020 .bashrc
>drwxr-xr-x   2 root root 4.0K Jul 31  2020 .config/
>-rw-r--r--   1 root root  15K Apr 13  2020 .face
>lrwxrwxrwx   1 root root    5 Jan  5 15:33 .face.icon -> .face
>-rw-r--r--   1 root root  807 Feb 25  2020 .profile
Note: The location of /etc/skel can be changed by editing the line that begins with SKEL= in the configuration file /etc/default/useradd.
Configure user resource limits
Any user can change it's own soft limits, between "zero", and the hard limit (typically enforced by pam_limit).
To print all the resource limits for the current user:
ulimit -a
Show the current Soft limit for "memlock":
ulimit -S -l
> 64
Set the current Soft "memlock" limit to 48KiB:
ulimit -S -l 48
The system resources are defined in a configuration file located at /etc/security/limits.conf. ulimit, when called, will report these values.
To manually set resource limits for users or groups:
sudo vim /etc/security/limits.conf
Each entry has to follow the following structure: [domain] [type] [item] [value].
These are some example lines which might be specified in /etc/security/limits.conf:
*               soft    core            0
root            hard    core            100000
*               hard    rss             10000
@student        hard    nproc           20
@faculty        soft    nproc           20
@faculty        hard    nproc           50
ftp             hard    nproc           0
@student        -       maxlogins       4
To find limits for a process:
cat /proc/<PID>/limits
Manage user privileges
A user with administrative privileges is sometimes called a super user. This is simply because that user has more privileges than normal users. Commands like su and sudo are programs for temporarily giving you “super user” (administrative) privileges.
Administrative privileges are associated with your user account. Administrator users are allowed to have these privileges while Standard users are not. Without administrative privileges you will not be able to install software. Some user accounts (e.g root) have permanent administrative privileges. You should not use administrative privileges all of the time, because you might accidentally change something you did not intend to (like delete a needed system file, for example).
These privileges are gained by adding the user to the sudo group. Users in the "sudo" group can use sudo to gain administrative privileges after supplying their password.
Note: Up until Ubuntu 11.10, administrator access using the sudo tool was granted via the "admin" Unix group. Starting with Ubuntu 12.04, administrator access are granted via the "sudo"group. This makes Ubuntu more consistent with the upstream implementation and Debian. For compatibility purposes, the admin group is still available to provide sudo/administrator access.
If you want a new user to be able to perform administrative tasks, you need to add the user to the sudo group:
sudo usermod -aG sudo <username>
As an alternative to putting your user in the sudo group, you can use the visudo command, which opens a configuration file called /etc/sudoers in the system's default editor, and explicitly specify privileges on a per-user basis: sudo visudo
Note: Typically, visudo uses vim to open the /etc/sudoers. If you don't have experience with vim and you want to edit the file with nano , change the default editor by running: sudo EDITOR=nano visudo
Use the arrow keys to move the cursor, search for the line that defines root previleges and use the same syntax for this user:
#       HOSTS=(USERS:GROUPS) COMMANDS
root    ALL=(ALL:ALL) ALL
newuser ALL=(ALL:ALL) ALL
Another typical example is to allow the user to run only specific commands via sudo (and without password). For example, to allow only the mkdir and rmdir commands, you would use:
username ALL=(ALL) NOPASSWD:/bin/mkdir,/bin/rmdir
To remove the sudo privileges from a specific user: sudo deluser <username> sudo
Configure PAM
PAM is a powerful suite of shared libraries used to dynamically authenticate a user to applications (or services) in a Linux system. It integrates multiple low-level authentication modules into a high-level API that provides dynamic authentication support for applications.
To employ PAM, an application/program needs to be “PAM-aware“; it needs to have been written and compiled specifically to use PAM. To find out if a program is “PAM-aware” or not, check if it has been compiled with the PAM library using the ldd command:
sudo ldd /usr/sbin/sshd | grep libpam.so
> libpam.so.0 => /lib/x86_64-linux-gnu/libpam.so.0 (0x00007effddbe2000)
The main configuration file for PAM is /etc/pam.conf and the /etc/pam.d/ directory contains the PAM configuration files for each PAM-aware application/services.
The syntax for the main configuration file is as follows: the file is made up of a list of rules written on a single line (you can extend rules using the “\” escape character) and comments are preceded with “#” marks and extend to the next end of line.
The format of each rule is a space separated collection of tokens (the first three are case-insensitive):
service type control-flag module module-arguments; where:
- service: actual application name
- type: module type/context/interface
- control-flag: indicates the behavior of the PAM-API should the module fail to succeed in its authentication task
- module: the absolute filename or relative pathname of the PAM
- module-arguments: space separated list of tokens for controlling module behavior.
The syntax of each file in /etc/pam.d/ is similar to that of the main file and is made up of lines of the following form:
type control-flag module module-arguments
A module is associated to one these management group types:
- account: provide services for account verification
- authentication: authenticate a user and set up user credentials
- password: are responsible for updating user passwords and work together with authentication modules
- session: manage actions performed at the beginning of a session and end of a session.
PAM loadable object files (i.e. the modules) are to be located in the following directory: /lib/security/ or /lib64/security depending on the architecture.
The supported control-flags are:
- requisite: failure instantly returns control to the application indicating the nature of the first module failure
- required: all these modules are required to succeed for libpam to return success to the application
- sufficient: given that all preceding modules have succeeded, the success of this module leads to an immediate and successful return to the application (failure of this module is ignored)
- optional: the success or failure of this module is generally not recorded.
In addition to the above keywords, there are two other valid control flags:
- include: include all lines of given type from the configuration file specified as an argument to this control
- substack: this differs from the previous one in that evaluation of the done and die actions in a substack does not cause skipping the rest of the complete module stack, but only of the substack..
Example: how to use PAM to disable root user access to a system via SSH and login.
We can use the /lib/security/pam_listfile.so module which offers great flexibility in limiting the privileges of specific accounts. Open and edit the file for the target service in the /etc/pam.d/ directory as shown.
sudo vim /etc/pam.d/sshd
sudo vim /etc/pam.d/login
Add this rule in both files:
auth    required       pam_listfile.so \
    onerr=succeed  item=user  sense=deny  file=/etc/ssh/deniedusers
Explaining the tokens in the above rule:
- auth: is the module type (or context)
- required: is a control-flag that means if the module is used, it must pass or the overall result will be fail, regardless of the status of other modules
- pam_listfile.so: is a module which provides a way to deny or allow services based on an arbitrary file
- onerr=succeed: module argument
- item=user: module argument which specifies what is listed in the file and should be checked for
- sense=deny: module argument which specifies action to take if found in file, if the item is NOT found in the file, then the opposite action is requested
- file=/etc/ssh/deniedusers: module argument which specifies file containing one item per line.
Next, we need to create the file /etc/ssh/deniedusers and add the name root in it:
sudo vim /etc/ssh/deniedusers
Save the changes and close the file, then set the required permissions on it:
sudo chmod 600 /etc/ssh/deniedusers
From now on, the above rule will tell PAM to consult the /etc/ssh/deniedusers file and deny access to the SSH and login services for any listed user.
Another good example of PAM configuration is showed in pam_tally2 module man page: it explains how to configure login to lock the account after 4 failed logins.
4. Networking - 12%
- Configure networking and hostname resolution statically or dynamically
- Configure network services to start automatically at boot
- Implement packet filtering (./iptables, firewalld or ufw)
- Start, stop, and check the status of network services
- Statically route IP traffic
- Synchronize time using other network peers
Configure networking and hostname resolution statically or dynamically
Networking
Networks consist of two or more devices, such as computer systems, printers, and related equipment which are connected by either physical cabling or wireless links for the purpose of sharing and distributing information among the connected devices.
The two protocol components of TCP/IP deal with different aspects of computer networking. Internet Protocol, the “IP” of TCP/IP is a connectionless protocol which deals only with network packet routing using the IP Datagram as the basic unit of networking information. The IP Datagram consists of a header followed by a message. The Transmission Control Protocol is the “TCP” of TCP/IP and enables network hosts to establish connections which may be used to exchange data streams. TCP also guarantees that the data between connections is delivered and that it arrives at one network host in the same order as sent from another network host.
The TCP/IP protocol configuration consists of several elements which must be set by editing the appropriate configuration files, or deploying solutions such as the Dynamic Host Configuration Protocol (DHCP) server which in turn, can be configured to provide the proper TCP/IP configuration settings to network clients automatically. These configuration values must be set correctly in order to facilitate the proper network operation of your Ubuntu system.
The common configuration elements of TCP/IP and their purposes are as follows:
-
IP address: The IP address is a unique identifying string expressed as four decimal numbers ranging from zero (0) to two-hundred and fifty-five (255), separated by periods, with each of the four numbers representing eight (8) bits of the address for a total length of thirty-two (32) bits for the whole address. This format is called dotted quad notation.
-
Netmask: The Subnet Mask (or simply, netmask) is a local bit mask, or set of flags which separate the portions of an IP address significant to the network from the bits significant to the subnetwork. For example, in a Class C network, the standard netmask is 255.255.255.0 which masks the first three bytes of the IPaddress and allows the last byte of the IP address to remain available for specifying hosts on the subnetwork.
-
Network Address: The Network Address represents the bytes comprising the network portion of an IP address. For example, the host 12.128.1.2 in a Class A network would use 12.0.0.0 as the network address, where twelve (12) represents the first byte of the IP address, (the network part) and zeroes (0) in all of the remaining three bytes to represent the potential host values. A network host using the private IP address 192.168.1.100 would in turn use a Network Address of 192.168.1.0, which specifies the first three bytes of the Class C 192.168.1 network and a zero (0) for all the possible hosts on the network.
-
Broadcast Address: The Broadcast Address is an IP address which allows network data to be sent simultaneously to all hosts on a given subnetwork rather than specifying a particular host. The standard general broadcast address for IP networks is 255.255.255.255, but this broadcast address cannot be used to send a broadcast message to every host on the Internet because routers block it. A more appropriate broadcast address is set to match a specific subnetwork. Forexample, on the private Class C IP network, 192.168.1.0, the broadcast address is 192.168.1.255. Broadcast messages are typically produced by network protocols such as the Address Resolution Protocol (ARP) and the Routing Information Protocol (RIP).
-
Gateway Address: A Gateway Address is the IP address through which a particular network, or host on a network, may be reached. If one network host wishes to communicate with another network host, and that host is not located on the same network, then a gateway must be used. In many cases, the Gateway Address will be that of a router on the same network, which will in turn pass traffic on to other networks or hosts, such as Internet hosts. The value of the Gateway Address setting must be correct, or your system will not be able to reach any hosts beyond those on the same network.
-
Nameserver Address: Nameserver Addresses represent the IP addresses of Domain Name Service (DNS) systems, which resolve network hostnames into IP addresses. There are three levels of Nameserver Addresses, which may be specified in order of precedence: The Primary Nameserver, the Secondary Nameserver, and the Tertiary Nameserver. In order for your system to be able to resolve network hostnames into their corresponding IP addresses, you must specify valid Nameserver Addresses which you are authorized to use in your system's TCP/IP configuration. In many cases these addresses can and will be provided by your network service provider,but many free and publicly accessible nameservers are available for use, such as the Level3 (Verizon) servers with IP addresses from 4.2.2.1 to 4.2.2.6.
Tip: The IP address, Netmask, Network Address, Broadcast Address, Gateway Address, and Nameserver Addresses are typically specified via the appropriate directives in the file /etc/network/interfaces (before Ubuntu 18.04, see below). For more information, view the system manual page for interfaces:
man interfaces
Netplan
Ubuntu 18.04 (LTS) has switched from ifupdown to Netplan for configuring network interfaces. Netplan is based on YAML config files that makes configuration process very simple. Netplan has replaced the old configuration file /etc/network/interfaces that was previously used for configuring network interfaces in Ubuntu.
During early boot, the Netplan networkd renderer runs, reads /{lib,etc,run}/netplan/*.yaml and writes configuration to /run to hand off control of devices to the specified networking daemon:
- configured devices get handled by
systemd-networkd by default, unless explicitly marked as managed by a specific renderer (NetworkManager) - devices not covered by the network config do not get touched at all.
If you are not on an Ubuntu Server, but on Desktop, chances are that the network is driven by the NetworkManager.
Netplan supports both networkd and NetworkManager as backends. You can specify which network backend should be used to configure particular devices by using the renderer key. You can also delegate all configuration of the network to NetworkManager itself by specifying only the renderer key:
network:
    version: 2
    renderer: NetworkManager
Ethernet Interfaces
Ethernet interfaces are identified by the system using predictable network interface names. These names can appear as eno1 or enp0s25. However, in some cases an interface may still use the kernel eth# style of naming.
To quickly identify all available Ethernet interfaces, you can use the ip command as shown below:
ip a
>1: lo: <LOOPBACK,UP,LOWER_UP> mtu 65536 qdisc noqueue state UNKNOWN group default qlen 1000
>    link/loopback 00:00:00:00:00:00 brd 00:00:00:00:00:00
>    inet 127.0.0.1/8 scope host lo
>       valid_lft forever preferred_lft forever
>    inet6 ::1/128 scope host
>       valid_lft forever preferred_lft forever
>2: enp0s25: <BROADCAST,MULTICAST,UP,LOWER_UP> mtu 1500 qdisc noqueue state UP group default qlen 1000
>    link/ether 00:16:3e:e2:52:42 brd ff:ff:ff:ff:ff:ff link-netnsid 0
>    inet 10.102.66.200/24 brd 10.102.66.255 scope global dynamic eth0
>       valid_lft 3257sec preferred_lft 3257sec
>    inet6 fe80::216:3eff:fee2:5242/64 scope link
>       valid_lft forever preferred_lft forever
Another application that can help identify all network interfaces available to your system is the lshw command. This command provides greater details around the hardware capabilities of specific adapters. In the example below, lshw shows a single Ethernet interface with the logical name of eth4 along with bus information, driver details and all supported capabilities:
sudo lshw -class network
  *-network
       description: Ethernet interface
       product: MT26448 [ConnectX EN 10GigE, PCIe 2.0 5GT/s]
       vendor: Mellanox Technologies
       physical id: 0
       bus info: pci@0004:01:00.0
       logical name: eth4
       version: b0
       serial: e4:1d:2d:67:83:56
       slot: U78CB.001.WZS09KB-P1-C6-T1
       size: 10Gbit/s
       capacity: 10Gbit/s
       width: 64 bits
       clock: 33MHz
       capabilities: pm vpd msix pciexpress bus_master cap_list ethernet physical fibre 10000bt-fd
       configuration: autonegotiation=off broadcast=yes driver=mlx4_en driverversion=4.0-0 duplex=full firmware=2.9.1326 ip=192.168.1.1 latency=0 link=yes multicast=yes port=fibre speed=10Gbit/s
       resources: iomemory:24000-23fff irq:481 memory:3fe200000000-3fe2000fffff memory:240000000000-240007ffffff
Ethernet Interface Logical Names
Interface logical names can also be configured via a netplan configuration. If you would like control which interface receives a particular logical name use the match and set-name keys. The match key is used to find an adapter based on some criteria like MAC address, driver, etc. Then the set-name key can be used to change the device to the desired logial name:
network:
  version: 2
  renderer: networkd
  ethernets:
    eth_lan0:
      dhcp4: true
      match:
        macaddress: 00:11:22:33:44:55
      set-name: eth_lan0
Ethernet Interface Settings
ethtool is a program that displays and changes ethernet card settings such as auto-negotiation, port speed, duplex mode, and Wake-on-LAN. The following is an example of how to view supported features and configured settings of an ethernet interface.
sudo ethtool eth4
>Settings for eth4:
>    Supported ports: [ FIBRE ]
>    Supported link modes:   10000baseT/Full
>    Supported pause frame use: No
>    Supports auto-negotiation: No
>    Supported FEC modes: Not reported
>    Advertised link modes:  10000baseT/Full
>    Advertised pause frame use: No
>    Advertised auto-negotiation: No
>    Advertised FEC modes: Not reported
>    Speed: 10000Mb/s
>    Duplex: Full
>    Port: FIBRE
>    PHYAD: 0
>    Transceiver: internal
>    Auto-negotiation: off
>    Supports Wake-on: d
>    Wake-on: d
>    Current message level: 0x00000014 (20)
>                   link ifdown
>    Link detected: yes
Temporary IP Address Assignment
For temporary network configurations, you can use the ip command which is also found on most other GNU/Linux operating systems. The ip command allows you to configure settings which take effect immediately, however they are not persistent and will be lost after a reboot.
To temporarily configure an IP address, you can use the ip command in the following manner. Modify the IP address and subnet mask to match your network requirements:
sudo ip addr add 10.102.66.200/24 dev enp0s25
The ip can then be used to set the link (i.e. network device) up or down:
ip link set dev enp0s25 up
ip link set dev enp0s25 down
To verify the IP address configuration of enp0s25, you can use the ip command in the following manner:
ip address show dev enp0s25
>10: enp0s25: <BROADCAST,MULTICAST,UP,LOWER_UP> mtu 1500 qdisc noqueue state UP group default qlen 1000
>    link/ether 00:16:3e:e2:52:42 brd ff:ff:ff:ff:ff:ff link-netnsid 0
>    inet 10.102.66.200/24 brd 10.102.66.255 scope global dynamic eth0
>       valid_lft 2857sec preferred_lft 2857sec
>    inet6 fe80::216:3eff:fee2:5242/64 scope link
>       valid_lft forever preferred_lft forever6
To configure a default gateway, you can use the ip command in the following manner. Modify the default gateway address to match your network requirements:
sudo ip route add default via 10.102.66.1
To verify your default gateway configuration, you can use the ip command in the following manner:
ip route show
>default via 10.102.66.1 dev eth0 proto dhcp src 10.102.66.200 metric 100
>10.102.66.0/24 dev eth0 proto kernel scope link src 10.102.66.200
>10.102.66.1 dev eth0 proto dhcp scope link src 10.102.66.200 metric 100
If you require DNS for your temporary network configuration, you can add DNS server IP addresses in the file /etc/resolv.conf. In general, editing /etc/resolv.conf directly is not recommanded, but this is a temporary and non-persistent configuration. The example below shows how to enter two DNS servers to /etc/resolv.conf, which should be changed to servers appropriate for your network:
nameserver 8.8.8.8
nameserver 8.8.4.4
If you no longer need this configuration and wish to purge all IP configuration from an interface, you can use the ip command with the flush option as shown below.
ip addr flush eth0
Note: Flushing the IP configuration using the ip command does not clear the contents of /etc/resolv.conf. You must remove or modify those entries manually, or reboot which should also cause /etc/resolv.conf, which is a symlink to /run/systemd/resolve/stub-resolv.conf, to be re-written.
Dynamic IP Address Assignment (DHCP Client)
To configure your server to use DHCP for dynamic address assignment, create a netplan configuration in the file /etc/netplan/99_config.yaml. The example below assumes you are configuring your first ethernet interface identified as enp3s0:
network:
  version: 2
  renderer: networkd
  ethernets:
    enp3s0:
      dhcp4: true
The configuration can then be applied using the netplan command: sudo netplan apply
In case you see any error, try debugging to investigate the problem. To run debug, use the following command as sudo: sudo netplan –d apply
To ensure that whether our machine is managed by “systemd-networkd”, all you have to do is using this command:
networkctl
#in case of success, you should see a something like this:
IDX LINK    TYPE  OPERATIONAL   SETUP
_______________________________________
1 enp3s0   ether  routable  configured
2 wlp2s0b1 wlan   routable  configured
Once all the configurations are successfully applied, restart the Network-Manager service by running the following command: sudo systemctl restart network-manager
If you are using a Ubuntu Server, use the following command instead: sudo systemctl restart system-networkd
Static IP Address Assignment
To configure your system to use static address assignment, create a netplan configuration in the file /etc/netplan/99_config.yaml. The example below assumes you are configuring your first ethernet interface identified as eth0. Change the addresses, gateway4, and nameservers values to meet the requirements of your network:
network:
  version: 2
  renderer: networkd
  ethernets:
    eth0:
      addresses:
        - 10.10.10.2/24
      gateway4: 10.10.10.1
      nameservers:
          search: [mydomain, otherdomain]
          addresses: [10.10.10.1, 1.1.1.1]
The configuration can then be applied using the netplan command: sudo netplan apply
Here is a a collection of example netplan configurations for common scenarios.
Name Resolution
Name resolution as it relates to IP networking is the process of mapping IP addresses to hostnames, making it easier to identify resources on a network. The following section will explain how to properly configure your system for name resolution using DNS and static hostname records.
DNS Client Configuration
Traditionally, the file /etc/resolv.conf was a static configuration file that rarely needed to be changed or automatically changed via DCHP client hooks. systemd-resolved handles name server configuration, and it should be interacted with through the systemd-resolve command. Netplan configures systemd-resolved to generate a list of nameservers and domains to put in /etc/resolv.conf, which is a symlink:
/etc/resolv.conf -> ../run/systemd/resolve/stub-resolv.conf
To configure the resolver, add the IP addresses of the nameservers that are appropriate for your network to the netplan configuration file. You can also add a list of search domains (DNS suffixes), which are used when a non-fully qualified hostname is given. The resulting file might look like the following:
network:
  version: 2
  renderer: networkd
  ethernets:
    enp0s25:
      addresses:
        - 192.168.0.100/24
      gateway4: 192.168.0.1
      nameservers:
          search: [mydomain, otherdomain]
          addresses: [1.1.1.1, 8.8.8.8, 4.4.4.4]
The search option can also be used with multiple domain names so that DNS queries will be appended in the order in which they are entered. For example, your network may have multiple sub-domains to search; a parent domain of example.com, and two sub-domains, sales.example.com and dev.example.com.
If you have multiple domains you wish to search, your configuration might look like the following:
network:
  version: 2
  renderer: networkd
  ethernets:
    enp0s25:
      addresses:
        - 192.168.0.100/24
      gateway4: 192.168.0.1
      nameservers:
          search: [example.com, sales.example.com, dev.example.com]
          addresses: [1.1.1.1, 8.8.8.8, 4.4.4.4]
If you try to ping a host with the name of server1, your system will automatically query DNS for its Fully Qualified Domain Name (FQDN) in the following order:
server1.example.com
server1.sales.example.com
server1.dev.example.com
If no matches are found, the DNS server will provide a result of notfound and the DNS query will fail.
If you are using NetworkManager in a desktop version of Ubuntu, editing /etc/netplan/*.yaml could not be enough.
If your current DNS server still points to your router (i.e. 192.168.1.1), there are at least two ways to solve this problem:
- You may configure these settings using the already mentioned GUI:
a. Choose a connection (from the Wired or Wireless tab) and click Edit b. Click on the IPv4 Settings tab c. Choose Automatic (DHCP) addresses only instead of just Automatic (DHCP) d. Enter the DNS servers in the DNS servers field, separated by spaces (e.g. 208.67.222.222 for OpenDNS) e. Click on Apply.
Note: 'Automatic (DHCP) addresses only' means that the network you are connecting to uses a DHCP server to assign IP addresses but you want to assign DNS servers manually.
Note: NetworkManager saves these settings in /etc/NetworkManager/system-connections/[name-of-your-connection].
- or, if your DNS settigs are messed up by multiple programs trying to update it, you can use
resolvconf:
sudo apt install resolvconf
sudo systemctl enable --now resolvconf.service
Then, edit /etc/resolvconf/resolv.conf.d/head and insert the nameservers youu want as:
nameserver 8.8.8.8
nameserver 8.8.4.4
Finally, to update /etc/resolv.conf by typing: sudo resolvconf -u
The /etc/resolv.conf file will be replaced by a symbolic link to /etc/resolvconf/run/resolv.conf, so that the system resolver will use this file instead of the previously symlinked /run/systemd/resolve/stub-resolv.conf.
Static Hostnames
Static hostnames are locally defined hostname-to-IP mappings located in the file /etc/hosts. Entries in the hosts file will have precedence over DNS by default. This means that if your system tries to resolve a hostname and it matches an entry in /etc/hosts, it will not attempt to look up the record in DNS. In some configurations, especially when Internet access is not required, servers that communicate with a limited number of resources can be conveniently set to use static hostnames instead of DNS.
The following is an example of a hosts file where a number of local servers have been identified by simple hostnames, aliases and their equivalent Fully Qualified Domain Names (FQDNs):
127.0.0.1   localhost
127.0.1.1   ubuntu-server
10.0.0.11   server1 server1.example.com vpn
10.0.0.12   server2 server2.example.com mail
10.0.0.13   server3 server3.example.com www
10.0.0.14   server4 server4.example.com file
Note: In the above example, notice that each of the servers have been given aliases in addition to their proper names and FQDN's. Server1 has been mapped to the name vpn, server2 is referred to as mail, server3 as www, and server4 as file.
To block ads and tracking sites, append to /etc/hosts the MVPS HOSTS file.
Name Service Switch Configuration
The order in which your system selects a method of resolving hostnames to IP addresses is controlled by the Name Service Switch (NSS) configuration file /etc/nsswitch.conf. As mentioned in the previous section, typically static hostnames defined in the systems /etc/hosts file have precedence over names resolved from DNS. The following is an example of the line responsible for this order of hostname lookups in the file /etc/nsswitch.conf:
hosts: files mdns4_minimal [NOTFOUND=return] dns mdns4
The entries listed are:
-
filesfirst tries to resolve static hostnames located in /etc/hosts -
mdns4_minimalattempts to resolve the name using Multicast DNS -
[NOTFOUND=return]means that any response of notfound by the preceding mdns4_minimal process should be treated as authoritative and that the system should not try to continue hunting for an answer -
dnsrepresents a legacy unicast DNS query -
mdns4represents a Multicast DNS query.
To modify the order of the above mentioned name resolution methods, you can simply change the hosts: string to the value of your choosing. For example, if you prefer to use legacy Unicast DNS versus Multicast DNS, you can change the string in /etc/nsswitch.conf as shown below:
hosts: files dns [NOTFOUND=return] mdns4_minimal mdns4
Bridging
Bridging multiple interfaces is a more advanced configuration, but is very useful in multiple scenarios. One scenario is setting up a bridge with multiple network interfaces, then using a firewall to filter traffic between two network segments. Another scenario is using bridge on a system with one interface to allow virtual machines direct access to the outside network. The following example covers the latter scenario.
Configure the bridge by editing your netplan configuration found in /etc/netplan/:
network:
  version: 2
  renderer: networkd
  ethernets:
    enp3s0:
      dhcp4: no
  bridges:
    br0:
      dhcp4: yes
      interfaces:
        - enp3s0
Note: Enter the appropriate values for your physical interface and network.
Now apply the configuration to enable the bridge: sudo netplan apply
The new bridge interface should now be up and running. The brctl command can provide useful information about the state of the bridge: sudo brctl show
Resolve a hostname to an ip address: dig +short google.com
Resolve a hostname with another DNS server:
nslookup
> server 8.8.8.8
> some.hostname.com
# or
dig some.hostname.com @8.8.8.8
Configure network services to start automatically at boot
It's usually a good idea to configure essential network services to automatically start on boot. This saves you the hassle of starting them manually upon a reboot and also, the resulting havoc caused in case you forget to do so. Some of the crucial network services include SSH, NTP, and httpd.
You can confirm what is your system service manager by running the following command:
ps --pid 1
>    PID TTY          TIME CMD
>      1 ?        00:00:04 systemd
To enable a service to start on boot, use the syntax: sudo systemctl enable <service-name>
Note: On SysV-based systems use
chkconfigin place ofsystemctl.
To confirm that the desired service has been enabled, list all the enabled services by executing the command:
sudo systemctl list-unit-files --state=enabled
Implement packet filtering
The Linux kernel includes the Netfilter subsystem, which is used to manipulate or decide the fate of network traffic headed into or through your server. All modern Linux firewall solutions use this system for packet filtering.
The kernel's packet filtering system would be of little use to administrators without a userspace interface to manage it. This is the purpose of iptables: when a packet reaches your server, it will be handed off to the Netfilter subsystem for acceptance, manipulation, or rejection based on the rules supplied to it from userspace via iptables. Thus, iptables is all you need to manage your firewall, if you're familiar with it, but many frontends are available to simplify the task.
Starting with CentOS 7, firewall-d replaced iptables as the default firewall management tool. The default firewall configuration tool for Ubuntu is ufw. By default, ufw is set to deny all incoming connections and allow all outgoing connections. This means anyone trying to reach your server would not be able to connect, while any application within the server would be able to reach the outside world.
Basic ufw management: sudo ufw [enable|disable|reset|status]
To open a port (SSH in this example): sudo ufw allow 22
Note: If the port you want to open or close is defined in
/etc/services, you can use the port name instead of the number. In the above examples, replace22withssh.
Rules can also be added using a numbered format: sudo ufw insert 1 allow 80
Similarly, to close an opened port: sudo ufw deny 22
To remove a rule, use delete followed by the rule: sudo ufw delete deny 22
It is also possible to allow access from specific hosts or networks to a port. The following example allows SSH access from host 192.168.0.2 to any IP address on this host: sudo ufw allow proto tcp from 192.168.0.2 to any port 22
Replace 192.168.0.2 with 192.168.0.0/24 to allow SSH access from the entire subnet.
Adding the –dry-run option to a ufw command will output the resulting rules, but not apply them. For example, the following is what would be applied if opening the HTTP port: sudo ufw --dry-run allow http
For more verbose status information use: sudo ufw status verbose
To view the numbered format: sudo ufw status numbered
Applications that open ports can include an ufw profile, which details the ports needed for the application to function properly. The profiles are kept in /etc/ufw/applications.d, and can be edited if the default ports have been changed.
To view which applications have installed a profile, enter the following in a terminal: sudo ufw app list
Similar to allowing traffic to a port, using an application profile is accomplished by entering: sudo ufw allow Samba
An extended syntax is available as well: ufw allow from 192.168.0.0/24 to any app Samba
Replace Samba and 192.168.0.0/24 with the application profile you are using and the IP range for your network. There is no need to specify the protocol for the application, because that information is detailed in the profile. Also, note that the app name replaces the port number.
To view details about which ports, protocols, etc., are defined for an application, enter: sudo ufw app info Samba
Start, stop, and check the status of network services
On systemd-based systems, use:
sudo systemctl [is-active|is-enabled-start|restart|reload|status|stop|try-restart] <name.service>
Note: On SysV-based systems use the
servicecommand instead.
Statically route IP traffic
IP Routing
IP routing is a means of specifying and discovering paths in a TCP/IP network along which network data may be sent. Routing uses a set of routing tables to direct the forwarding of network data packets from their source to the destination, often via many intermediary network nodes known as routers. There are two primary forms of IP routing: Static Routing and Dynamic Routing.
Static routing involves manually adding IP routes to the system's routing table, and this is usually done by manipulating the routing table with the route command. Static routing enjoys many advantages over dynamic routing, such as simplicity of implementation on smaller networks, predictability (the routing table is always computed in advance, and thus the route is precisely the same each time it is used), and low overhead on other routers and network links due to the lack of a dynamic routing protocol. However, static routing does present some disadvantages as well. For example, static routing is limited to small networks and does not scale well. Static routing also fails completely to adapt to network outages and failures along the route due to the fixed nature of the route.
Dynamic routing depends on large networks with multiple possible IP routes from a source to a destination and makes use of special routing protocols, such as the Router Information Protocol (RIP), which handle the automatic adjustments in routing tables that make dynamic routing possible. Dynamic routing has several advantages over static routing, such as superior scalability and the ability to adapt to failures and outages along network routes. Additionally, there is less manual configuration of the routing tables, since routers learn from one another about their existence and available routes. This trait also eliminates the possibility of introducing mistakes in the routing tables via human error. Dynamic routing is not perfect, however, and presents disadvantages such as heightened complexity and additional network overhead from router communications, which does not immediately benefit the end users, but still consumes network bandwidth.
When you need to access network devices located on a different network segment than the one you are on, you need to have a route set up so the networking stack knows how to get to the other network segment. This generally just points to your main gateway, but you may want to set up additional static routes, where you don't want the traffic going through your main default gateway.
For Ubuntu versions prior to 18.04, you had to manually edit the /etc/network/interfaces file to set up persistent static routes. With the introduction of Ubuntu 18.04, along came the netplan YAML based network configuration tool.
The netplan configuration files are located in the /etc/netplan folder (for more info about technical specification, have a look at the reference).
First step is to open the main netplan configuration file using administrative privileges: sudo vi /etc/netplan/01-network-manager-all.yaml
Find the configuration stanza related to the network interface which you wish to add the static route to. In this example we will add the the static route to the destination network subnet 172.16.0.0/24 via the network gateway 192.168.1.100 on the interface enp0s3:
# This file is generated from information provided by
# the datasource.  Changes to it will not persist across an instance.
# To disable cloud-init's network configuration capabilities, write a file
# /etc/cloud/cloud.cfg.d/99-disable-network-config.cfg with the following:
# network: {config: disabled}
network:
    ethernets:
        enp0s3:
            dhcp4: false
            addresses: [192.168.1.202/24]
            gateway4: 192.168.1.1
            nameservers:
              addresses: [8.8.8.8,8.8.4.4,192.168.1.1]
            routes:
            - to: 172.16.0.0/24
              via: 192.168.1.100
    version: 2
Once you made all required changes to add the static route all the new netplan configuration using the below command: sudo netplan apply
Or, if you want to test it first, and potentially roll back any changes, you can use the following command: sudo netplan try [config-file]
This option apply the changes, and provide a 120 timeout where by if you don't accept the changes, they will revert back. This is useful to prevent you from locking yourself out of the system, if the network change didn't work the way you were intending.
Check all static routes available on your Ubuntu system:
ip route s
> default via 192.168.1.1 dev enp0s3 proto static
> 172.16.0.0/24 via 192.168.1.100 dev enp0s3 proto static
> 192.168.1.0/24 dev enp0s3 proto kernel scope link src 192.168.1.202
To add non-persistent routes:
sudo ip route add 10.10.10.0/24 via 192.168.1.254           # specific route
sudo ip route add default via 192.168.1.254                 # default route (gw)
Example: adding a static route to a different subnet that cannot be accessed through your default gateway
If your computer is on a network and is not directly connected to the internet, it will be configured with what is called a default gateway, which is usually a router. If the computer cannot find the specific IP address on its local network (aka broadcast domain), as defined by its subnet, it will forward any packets headed to that IP address to the default gateway. The gateway will then attempt to forward packets elsewhere, such as the internet, or another broadcast domain.
But what if you have a separate network (i.e. another office department) that is NOT accessible via the default gateway?
For example, your internet router may be located at 10.0.0.1 and it is serving your local network, 10.0.0.0/8. However, you have a 172.16.5.0/24 network that is accessible only through a secondary router, which has the IP address 10.0.0.101 on the main network. Therefore, you need to point your OS to the secondary router for any IP addresses located in the 172.16.5.0-255 address space. To do this, you need to add a static route.
If you wish to add one temporarily, simply run the ip route add command with the right network information:
ip route add 172.16.5.0/24 via 10.0.0.101 dev eth0
172.16.5.0 is the network you wish to access. /24 is the subnet mask 10.0.0.101 is the secondary router to which you are adding a default route eth0 is the network interface assigned to your main network (in this case, 10.0.0.0/8)
Note: ip route add command will only persist until the next reboot or interface/network settings restart.
Further reading:
Synchronize time using other network peers
Ubuntu by default uses timedatectl (front-end utility)/timesyncd (daemon) to synchronize time and users can optionally use chrony to serve the Network Time Protocol.
Until recently, most network time synchronization was handled by the Network Time Protocol daemon or ntpd. This service connects to a pool of other NTP servers that provide it with constant and accurate time updates.
Ubuntu's default install now uses timesyncd instead of ntpd. timesyncd connects to the same time servers and works in roughly the same way, but is more lightweight and more integrated with systemd and the low level workings of Ubuntu.
ntpdate is considered deprecated in favor of timedatectl (or chrony) and thereby no more installed by default. timesyncd will generally do the right thing keeping your time in sync, and chrony will help with more complex cases: systemd-timesyncd implements SNTP, not NTP, hence multi-server support is out of focus; if you want a full NTP implementation, please use ntpd (<18.04) or chrony (>18.04).
We can query the status of timesyncd by running timedatectl with no arguments. You don't need to use sudo in this case: timedatectl
system clock synchronized: yes indicates that the time has been successfully synced, and systemd-timesyncd.service active: yes means that timesyncd is enabled and running.
If you're not sure about your time zone, you can list the available time zones with the following command: timedatectl list-timezones
Next, you can set the time zone using the timedatectl set-timezone command: timedatectl set-timezone America/Antigua
Hardware vs System Clock
A Linux system will generally have two clocks, a hardware clock/real time clock (RTC) and a system clock.
The hardware clock is physically present and continues to run from battery power even if the system is not plugged into a power source, this is how the time stays in place when there is no power available. As the Linux system boots up it will read time from the hardware clock, this initial time is then passed to the system clock.
The system clock runs in the kernel and after getting its initial time from the hardware clock it will then synchronize with an NTP server to become up to date.
We can manually synchronize the hardware clock to the system clock if required, this would generally only be required if there was no NTP server available: hwclock --hctosys
We can also reverse the process and synchronize the system clock to the hardware clock. hwclock --systohc
The hwclock command can also be used to display the current time of the hardware clock as shown below:
sudo hwclock
> Tue 15 Sep 2015 22:24:32 AEST  -0.352785 seconds
Understanding Stratum
NTP servers work based on a layered hierarchy referred to as stratum, starting at stratum 0. Stratum 0 are the highly exact time sources such as atomic clocks or GPS clocks, these are our reference time devices. Stratum 1 are the computers that synchronize with the stratum 0 sources, these are highly accurate NTP servers. Stratum 2 servers then get their time from the stratum 1 servers, while stratum 3 servers synchronize with stratum 2 sources.
Essentially stratum n+1 will synchronize against stratum n, the highest limit is 15, while 16 refers to a device that is not synchronized. There are plenty of public stratum-1 servers available on the Internet for use. It is generally recommended that you synchronize with a time source higher in the hierarchy, for instance synchronizing time against a stratum 1 server will be considered more reliable than using a stratum 4 server.
Firewall Rules
By default NTP uses UDP port 123, so if you are connecting over the Internet to an external NTP server ensure that outbound UDP 123 traffic is allowed out to the NTP server specified in your configuration. Normally by default all outbound traffic is allowed so this should not be a problem. Public NTP servers on the Internet should already be configured to accept inbound NTP traffic.
How to synchronize the system clock with a remote server (enable NTP) using timedatectl
Enable the NTP service on your Linux system with the command, if it's inactive:
sudo timedatectl set-ntp on
It's worth noting that this command fails if a NTP service is not installed, e.g. timesyncd, ntpd, Chrony or others. timesyncd should be installed by default in many cases though (for example it's installed by default with Ubuntu 16.04 and newer).
If using a service like chrony or ntpd to make changes, these are not shown by timedatectl until systemd-timedated is restarted:
sudo systemctl restart systemd-timedated
On an Ubuntu 18.04 server I also had to restart systemd-timesyncd (but this was no needed on my Ubuntu 19.04 or Solus OS systems for example), or else the system time would not get synchronized. In case you're also using timesyncd, and timedatectl shows System clock synchronized: no, even though it shows NTP service active, restart systemd-timesyncd: sudo systemctl restart systemd-timesyncd
When using the default systemd-timesyncd service, you can see some more information than that provided by timedatectl, like the NTP time server used, and a log showing the last time the synchronization was performed, with: sudo systemctl status systemd-timesyncd
On systemd 239 and newer (e.g. this won't work on Ubuntu 18.04, because it uses systemd 237) you may show the systemd-timesyncd status using: timedatectl show-timesync
And the properties systemd-timesyncd using: timedatectl timesync-status
You can change the settings shown here by editing the /etc/systemd/timesyncd.conf configuration file. E.g. to change the NTP servers (you could use the servers provided by the NTP Pool Project), uncomment the NTP line, and add the servers you want to use separated by a space. After changing the configuration file, restart systemd-timesyncd:
[Time]
NTP=0.it.pool.ntp.org 1.it.pool.ntp.org 2.it.pool.ntp.org 3.it.pool.ntp.org
FallbackNTP=ntp.ubuntu.com
RootDistanceMaxSec=5
PollIntervalMinSec=32
PollIntervalMaxSec=2048
5. Service Configuration - 20%
- Configure a caching DNS server
- Maintain a DNS zone
- Configure email aliases
- Configure SSH servers and clients
- Restrict access to the HTTP proxy server
- Configure an IMAP and IMAPS service
- Query and modify the behavior of system services at various operating modes
- Configure an HTTP server
- Configure HTTP server log files
- Configure a database server
- Restrict access to a web page
- Manage and configure containers
- Manage and configure Virtual Machines
Configure a caching DNS server
Domain Name Service (DNS) is an Internet service that maps IP addresses and fully qualified domain names (FQDN) to one another. In this way, DNS alleviates the need to remember IP addresses. Computers that run DNS are called name servers. Ubuntu ships with BIND (Berkley Internet Naming Daemon), the most common program used for maintaining a name server on Linux.
The following is meant to show you how to set up a local DNS resolver on Ubuntu (20.04), with the widely-used BIND9 DNS software. A DNS resolver is known by many names, some of which are listed below. They all refer to the same thing:
- full resolver (in contrast to stub resolver)
- DNS recursor
- recursive DNS server
- recursive resolver
Also, be aware that a DNS server can also be called a name server, as said before. Examples of DNS resolver are 8.8.8.8 (Google public DNS server) and 1.1.1.1 (Cloudflare public DNS server). The OS on your computer also has a resolver, although it's called stub resolver due to its limited capability. A stub resolver is a small DNS client on the end user's computer that receives DNS requests from applications such as Firefox and forward requests to a recursive resolver. Almost every resolver can cache DNS response to improve performance, so they are also called caching DNS server.
There are many ways to configure BIND9. Some of the most common configurations are a caching nameserver, primary server, and secondary server:
- when configured as a caching nameserver BIND9 will find the answer to name queries and remember the answer when the domain is queried again
- as a primary server, BIND9 reads the data for a zone from a file on its host and is authoritative for that zone
- as a secondary server, BIND9 gets the zone data from another nameserver that is authoritative for the zone.
Run the following command to install BIND 9 on Ubuntu (20.04), from the default repository (BIND 9 is the current version and BIND 10 is a dead project):
sudo apt update
sudo apt install bind9 bind9utils bind9-doc bind9-host
The BIND server will run as the bind user, which is created during installation, and listens on TCP and UDP port 53. The BIND daemon is called named. The rndc binary is used to reload/stop and control other aspects of the BIND daemon. Communication is done over TCP port 953.
The DNS configuration files are stored in the /etc/bind directory. The primary configuration file is /etc/bind/named.conf, which in the layout provided by the package just includes these files:
- /etc/bind/named.conf.options: global DNS options
- /etc/bind/named.conf.local: for your zones
- /etc/bind/named.conf.default-zones: default zones such as localhost, its reverse, and the root hints.
The root nameservers used to be described in the file /etc/bind/db.root. This is now provided instead by the /usr/share/dns/root.hints file shipped with the dns-root-data package, and is referenced in the named.conf.default-zones configuration file above.
It is possible to configure the same server to be a caching name server, primary, and secondary: it all depends on the zones it is serving. A server can be the Start of Authority (SOA) for one zone, while providing secondary service for another zone. All the while providing caching services for hosts on the local LAN.
Caching Nameserver
The default configuration acts as a caching server. Simply uncomment and edit /etc/bind/named.conf.options to set the IP addresses of your ISP's DNS servers:
forwarders {
    1.2.3.4;
    5.6.7.8;
};
Replace 1.2.3.4 and 5.6.7.8 with the IP Addresses of actual nameservers (e.g 8.8.8.8, 8.8.4.4).
Save and close the file. Then test the config file syntax: sudo named-checkconf
If the test is successful (indicated by a silent output), then restart BIND9: sudo systemctl restart named
If you have UFW firewall running on the BIND server, then you need to open port 53 to allow LAN clients to send DNS queries: sudo ufw allow domain
To turn query logging on, run: sudo rndc querylog on
This will open TCP and UDP port 53 to the private network 192.168.0.0/24. Then from another computer in the same LAN, we can run the following command to query the A record of google.com. Replace 192.168.0.102 with the IP address of your BIND resolver: dig A google.com @192.168.0.102
Now on the BIND resolver, check the query log with the following command: sudo journalctl -eu named
This will show the latest log message of the bind9 service unit. You should fine something like the following line in the log, which indicates that a DNS query for google.com's A record has been received from port 57806 of 192.168.0.103:
named[1162]: client @0x7f4d2406f0f0 192.168.0.103#57806 (google.com): query: google.com IN A +E(0)K (192.168.0.102)
Another way of testing your configuration is to use dig against the loopback interface to make sure it is listening on port 53. From a terminal prompt:
dig -x 127.0.0.1
You should see lines similar to the following in the command output:
;; Query time: 1 msec
;; SERVER: 192.168.1.10#53(192.168.1.10)
If you have configured BIND9 as a Caching nameserver “dig” an outside domain to check the query time: dig ubuntu.com
Note the query time towards the end of the command output: ;; Query time: 49 msec
After a second dig there should be improvement: ;; Query time: 1 msec
Setting the Default DNS Resolver on Ubuntu 20.04 Server
systemd-resolved provides the stub resolver on Ubuntu 20.04. As mentioned in the beginning of this article, a stub resolver is a small DNS client on the end-user's computer that receives DNS requests from applications such as Firefox and forward requests to a recursive resolver.
The default recursive resolver can be seen with this command: systemd-resolve --status
If you don'find 127.0.0.1 as your current DNS Server, BIND isn't the default. If your are testing it on your laptop, chances are that your current DNS server is your home router.
If you run the following command on the BIND server, the related DNS query won't be found in BIND log: dig A facebook.com
Instead, you need to explicitly tell dig to use BIND: dig A facebook.com @127.0.0.1
To set BIND as the default resolver, open the systemd-resolved configuration file: sudo vi /etc/systemd/resolved.conf
In the [Resolve] section, add the following line. This will set a global DNS server for your server: DNS=127.0.0.1
Save and close the file. Then restart systemd-resolved service: sudo systemctl restart systemd-resolved
Now run the following command to check the default DNS resolver: systemd-resolve --status
Now perform a DNS query without specifying 127.0.0.1: dig A facebook.com
You will see the DNS query in BIND log, which means BIND is now the default recursive resolver. If you don't see any queries in the BIND log, you might need to configure per-link DNS server.
Maintain a DNS zone
A DNS zone is a distinct part of the domain namespace which is delegated to a legal entity — a person, organization or company, who is responsible for maintaining the DNS zone. A DNS zone is also an administrative function, allowing for granular control of DNS components, such as authoritative name servers.
When a web browser or other network device needs to find the IP address for a hostname such as “example.com”, it performs a DNS lookup - essentially a DNS zone check - and is taken to the DNS server that manages the DNS zone for that hostname. This server is called the authoritative name server for the domain. The authoritative name server then resolves the DNS lookup by providing the IP address, or other data, for the requested hostname.
The Domain Name System (DNS) defines a domain namespace, which specifies Top Level Domains (such as “.com”), second-level domains, (such as “acme.com”) and lower-level domains, also called subdomains (such as “support.acme.com”). Each of these levels can be a DNS zone.
For example, the root domain “acme.com” may be delegated to a Acme Corporation. Acme assumes responsibility for setting up an authoritative DNS server that holds the correct DNS records for the domain.
At each hierarchical level of the DNS system, there is a Name Server containing a zone file, which holds the trusted, correct DNS records for that zone.
The root of the DNS system, represented by a dot at the end of the domain name — for example, "www.example.com." — is the primary DNS zone. Since 2016, the root zone is overseen by the Internet Corporation for Assigned Names and Numbers (ICANN), which delegates management to a subsidiary acting as the Internet Assigned Numbers Authority (IANA).
The DNS root zone is operated by 13 logical servers, run by organizations like Verisign, the U.S. Army Research Labs and NASA. Any recursive DNS query (more about DNS query types here) starts by contacting one of these root servers, and requesting details for the next level down the tree — the Top Level Domain (TLD) server.
There is a DNS zone for each Top Level Domain, such as “.com”, “.org” or country codes like “.co.uk”. There are currently over 1500 top level domains. Most top level domains are managed by ICANN/IANA.
Second-level domains like the domain “ns1.com”, are defined as separate DNS zones, operated by individuals or organizations. Organizations can run their own DNS name servers, or delegate management to an external provider.
If a domain has subdomains, they can be part of the same zone. Alternatively, if a subdomain is an independent website, and requires separate DNS management, it can be defined as its own DNS zone.
DNS servers can be deployed in a primary/secondary topology, where a secondary DNS server holds a read-only copy of the primary DNS server's DNS records. The primary server holds the primary zone file, and the secondary server constitutes an identical secondary zone; DNS requests are distributed between primary and secondary servers. A DNS zone transfer occurs when the primary server zone file is copied, in whole or in part, to the secondary DNS server.
DNS zone files are defined in RFC 1035 and RFC 1034. A zone file contains mappings between domain names, IP addresses and other resources, organized in the form of resource records (RR).
There are two types of zone files:
- a DNS Primary File which authoritatively describes a zone
- a DNS Cache File which lists the contents of a DNS cache — this is only a copy of the authoritative DNS zone.
In a zone file, each line represents a DNS resource record (RR). A record is made up of the following fields:
- Name is an alphanumeric identifier of the DNS record. It can be left blank, and inherits its value from the previous record.
- TTL (time to live) specifies how long the record should be kept in the local cache of a DNS client. If not specified, the global TTL value at the top of the zone file is used.
- Record class indicates the namespace — typically IN, which is the Internet namespace.
- Record type is the DNS record type — for example an A record maps a hostname to an IPv4 address, and a CNAME is an alias which points a hostname to another hostname.
- Record data has one or more information elements, depending on the record type, separated by a white space. For example an MX record has two elements — a priority and a domain name for an email server.
DNS Zone files start with two mandatory records:
- Global Time to Live (TTL), which specifies how long records should be kept in local DNS cache.
- Start of Authority (SOA) record—specifies the primary authoritative name server for the DNS Zone.
After these two records, the zone file can contain any number of resource records, which can include:
- Name Server records (NS) — specifies that a specific DNS Zone, such as “example.com” is delegated to a specific authoritative name server
- IPv4 Address Mapping records (A) — a hostname and its IPv4 address.
- IPv6 Address records (AAAA) — a hostname and its IPv6 address.
- Canonical Name records (CNAME) — points a hostname to an alias. This is another hostname, which the DNS client is redirected to
- Mail exchanger record (MX) — specifies an SMTP email server for the domain.
Zone File Tips:
- when adding a record for a hostname, the hostname must end with a period (.)
- hostnames which do not end with a period are considered relative to the main domain name — for example, when specifying a "www" or “ftp” record, there is no need for a period
- you can add comments in a zone file by adding a semicolon (
;) after a resource record - many admins like to use the last date edited as the serial of a zone, such as 2020012100 which is yyyymmddss (where
ssis the Serial Number)
Primary Server maintaining a Forward Zone
To add a DNS zone to BIND9, turning BIND9 into a Primary server, first edit /etc/bind/named.conf.local:
zone "example.com" {
    type master;
    file "/etc/bind/db.example.com";
};
Now use an existing zone file as a template to create the /etc/bind/db.example.com file: sudo cp /etc/bind/db.local /etc/bind/db.example.com
Edit the new zone file /etc/bind/db.example.com and change localhost. to the FQDN of your server, leaving the additional . at the end. Change 127.0.0.1 to the nameserver's IP Address and root.localhost to a valid email address, but with a . instead of the usual @ symbol, again leaving the . at the end. Change the comment to indicate the domain this file is for.
Create an A record for the base domain, example.com. Also, create an A record for ns.example.com, the name server in this example:
;
; BIND data file for example.com
;
$TTL    604800
@       IN      SOA     example.com. root.example.com. (
                              2         ; Serial
                         604800         ; Refresh
                          86400         ; Retry
                        2419200         ; Expire
                         604800 )       ; Negative Cache TTL

@       IN      NS      ns.example.com.
@       IN      A       192.168.1.10
@       IN      AAAA    ::1
ns      IN      A       192.168.1.10
You must increment the Serial Number every time you make changes to the zone file. If you make multiple changes before restarting BIND9, simply increment the Serial once.
Once you have made changes to the zone file BIND9 needs to be restarted for the changes to take effect: sudo systemctl restart bind9.service
Reverse Zone
Now that the zone is setup and resolving names to IP addresses, a reverse zone needs to be added to allows DNS to resolve an address to a name.
Edit /etc/bind/named.conf.local and add the following:
zone "1.168.192.in-addr.arpa" {
    type master;
    file "/etc/bind/db.192";
};
Note: Replace 1.168.192 with the first three octets of whatever network you are using. Also, name the zone file /etc/bind/db.192 appropriately. It should match the first octet of your network. Reverse DNS lookups for IPv4 addresses use the special domain
in-addr.arpa. In this domain, an IPv4 address is represented as a concatenated sequence of four decimal numbers, separated by dots, to which is appended the second level domain suffix.in-addr.arpa. The four decimal numbers are obtained by splitting the 32-bit IPv4 address into four octets and converting each octet into a decimal number. These decimal numbers are then concatenated in the order: least significant octet first (leftmost), to most significant octet last (rightmost). It is important to note that this is the reverse order to the usual dotted-decimal convention for writing IPv4 addresses in textual form. For example, to do a reverse lookup of the IP address8.8.4.4the PTR record for the domain name4.4.8.8.in-addr.arpawould be looked up, and found to point togoogle-public-dns-b.google.com.
Now create the /etc/bind/db.192 file from template: sudo cp /etc/bind/db.127 /etc/bind/db.192
Next edit /etc/bind/db.192 changing the same options as /etc/bind/db.example.com:
;
; BIND reverse data file for local 192.168.1.XXX net
;
$TTL    604800
@       IN      SOA     ns.example.com. root.example.com. (
                              2         ; Serial
                         604800         ; Refresh
                          86400         ; Retry
                        2419200         ; Expire
                         604800 )       ; Negative Cache TTL
;
@       IN      NS      ns.
10      IN      PTR     ns.example.com.
The Serial Number in the Reverse zone needs to be incremented on each change as well. For each A record you configure in /etc/bind/db.example.com, that is for a different address, you need to create a PTR record in /etc/bind/db.192.
After creating the reverse zone file restart BIND9: sudo systemctl restart bind9.service
Secondary Server
Once a Primary Server has been configured a secondary server is highly recommended in order to maintain the availability of the domain should the Primary become unavailable.
First, on the primary server, the zone transfer needs to be allowed. Add the allow-transfer option to the example forward and reverse zone definitions in /etc/bind/named.conf.local:
zone "example.com" {
    type master;
    file "/etc/bind/db.example.com";
    allow-transfer { 192.168.1.11; };
};

zone "1.168.192.in-addr.arpa" {
    type master;
    file "/etc/bind/db.192";
    allow-transfer { 192.168.1.11; };
};
Note: Replace 192.168.1.11 with the IP address of your secondary nameserver.
Restart BIND9 on the Primary server: sudo systemctl restart bind9.service
Next, on the scondary server, install the bind9 package the same way as on the primary. Then edit the /etc/bind/named.conf.local and add the following declarations for the forward and reverse zones:
zone "example.com" {
    type slave;
    file "db.example.com";
    masters { 192.168.1.10; };
};

zone "1.168.192.in-addr.arpa" {
    type slave;
    file "db.192";
    masters { 192.168.1.10; };
};
Note: Replace 192.168.1.10 with the IP address of your primary nameserver.
Restart BIND9 on the secondary server: sudo systemctl restart bind9.service
In /var/log/syslog you should see something similar to the following (some lines have been split to fit the format of this document):
client 192.168.1.10#39448: received notify for zone '1.168.192.in-addr.arpa'
zone 1.168.192.in-addr.arpa/IN: Transfer started.
transfer of '100.18.172.in-addr.arpa/IN' from 192.168.1.10#53:
 connected using 192.168.1.11#37531
zone 1.168.192.in-addr.arpa/IN: transferred serial 5
transfer of '100.18.172.in-addr.arpa/IN' from 192.168.1.10#53:
 Transfer completed: 1 messages,
6 records, 212 bytes, 0.002 secs (106000 bytes/sec)
zone 1.168.192.in-addr.arpa/IN: sending notifies (serial 5)

client 192.168.1.10#20329: received notify for zone 'example.com'
zone example.com/IN: Transfer started.
transfer of 'example.com/IN' from 192.168.1.10#53: connected using 192.168.1.11#38577
zone example.com/IN: transferred serial 5
transfer of 'example.com/IN' from 192.168.1.10#53: Transfer completed: 1 messages,
8 records, 225 bytes, 0.002 secs (112500 bytes/sec)
Note: A zone is only transferred if the Serial Number on the primary is larger than the one on the secondary. If you want to have your primary DNS notifying other secondary DNS servers of zone changes, you can add
also-notify { ipaddress; };to /etc/bind/named.conf.local as shown in the example below:
zone "example.com" {
    type master;
    file "/etc/bind/db.example.com";
    allow-transfer { 192.168.1.11; };
    also-notify { 192.168.1.11; };
};

zone "1.168.192.in-addr.arpa" {
    type master;
    file "/etc/bind/db.192";
    allow-transfer { 192.168.1.11; };
    also-notify { 192.168.1.11; };
};
Note: The default directory for non-authoritative zone files is /var/cache/bind/. This directory is also configured in AppArmor to allow the named daemon to write to it.
Testing
A good way to test your zone files is by using the named-checkzone utility installed with the bind9 package. This utility allows you to make sure the configuration is correct before restarting BIND9 and making the changes live.
To test our example forward zone file enter the following from a command prompt: named-checkzone example.com /etc/bind/db.example.com
If everything is configured correctly you should see output similar to:
zone example.com/IN: loaded serial 6
OK
Similarly, to test the reverse zone file enter the following: named-checkzone 1.168.192.in-addr.arpa /etc/bind/db.192
The output should be similar to:
zone 1.168.192.in-addr.arpa/IN: loaded serial 3
OK
Configure email aliases
The process of getting an email from one person to another over a network or the Internet involves many systems working together. Each of these systems must be correctly configured for the process to work. The sender uses a Mail User Agent (MUA), or email client, to send the message through one or more Mail Transfer Agents (MTA), the last of which will hand it off to a Mail Delivery Agent (MDA) for delivery to the recipient's mailbox, from which it will be retrieved by the recipient's email client, usually via a POP3 or IMAP server.
The sendmail smtp mail server is able to set up mailbox aliases which can be used to forward mail to specific users, or even other aliases. This can be done by simply editing a configuration file called ‘aliases' that is generally located in /etc/mail/aliases (symlinked to /etc/aliases).
The following are some example aliases from an aliases file:
# Unix Workstation Support Group
ajc: ajc@indiana.edu
brier: brier@indiana.edu
leighg: leighg@indiana.edu
rtompkin: rtompkin@indiana.edu
uthuppur: uthuppur@indiana.edu

group: ajc,brier,leighg,rtompkin,uthuppur
The first line is a comment, ignored by sendmail, as is the blank line before the group alias. The rest of the lines are aliases, which explain a lot about how aliasing works.
The first five aliases (ajc, brier, leighg, rtompkin, and uthuppur) are for those users, and they simply redirect each user's mail to user@indiana.edu. So, instead of being delivered locally, mail to each of those users will go to them @indiana.edu (which, incidentally, is another alias on IU's post office machines, which redirects mail to the user's preferred email address here at IU).
The last alias, group, is a bit more interesting in terms of demonstrating how aliasing works. The group alias does not correspond to an actual user of the system. Instead, it is an alias pointing to a group of users (in this case, the members of the UWSG). So, an alias can direct mail to more than one address, as long as addresses are separated by commas.
Edit the file in your favorite text editor to suit your needs:
sudo vi /etc/mail/aliases
Once you have the aliases configuration file set up the way you want, you need to use that plain text file to update the random access database aliases.db file using the newaliases command as follows:
sudo newaliases
How To Install And Configure Sendmail On Ubuntu
-
Install Sendmail:
sudo apt-get install sendmail -
Configure /etc/hosts file.
Find your hostname by typing:
hostname
Then:
sudo vi /etc/hosts
On the line starting with 127.0.0.1, add the hostname to the end so it looks the same as:
127.0.0.1 localhost <hostname>
(You willl notice that your hostname can also be identified on the line that starts with 127.0.1.1 where it appears twice)
-
Run Sendmail's config and answer ‘Y' to everything:
sudo sendmailconfig -
Restart Apache
sudo service apache2 restart -
Using sendmail.
To quickly send an email:
sendmail -v someone@email.com
After hitting the enter key, on the line directly below, enter a From address (each line after you hit enter will be blank):
From: you@yourdomain.com
Hit enter again and type a subject:
Subject: This is the subject field of the email
Hit enter again and type the message:
This is the message to be sent.
Hit enter again. To send the email, type a ‘.‘ (period/dot) on the empty line and press enter:
.
Wait a few seconds and you will see the output of the email being sent.
Configure SSH servers and clients
- Installation
Installation of the OpenSSH client and server applications is simple. To install the OpenSSH client applications on your Ubuntu system, use this command at a terminal prompt:
sudo apt install openssh-client
To install the OpenSSH server application, and related support files, use this command at a terminal prompt:
sudo apt install openssh-server
- Configuration
You may configure the default behavior of the OpenSSH server application, sshd, by editing the file /etc/ssh/sshd_config. For information about the configuration directives used in this file, you may view the appropriate manual page with the following command, issued at a terminal prompt:
man sshd_config
There are many directives in the sshd configuration file controlling such things as communication settings, and authentication modes. The following are examples of configuration directives that can be changed by editing the /etc/ssh/sshd_config file.
Tip: Prior to editing the configuration file, you should make a copy of the original file and protect it from writing so you will have the original settings as a reference and to reuse as necessary. Copy the /etc/ssh/sshd_config file and protect it from writing with the following commands, issued at a terminal prompt:
sudo cp /etc/ssh/sshd_config /etc/ssh/sshd_config.original
sudo chmod a-w /etc/ssh/sshd_config.original
Furthermore since losing an ssh server might mean losing your way to reach a server, check the configuration after changing it and before restarting the server:
sudo sshd -t -f /etc/ssh/sshd_config
The following are examples of configuration directives you may change.
To set your OpenSSH to listen on TCP port 2222 instead of the default TCP port 22, change the Port directive as such:
Port 2222
To make your OpenSSH server display the contents of the /etc/issue.net file as a pre-login banner, simply add or modify this line in the /etc/ssh/sshd_config file:
Banner /etc/issue.net
After making changes to the /etc/ssh/sshd_config file, save the file, and restart the sshd server application to effect the changes using the following command at a terminal prompt:
sudo systemctl restart sshd.service
Warning: Many other configuration directives for sshd are available to change the server application's behavior to fit your needs. Be advised, however, if your only method of access to a server is ssh, and you make a mistake in configuring sshd via the /etc/ssh/sshd_config file, you may find you are locked out of the server upon restarting it. Additionally, if an incorrect configuration directive is supplied, the sshd server may refuse to start, so be extra careful when editing this file on a remote server.
- SSH Keys
SSH allow authentication between two hosts without the need of a password. SSH key authentication uses a private key and a public key.
To generate the keys, from a terminal prompt enter:
ssh-keygen -t rsa
This will generate the keys using the RSA Algorithm. At the time of this writing, the generated keys will have 3072 bits. You can modify the number of bits by using the -b option. For example, to generate keys with 4096 bits, you can do:
ssh-keygen -t rsa -b 4096
During the process you will be prompted for a password. Simply hit Enter when prompted to create the key.
By default the public key is saved in the file ~/.ssh/id_rsa.pub, while ~/.ssh/id_rsa is the private key. Now copy the id_rsa.pub file to the remote host and append it to ~/.ssh/authorized_keys by entering:
ssh-copy-id <username>@<remotehost>
Please, note that this requires that password authentication is enabled on the remote ssh server.
Finally, double check the permissions on the authorized_keys file, only the authenticated user should have read and write permissions. If the permissions are not correct change them by:
chmod 600 .ssh/authorized_keys
You should now be able to SSH to the host without being prompted for a password, but you will be asked to provide the passphrase of the private key.
To avoid it, you can use ssh-agent to handle passwords for SSH private keys. Use ssh-add to add the keys to the list maintained by ssh-agent. After you add a private key password to ssh-agent, you do not need to enter it each time you connect to a remote host with your public key until you restart your host or you log out from it:
ssh-agent $SHELL
ssh-add
ssh-add -l
ssh <username>@<remotehost>
To completely automate ssh-login without neither entering the passphrase, you can use gpg and sshpass:
sudo apt install sshpass
echo 'YOUR_PWD' > .sshpasswd
gpg -c .sshpasswd
rm .sshpasswd
gpg -d -q .sshpasswd.gpg | sshpass -Ppassphrase ssh -o StrictHostKeyChecking=no -tt <username>@<remotehost>
- Import keys from public keyservers
These days many users have already ssh keys registered with services like launchpad or github. Those can be easily imported with:
ssh-import-id <username-on-remote-service>
The prefix lp: is implied and means fetching from launchpad, the alternative gh: will make the tool fetch from github instead.
- Two factor authentication with U2F/FIDO
OpenSSH 8.2 added support for U2F/FIDO hardware authentication devices. These devices are used to provide an extra layer of security on top of the existing key-based authentication, as the hardware token needs to be present to finish the authentication.
It's very simple to use and setup. The only extra step is generate a new keypair that can be used with the hardware device. For that, there are two key types that can be used: ecdsa-sk and ed25519-sk. The former has broader hardware support, while the latter might need a more recent device.
Once the keypair is generated, it can be used as you would normally use any other type of key in openssh. The only requirement is that in order to use the private key, the U2F device has to be present on the host.
For example, plug the U2F device in and generate a keypair to use with it:
$ ssh-keygen -t ecdsa-sk
Generating public/private ecdsa-sk key pair.
You may need to touch your authenticator to authorize key generation. <-- touch device
Enter file in which to save the key (/home/ubuntu/.ssh/id_ecdsa_sk):
Enter passphrase (empty for no passphrase):
Enter same passphrase again:
Your identification has been saved in /home/ubuntu/.ssh/id_ecdsa_sk
Your public key has been saved in /home/ubuntu/.ssh/id_ecdsa_sk.pub
The key fingerprint is:
SHA256:V9PQ1MqaU8FODXdHqDiH9Mxb8XK3o5aVYDQLVl9IFRo ubuntu@focal
Now just transfer the public part to the server to ~/.ssh/authorized_keys and you are ready to go:
$ ssh -i .ssh/id_ecdsa_sk ubuntu@focal.server
Confirm user presence for key ECDSA-SK SHA256:V9PQ1MqaU8FODXdHqDiH9Mxb8XK3o5aVYDQLVl9IFRo <-- touch device
Welcome to Ubuntu Focal Fossa (GNU/Linux 5.4.0-21-generic x86_64)
(...)
ubuntu@focal.server:~$
Restrict access to the HTTP proxy server
Squid is a full-featured caching proxy supporting popular network protocols like HTTP, HTTPS, FTP, and more. It can be used to improve the web server's performance by caching repeated requests, filter web traffic, and access geo-restricted content.
Installing Squid on Ubuntu
The squid package is included in the standard Ubuntu 20.04 repositories. To install it, run the following commands as sudo user:
sudo apt update
sudo apt install squid
Once the installation is completed, the Squid service will start automatically. To verify it, check the service status:
sudo systemctl status squid
Configuring Squid
The squid service can be configured by editing the /etc/squid/squid.conf file. The configuration file contains comments that describe what each configuration option does. You can also put your configuration settings in separate files, which can be included in the main configuration file using the “include” directive.
Before making any changes, it is recommended to back up the original configuration file:
sudo cp /etc/squid/squid.conf{,.orginal}
To start configuring your squid instance, open the file in your text editor:
sudo vi /etc/squid/squid.conf
By default, squid is set to listen on port 3128 on all network interfaces on the server.
If you want to change the port and set a listening interface, locate the line starting with http_port and specify the interface IP address and the new port. If no interface is specified Squid will listen on all interfaces.
Running Squid on all interfaces and on the default port should be fine for most users.
Squid allows you to control how the clients can access the web resources using Access Control Lists (ACLs). By default, access is permitted only from the localhost.
If all clients who use the proxy have a static IP address, the simplest option to restrict access to the proxy server is to create an ACL that will include the allowed IPs. Otherwise, you can set squid to use authentication.
Instead of adding the IP addresses in the main configuration file, create a new dedicated file that will hold the allowed IPs:
#/etc/squid/allowed_ips
192.168.33.1
# All other allowed IPs
Once done, open the main configuration file and create a new ACL named allowed_ips and allow access to that ACL using the http_access directive:
#/etc/squid/squid.conf
# ...
acl allowed_ips src "/etc/squid/allowed_ips.txt"
# ...
http_access allow localhost
http_access allow allowed_ips
# And finally deny all other access to this proxy
http_access deny all
The order of the http_access rules is important. Make sure you add the line before http_access deny all.
The http_access directive works in a similar way as the firewall rules. Squid reads the rules from top to bottom, and when a rule matches, the rules below are not processed.
Whenever you make changes to the configuration file, you need to restart the Squid service for the changes to take effect:
sudo systemctl restart squid
Squid Authentication
If restricting access based on IP doesn't work for your use case, you can configure squid to use a back-end to authenticate users. Squid supports Samba, LDAP, and HTTP basic auth.
In this guide, we'll use basic auth. It is a simple authentication method built into the HTTP protocol.
To generate a crypted password, use the openssl tool. The following command appends the USERNAME:PASSWORD pair to the /etc/squid/htpasswd file:
printf "USERNAME:$(openssl passwd -crypt PASSWORD)\n" | sudo tee -a /etc/squid/htpasswd
For example, to create a user “josh” with password “P@ssvv0rT”, you would run:
printf "josh:$(openssl passwd -crypt 'P@ssvv0rd')\n" | sudo tee -a /etc/squid/htpasswd
>josh:QMxVjdyPchJl6
The next step is to enable the HTTP basic authentication and include the file containing the user credentials to the squid configuration file.
Open the main configuration and add the following:
#/etc/squid/squid.conf
# ...
auth_param basic program /usr/lib/squid3/basic_ncsa_auth /etc/squid/htpasswd
auth_param basic realm proxy
acl authenticated proxy_auth REQUIRED
# ...
#http_access allow localnet
http_access allow localhost
http_access allow authenticated
# And finally deny all other access to this proxy
http_access deny all
The first three lines are creating a new ACL named authenticated, and the last "http_access allow" line is allowing access to authenticated users.
Restart the Squid service:
sudo systemctl restart squid
Configuring firewall
To open the Squid ports, enable the UFW ‘Squid' profile:
sudo ufw allow 'Squid'
Configuring Firefox to Use Proxy
In the upper right-hand corner, click on the hamburger icon ☰ to open Firefox's menu: click on the ⚙ Preferences link.
Scroll down to the Network Settings section and click on the Settings... button.
A new window will open.
Select the Manual proxy configuration radio button.
Enter your Squid server IP address in the HTTP Host field and 3128 in the Port field.
Select the Use this proxy server for all protocols checkbox.
Click on the OK button to save the settings.
At this point, your Firefox is configured, and you can browse the Internet through the Squid proxy. To verify it, open google.com, type “what is my ip” and you should see your Squid server IP address.
To revert back to the default settings, go to Network Settings, select the Use system proxy settings radio button and save the settings.
There are several plugins that can also help you to configure Firefox's proxy settings, such as FoxyProxy.
Configure an IMAP and IMAPS service
Dovecot is a Mail Delivery Agent, written with security primarily in mind. It supports the major mailbox formats: mbox or Maildir. This section explains how to set it up as an IMAP or POP3 server.
Installation
To install a basic Dovecot server with common POP3 and IMAP functions, run the following command:
sudo apt install dovecot-imapd dovecot-pop3d
There are various other Dovecot modules including dovecot-sieve (mail filtering), dovecot-solr (full text search), dovecot-antispam (spam filter training), dovecot-ldap (user directory).
Configuration
To configure Dovecot, edit the file /etc/dovecot/dovecot.conf and its included config files in /etc/dovecot/conf.d/. By default all installed protocols will be enabled via an include directive in /etc/dovecot/dovecot.conf:
!include_try /usr/share/dovecot/protocols.d/*.protocol
IMAPS and POP3S are more secure because they use SSL encryption to connect. A basic self-signed ssl certificate is automatically set up by package ssl-cert and used by Dovecot in /etc/dovecot/conf.d/10-ssl.conf.
By default mbox format is configured, if required you can also use Maildir. More about that can be found in the comments in /etc/dovecot/conf.d//10-mail.conf. Also see the Dovecot web site to learn about further benefits and details.
Make sure to also configure your Mail Transport Agent (MTA) to transfer the incoming mail to the selected type of mailbox.
Once you have configured Dovecot, restart its daemon in order to test your setup:
sudo service dovecot restart
Try to log in with the commands telnet localhost pop3 (for POP3) or telnet localhost imap2 (for IMAP). You should see something like the following:
telnet localhost pop3
> Trying 127.0.0.1...
> Connected to localhost.localdomain.
> Escape character is '^]'.
> +OK Dovecot ready.
Dovecot SSL Configuration
Dovecot is configured to use SSL automatically by default, using the package ssl-cert which provides a self signed certificate.
You can instead generate your own custom certificate for Dovecot using openssh, for example:
sudo openssl req -new -x509 -days 1000 -nodes -out "/etc/dovecot/dovecot.pem" \
    -keyout "/etc/dovecot/private/dovecot.pem"
See certificates-and-security for more details on creating custom certificates.
Then edit /etc/dovecot/conf.d/10-ssl.conf and amend following lines to specify Dovecat use these custom certificates :
ssl_cert = </etc/dovecot/private/dovecot.pem
ssl_key = </etc/dovecot/private/dovecot.key
You can get the SSL certificate from a Certificate Issuing Authority or you can create self-signed one (see certificates-and-security for details). Once you create the certificate, you will have a key file and a certificate file that you want to make known in the config shown above.
Firewall Configuration for an Email Server
To access your mail server from another computer, you must configure your firewall to allow connections to the server on the necessary ports:
- IMAP - 143
- IMAPS - 993
- POP3 - 110
- POP3S - 995
Query and modify the behavior of system services at various operating modes
The basic object that systemd manages and acts upon is a unit. Units can be of many types, but the most common type is a service (indicated by a unit file ending in .service). To manage services on a systemd enabled server, our main tool is the systemctl command.
Basic Unit Management
All of the normal init system commands have equivalent actions with the systemctl command. We will use the nginx.service unit to demonstrate (you'll have to install Nginx with your package manager to get this service file).
For instance, we can start the service by typing:
sudo systemctl start nginx.service
We can stop it again by typing:
sudo systemctl stop nginx.service
To restart the service, we can type:
sudo systemctl restart nginx.service
To attempt to reload the service without interrupting normal functionality, we can type:
sudo systemctl reload nginx.service
Enabling or Disabling Units
By default, most systemd unit files are not started automatically at boot. To configure this functionality, you need to enable to unit. This hooks it up to a certain boot target, causing it to be triggered when that target is started.
To enable a service to start automatically at boot, type:
sudo systemctl enable nginx.service
If you wish to disable the service again, type:
sudo systemctl disable nginx.service
Getting an Overview of the System State
There is a great deal of information that we can pull from a systemd server to get an overview of the system state.
For instance, to get all of the unit files that systemd has listed as active, type (you can actually leave off the list-units as this is the default systemctl behavior):
systemctl list-units
To list all of the units that systemd has loaded or attempted to load into memory, including those that are not currently active, add the --all switch:
systemctl list-units --all
To list all of the units installed on the system, including those that systemd has not tried to load into memory, type:
systemctl list-unit-files
Viewing Basic Log Information
A systemd component called journald collects and manages journal entries from all parts of the system. This is basically log information from applications and the kernel.
To see all log entries, starting at the oldest entry, type:
journalctl
By default, this will show you entries from the current and previous boots if journald is configured to save previous boot records. Some distributions enable this by default, while others do not (to enable this, either edit the /etc/systemd/journald.conf file and set the Storage= option to “persistent”, or create the persistent directory by typing sudo mkdir -p /var/log/journal).
If you only wish to see the journal entries from the current boot, add the -b flag:
journalctl -b
To see only kernel messages, such as those that are typically represented by dmesg, you can use the -k flag:
journalctl -k
Again, you can limit this only to the current boot by appending the -b flag:
journalctl -k -b
Querying Unit States and Logs
While the above commands gave you access to the general system state, you can also get information about the state of individual units.
To see an overview of the current state of a unit, you can use the status option with the systemctl command. This will show you whether the unit is active, information about the process, and the latest journal entries:
systemctl status nginx.service
To see all of the journal entries for the unit in question, give the -u option with the unit name to the journalctl command (-e to jump to the end):
journalctl -e -u nginx.service
As always, you can limit the entries to the current boot by adding the -b flag:
journalctl -b -u nginx.service
Inspecting Units and Unit Files
By now, you know how to modify a unit's state by starting or stopping it, and you know how to view state and journal information to get an idea of what is happening with the process. However, we haven't seen yet how to inspect other aspects of units and unit files.
A unit file contains the parameters that systemd uses to manage and run a unit. To see the full contents of a unit file, type:
systemctl cat nginx.service
To see the dependency tree of a unit (which units systemd will attempt to activate when starting the unit), type:
systemctl list-dependencies nginx.service
This will show the dependent units, with target units recursively expanded. To expand all dependent units recursively, pass the --all flag:
systemctl list-dependencies --all nginx.service
Finally, to see the low-level details of the unit's settings on the system, you can use the show option:
systemctl show nginx.service
This will give you the value of each parameter being managed by systemd.
Modifying Unit Files
If you need to make a modification to a unit file, systemd allows you to make changes from the systemctl command itself so that you don't have to go to the actual disk location.
To add a unit file snippet, which can be used to append or override settings in the default unit file, simply call the edit option on the unit:
sudo systemctl edit nginx.service
If you prefer to modify the entire content of the unit file instead of creating a snippet, pass the --full flag:
sudo systemctl edit --full nginx.service
After modifying a unit file, you should reload the systemd process itself to pick up your changes:
sudo systemctl daemon-reload
Manually Editing Unit Files
The files that define how systemd will handle a unit can be found in many different locations, each of which have different priorities and implications.
The system's copy of unit files are generally kept in the /lib/systemd/system directory. When software installs unit files on the system, this is the location where they are placed by default.
Unit files stored here are able to be started and stopped on-demand during a session. This will be the generic, vanilla unit file, often written by the upstream project's maintainers that should work on any system that deploys systemd in its standard implementation. You should not edit files in this directory. Instead you should override the file, if necessary, using another unit file location which will supersede the file in this location.
If you wish to modify the way that a unit functions, the best location to do so is within the /etc/systemd/system directory. Unit files found in this directory location take precedence over any of the other locations on the filesystem. If you need to modify the system's copy of a unit file, putting a replacement in this directory is the safest and most flexible way to do this.
If you wish to override only specific directives from the system's unit file, you can actually provide unit file snippets within a subdirectory. These will append or modify the directives of the system's copy, allowing you to specify only the options you want to change.
The correct way to do this is to create a directory named after the unit file with .d appended on the end. So for a unit called example.service, a subdirectory called example.service.d could be created. Within this directory a file ending with .conf can be used to override or extend the attributes of the system's unit file.
There is also a location for run-time unit definitions at /run/systemd/system. Unit files found in this directory have a priority landing between those in /etc/systemd/system and /lib/systemd/system. Files in this location are given less weight than the former location, but more weight than the latter.
The systemd process itself uses this location for dynamically created unit files created at runtime. This directory can be used to change the system's unit behavior for the duration of the session. All changes made in this directory will be lost when the server is rebooted.
Using Targets (Runlevels)
Another function of an init system is to transition the server itself between different states. Traditional init systems typically refer to these as “runlevels”, allowing the system to only be in one runlevel at any one time.
In systemd, targets are used instead. Targets are basically synchronization points that the server can used to bring the server into a specific state. Service and other unit files can be tied to a target and multiple targets can be active at the same time.
To see all of the targets available on your system, type:
systemctl list-unit-files --type=target
To view the default target that systemd tries to reach at boot (which in turn starts all of the unit files that make up the dependency tree of that target), type:
systemctl get-default
You can change the default target that will be used at boot by using the set-default option:
sudo systemctl set-default multi-user.target
To see what units are tied to a target, you can type:
systemctl list-dependencies multi-user.target
You can modify the system state to transition between targets with the isolate option. This will stop any units that are not tied to the specified target. Be sure that the target you are isolating does not stop any essential services:
sudo systemctl isolate multi-user.target
Stopping or Rebooting the Server
For some of the major states that a system can transition to, shortcuts are available. For instance, to power off your server, you can type:
sudo systemctl poweroff
If you wish to reboot the system instead, that can be accomplished by typing:
sudo systemctl reboot
You can boot into rescue mode by typing:
sudo systemctl rescue
Note that most operating systems include traditional aliases to these operations so that you can simply type sudo poweroff or 'sudo reboot` without the systemctl. However, this is not guaranteed to be set up on all systems.
Configure an HTTP server
The primary function of a web server is to store, process and deliver Web pages to clients. The clients communicate with the server sending HTTP requests. Clients, mostly via Web Browsers, request for a specific resources and the server responds with the content of that resource or an error message. The response is usually a Web page such as HTML documents which may include images, style sheets, scripts, and the content in form of text.
When accessing a Web Server, every HTTP request that is received is responded to with a content and a HTTP status code. HTTP status codes are three-digit codes, and are grouped into five different classes. The class of a status code can be quickly identified by its first digit:
- 1xx : Informational - Request received, continuing process
- 2xx : Success - The action was successfully received, understood, and accepted
- 3xx : Redirection - Further action must be taken in order to complete the request
- 4xx : Client Error - The request contains bad syntax or cannot be fulfilled
- 5xx : Server Error - The server failed to fulfill an apparently valid request
More information about status code check the RFC 2616. Implementation
Web Servers are heavily used in the deployment of Web sites and in this scenario we can use two different implementations:
- Static Web Server: The content of the server's response will be the hosted files “as-is”.
- Dynamic Web Server: Consist in a Web Server plus an extra software, usually an application server and a database. For example, to produce the Web pages you see in the Web browser, the- application server might fill an HTML template with contents from a database. Due to that we say that the content of the server's response is generated dynamically.
Installation
At a terminal prompt enter the following command:
sudo apt install apache2
Configuration
Apache2 is configured by placing directives in plain text configuration files. These directives are separated between the following files and directories:
- apache2.conf: the main Apache2 configuration file. Contains settings that are global to Apache2.
- httpd.conf: historically the main Apache2 configuration file, named after the httpd daemon. In other distributions (or older versions of Ubuntu), the file might be present. In Ubuntu,all configuration options have been moved to apache2.conf and the below referenced directories, and this file no longer exists.
- conf-available: this directory contains available configuration files. All files that were previously in /etc/apache2/conf.d should be moved to /etc/apache2/conf-available.
- conf-enabled: holds symlinks to the files in /etc/apache2/conf-available. When a configuration file is symlinked, it will be enabled the next time apache2 is restarted.
- envvars: file where Apache2 environment variables are set.
- mods-available: this directory contains configuration files to both load modules and configure them. Not all modules will have specific configuration files, however.
- mods-enabled: holds symlinks to the files in /etc/apache2/mods-available. When a module configuration file is symlinked it will be enabled the next time apache2 is restarted.
- ports.conf: houses the directives that determine which TCP ports Apache2 is listening on.
- sites-available: this directory has configuration files for Apache2 Virtual Hosts. Virtual Hosts allow Apache2 to be configured for multiple sites that have separate configurations.
- sites-enabled: like mods-enabled, sites-enabled contains symlinks to the /etc/apache2/sites-available directory. Similarly when a configuration file in sites-available is symlinked,the - site configured by it will be active once Apache2 is restarted.
- magic: instructions for determining MIME type based on the first few bytes of a file.
In addition, other configuration files may be added using the Include directive, and wildcards can be used to include many configuration files. Any directive may be placed in any of these configuration files. Changes to the main configuration files are only recognized by Apache2 when it is started or restarted.
The server also reads a file containing mime document types; the filename is set by the TypesConfig directive, typically via /etc/apache2/mods-available/mime.conf, which might also include additions and overrides, and is /etc/mime.types by default.
Basic Settings
Apache2 ships with a virtual-host-friendly default configuration. That is, it is configured with a single default virtual host (using the VirtualHost directive) which can be modified or used as-is if you have a single site, or used as a template for additional virtual hosts if you have multiple sites. If left alone, the default virtual host will serve as yourdefault site, or the site users will see if the URL they enter does not match the ServerName directive of any of your custom sites. To modify the default virtual host, edit the file etc/apache2/sites-available/000-default.conf.
Note
The term Virtual Host refers to the practice of running more than one web site (such as company1.example.com and company2.example.com) on a single machine. Virtual hosts can be "IP-based", meaning that you have a different IP address for every web site, or "name-based", meaning that you have multiple names running on each IP address. The fact that they are running on the same physical server is not apparent to the end user.
Note
The directives set for a virtual host only apply to that particular virtual host. If a directive is set server-wide and not defined within the virtual host settings, the default setting is used. For example, you can define a Webmaster email address and not define individual email addresses for each virtual host.
If you wish to configure a new virtual host or site, copy that file into the same directory with a name you choose. For example:
sudo cp /etc/apache2/sites-available/000-default.conf /etc/apache2/sites-available/mynewsite.conf
Edit the new file to configure the new site using some of the directives described below.
The ServerAdmin directive specifies the email address to be advertised for the server's administrator. The default value is webmaster@localhost. This should be changed to an emailaddress that is delivered to you (if you are the server's administrator). If your website has a problem, Apache2 will display an error message containing this email address to reportthe problem to. Find this directive in your site's configuration file in /etc/apache2/sites-available.
The Listen directive specifies the port, and optionally the IP address, Apache2 should listen on. If the IP address is not specified, Apache2 will listen on all IP addresses assignedto the machine it runs on. The default value for the Listen directive is 80. Change this to 127.0.0.1:80 to cause Apache2 to listen only on your loopback interface so that it will notbe available to the Internet, to (for example) 81 to change the port that it listens on, or leave it as is for normal operation. This directive can be found and changed in its ownfile, /etc/apache2/ports.conf
The ServerName directive is optional and specifies what FQDN your site should answer to. The default virtual host has no ServerName directive specified, so it will respond to allrequests that do not match a ServerName directive in another virtual host. If you have just acquired the domain name mynewsite.com and wish to host it on your Ubuntu server, the valueof the ServerName directive in your virtual host configuration file should be mynewsite.com. Add this directive to the new virtual host file you created earlier (/etc/apache2sites-available/mynewsite.conf).
You may also want your site to respond to www.mynewsite.com, since many users will assume the www prefix is appropriate. Use the ServerAlias directive for this. You may also usewildcards in the ServerAlias directive.
For example, the following configuration will cause your site to respond to any domain request ending in .mynewsite.com.
ServerAlias *.mynewsite.com
The DocumentRoot directive specifies where Apache2 should look for the files that make up the site. The default value is /var/www/html, as specified in /etc/apache2/sites-available000-default.conf. If desired, change this value in your site's virtual host file, and remember to create that directory if necessary!
Enable the new VirtualHost using the a2ensite utility and restart Apache2:
sudo a2ensite mynewsite.conf
sudo systemctl restart apache2.service
Note
Be sure to replace mynewsite with a more descriptive name for the VirtualHost. One method is to name the file after the ServerName directive of the VirtualHost.
Note
If you haven't been using actual domain names that you own to test this procedure and have been using some example domains instead, you can at least test the functionality of this process by temporarily modifying the /etc/hosts file on your local computer:
<your_server_IP> example.com
Similarly, use the a2dissite utility to disable sites. This is can be useful when troubleshooting configuration problems with multiple VirtualHosts:
sudo a2dissite mynewsite
sudo systemctl restart apache2.service
Default Settings
This section explains configuration of the Apache2 server default settings. For example, if you add a virtual host, the settings you configure for the virtual host take precedence for that virtual host. For a directive not defined within the virtual host settings, the default value is used.
The DirectoryIndex is the default page served by the server when a user requests an index of a directory by specifying a forward slash (/) at the end of the directory name.
For example, when a user requests the page http://www.example.com/this_directory/, he or she will get either the DirectoryIndex page if it exists, a server-generated directory list if it does not and the Indexes option is specified, or a Permission Denied page if neither is true. The server will try to find one of the files listed in the DirectoryIndex directive and will return the first one it finds. If it does not find any of these files and if Options Indexes is set for that directory, the server will generate and return a list, in HTML format, of the subdirectories and files in the directory. The default value, found in /etc/apache2/mods-available/dir.conf is “index.html index.cgi index.pl index.php index.xhtml index.htm”. Thus, if Apache2 finds a file in a requested directory matching any of these names, the first will be displayed.
The ErrorDocument directive allows you to specify a file for Apache2 to use for specific error events. For example, if a user requests a resource that does not exist, a 404 error will occur. By default, Apache2 will simply return a HTTP 404 Return code. Read /etc/apache2/conf-available/localized-error-pages.conf for detailed instructions for using ErrorDocument, including locations of example files.
By default, the server writes the transfer log to the file /var/log/apache2/access.log. You can change this on a per-site basis in your virtual host configuration files with the CustomLog directive, or omit it to accept the default, specified in /etc/apache2/conf-available/other-vhosts-access-log.conf. You may also specify the file to which errors are logged, via the ErrorLog directive, whose default is /var/log/apache2/error.log. These are kept separate from the transfer logs to aid in troubleshooting problems with your Apache2 server. You may also specify the LogLevel (the default value is “warn”) and the LogFormat (see /etc/apache2/apache2.conf for the default value).
Some options are specified on a per-directory basis rather than per-server. Options is one of these directives. A Directory stanza is enclosed in XML-like tags, like so:
<Directory /var/www/html/mynewsite>
...
</Directory>
HTTPS Configuration
The mod_ssl module adds an important feature to the Apache2 server - the ability to encrypt communications. Thus, when your browser is communicating using SSL, the https:// prefix is used at the beginning of the Uniform Resource Locator (URL) in the browser navigation bar.
The mod_ssl module is available in apache2-common package. Execute the following command at a terminal prompt to enable the mod_ssl module:
sudo a2enmod ssl
There is a default HTTPS configuration file in /etc/apache2/sites-available/default-ssl.conf. In order for Apache2 to provide HTTPS, a certificate and key file are also needed. The default HTTPS configuration will use a certificate and key generated by the ssl-cert package. They are good for testing, but the auto-generated certificate and key should be replaced by a certificate specific to the site or server. For information on generating a key and obtaining a certificate see Certificates.
To configure Apache2 default configuration for HTTPS, enter the following:
sudo a2ensite default-ssl
Note: The directories /etc/ssl/certs and /etc/ssl/private are the default locations. If you install the certificate and key in another directory make sure to change SSLCertificateFile and SSLCertificateKeyFile appropriately.
To generate a self-signed certificate:
openssl req -x509 -nodes -days 365 -newkey rsa:2048 -keyout /etc/ssl/private/<apache-self-signed>.key -out /etc/ssl/private/<apache-self-signed>.crt
Edit /etc/apache2/sites-available/mynewsite.conf as follows:
<VirtualHost *:443>
    ServerName mynewsite.com
    DocumentRoot /var/www/mynewsite

    SSLEngine on
    SSLCertificateFile /etc/ssl/private/<apache-self-signed>.crt
    SSLCertificateKeyFile /etc/ssl/private/<apache-self-signed>.key
</VirtualHost>
Enable your configuration:
sudo a2ensite mynewsite.conf
Test it:
sudo apache2ctl configtest
With Apache2 now configured for HTTPS, restart the service to enable the new settings:
sudo systemctl restart apache2.service
Note: Depending on how you obtained your certificate you may need to enter a passphrase when Apache2 starts.
You can access the secure server pages by typing https://mynewsite.com in your browser address bar.
Note: You should receive a warning, since the certificate is not signed by any certificate authorities known by the browser
To redirect http to https, add to /etc/apache2/sites-available/mynewsite.conf:
<VirtualHost *:80>
    ServerName mynewsite.com
    Redirect / https://mynewsite.com/
</VirtualHost>
Teste again the configuration and reload the apache2 service.
Sharing Write Permission
For more than one user to be able to write to the same directory it will be necessary to grant write permission to a group they share in common. The following example grants shared write permission to /var/www/html to the group “webmasters”.
sudo chgrp -R webmasters /var/www/html
sudo chmod -R g=rwX /var/www/html/
These commands recursively set the group permission on all files and directories in /var/www/html to allow reading, writing and searching of directories. Many admins find this useful for allowing multiple users to edit files in a directory tree.
Warning: The apache2 daemon will run as the www-data user, which has a corresponding www-data group. These should not be granted write access to the document root, as this would mean that vulnerabilities in Apache or the applications it is serving would allow attackers to overwrite the served content.
Configure HTTP server log files
By default on Debian-based distributions such as Ubuntu , access and error logs are located in the /var/log/apache2 directory. On CentOS the log files are placed in /var/log/httpd directory.
Reading and Understanding the Apache Log Files
The log files can be opened and parsed using standard commands like cat , less , grep , cut , awk , and so on.
Here is an example record from the access log file that uses the Debian' combine log format:
192.168.33.1 - - [08/Jan/2020:21:39:03 +0000] "GET / HTTP/1.1" 200 6169 "-" "Mozilla/5.0 (X11; Linux x86_64) AppleWebKit/537.36 (KHTML, like Gecko) Chrome/79.0.3945.88 Safari/537.36"
Let's break down what each field of the record means:
%h(192.168.33.1) - The Hostname or the IP address of the client making the request.%l(-) - Remote logname. When the user name is not set, this field shows -.%u(-) - If the request is authenticated, the remote user name is shown.%t([08/Jan/2020:21:39:03 +0000]) - Local server time.\"%r\"("GET / HTTP/1.1") - First line of request. The request type, path, and protocol.%>s(200) - The final server response code. If the > symbol is not used and the request has been internally redirected, it will show the status of the original request.%O(396) - The size of server response in bytes.\"%{Referer}i\"("-") - The URL of the referral.\"%{User-Agent}i\"(Mozilla/5.0 ...) - The user agent of the client (web browser).
Virtual Hosts and Global Logging
The logging behavior and the location of the files can be set either globally or per virtual host basis.
Then the CustomLog or ErrorLog directives are set in the main server context, the server writes all log messages to the same access and error log files. Otherwise, if the directives are placed inside a
The log directive set in the
Virtual hosts without CustomLog or ErrorLog directives will have their log messages written to the global server logs.
The CustomLog directive defines the location of the log file and the format of the logged messages.
The most basic syntax of the CustomLog directive is as follows:
CustomLog log_file format [condition];
The second argument, format specifies the format of the log messages. It can be either an explicit format definition or a nickname defined by the LogFormat directive.
LogFormat "%h %l %u %t \"%r\" %>s %O \"%{Referer}i\" \"%{User-Agent}i\"" combined
CustomLog logs/access.log combined
The third argument [condition] is optional and allows you to write log messages only when a specific condition is met.
The ErrorLog directive defines the name location of the error log. It takes the following form:
ErrorLog log_file
For better readability, it is recommended to set separate access and error log files for each virtual host. Here is an example:
<VirtualHost *:80>
     ServerName example.com
     ServerAlias www.example.com
     ServerAdmin webmaster@example.com
     DocumentRoot /var/www/example.com/public
     LogLevel warn
     ErrorLog /var/www/example.com/logs/error.log
     CustomLog /var/www/example.com/logs/access.log combined
</VirtualHost>
If your server is low on resources and you have a busy website, you might want to disable the access log. To do that, simply comment out or remove the CustomLog directive from the main server configuration and virtual server sections.
If you want to turn off the access log only for one virtual host, set the first argument of the CustomLog directive to /dev/null:
CustomLog /dev/null combined
Restart the Apache service for the changes to take effect.
Configure logging level
The LogLevel parameter sets the level of logging. Below are levels listed by their severity (from low to high):
- trace1 - trace8 - Trace messages.
- debug - Debugging messages.
- info - Informational messages.
- notice - Notices.
- warn - Warnings.
- error - Errors while processing a request.
- crit - Critical issues. Requires a prompt action.
- alert - Alerts. Action must be taken immediately.
- emerg - Emergency situation. The system is in an unusable state.
Each log level includes the higher levels. For example, if you set the log level to warn, Apache also writes the error, crit, alert, and emerg messages.
When the LogLevel parameter is not specified, it defaults to warn. It is recommended to set the level to at least crit.
Configure a database server
Ubuntu provides two popular database servers:
Both are popular choices among developers, with similar feature sets and performance capabilities. Historically, Postgres tended to be a preferred choice for its attention to standards conformance, features, and extensibility, whereas Mysql may be more preferred for higher performance requirements, however over time each has made good strides catching up with the other. Specialized needs may make one a better option for a certain application, but in general both are good, strong options.
They are available in the main repository and equally supported by Ubuntu.
MySQL
MySQL is a fast, multi-threaded, multi-user, and robust SQL database server. It is intended for mission-critical, heavy-load production systems and mass-deployed software. To install MySQL, run the following command from a terminal prompt: sudo apt install mysql-server
Once the installation is complete, the MySQL server should be started automatically: sudo systemctl status mysql
ou can edit the files in /etc/mysql/ to configure the basic settings – log file, port number, etc. For example, to configure MySQL to listen for connections from network hosts, in the file /etc/mysql/mysql.conf.d/mysqld.cnf, change the bind-address directive to the server's IP address:
bind-address = 192.168.0.5
Note: Replace
192.168.0.5with the appropriate address, which can be determined viaip address show.
After making a configuration change, the MySQL daemon will need to be restarted: sudo systemctl restart mysql
Whilst the default configuration of MySQL provided by the Ubuntu packages is perfectly functional and performs well there are things you may wish to consider before you proceed.
MySQL is designed to allow data to be stored in different ways. These methods are referred to as either database or storage engines. There are two main engines that you'll be interested in: InnoDB (locking can occur on a row level basis within a table --> multiple updates can occur on a single table simultaneously) and MyISAM (only capable of locking an entire table for writing --> only one process can update a table at a time). Storage engines are transparent to the end user. MySQL will handle things differently under the surface, but regardless of which storage engine is in use, you will interact with the database in the same way.
For fresh installations of MySQL, you'll want to run the DBMS's included security script. This script changes some of the less secure default options for things like remote root logins and sample users.
Run the security script with sudo: sudo mysql_secure_installation
This will take you through a series of prompts where you can make some changes to your MySQL installation's security options. The first prompt will ask whether you'd like to set up the Validate Password Plugin, which can be used to test the password strength of new MySQL users before deeming them valid.
If you elect to set up the Validate Password Plugin, any MySQL user you create that authenticates with a password will be required to have a password that satisfies the policy you select. The strongest policy level — which you can select by entering 2 — will require passwords to be at least eight characters long and include a mix of uppercase, lowercase, numeric, and special characters:
Regardless of whether you choose to set up the Validate Password Plugin, the next prompt will be to set a password for the MySQL root user.
Note: Even though you've set a password for the root MySQL user, this user is not currently configured to authenticate with a password when connecting to the MySQL shell.
If you used the Validate Password Plugin, you'll receive feedback on the strength of your new password. Then the script will ask if you want to continue with the password you just entered or if you want to enter a new one. Assuming you're satisfied with the strength of the password you just entered, enter Y to continue the script.
From there, you can press Y and then ENTER to accept the defaults for all the subsequent questions. This will remove some anonymous users and the test database, disable remote root logins, and load these new rules so that MySQL immediately respects the changes you have made.
Once the script completes, your MySQL installation will be secured. You can now move on to creating a dedicated database user with the MySQL client.
Upon installation, MySQL creates a root user account which you can use to manage your database. This user has full privileges over the MySQL server, meaning it has complete control over every database, table, user, and so on. Because of this, it's best to avoid using this account outside of administrative functions. This step outlines how to use the root MySQL user to create a new user account and grant it privileges.
In Ubuntu systems running MySQL 5.7 (and later versions), the root MySQL user is set to authenticate using the auth_socket plugin by default rather than with a password. This plugin requires that the name of the operating system user that invokes the MySQL client matches the name of the MySQL user specified in the command, so you must invoke mysql with sudo privileges to gain access to the root MySQL user: sudo mysql
Note: If you installed MySQL with another tutorial and enabled password authentication for root, you will need to use a different command to access the MySQL shell. The following will run your MySQL client with regular user privileges, and you will only gain administrator privileges within the database by authenticating:
mysql -u root -p
Once you have access to the MySQL prompt, you can create a new user with a CREATE USER statement. These follow this general syntax:
CREATE USER 'username'@'host' IDENTIFIED WITH authentication_plugin BY 'password';
After CREATE USER, you specify a username. This is immediately followed by an @ sign and then the hostname from which this user will connect. If you only plan to access this user locally from your Ubuntu server, you can specify localhost. Wrapping both the username and host in single quotes isn't always necessary, but doing so can help to prevent errors.
You have several options when it comes to choosing your user's authentication plugin. The auth_socket plugin mentioned previously can be convenient, as it provides strong security without requiring valid users to enter a password to access the database. But it also prevents remote connections, which can complicate things when external programs need to interact with MySQL.
As an alternative, you can leave out the WITH authentication plugin portion of the syntax entirely to have the user authenticate with MySQL's default plugin, caching_sha2_password. The MySQL documentation recommends this plugin for users who want to log in with a password due to its strong security features.
Run the following command to create a user that authenticates with caching_sha2_password. Be sure to change sammy to your preferred username and password to a strong password of your choosing: CREATE USER 'sammy'@'localhost' IDENTIFIED BY 'password';
Note: There is a known issue with some versions of PHP that causes problems with caching_sha2_password. If you plan to use this database with a PHP application — phpMyAdmin, for example — you may want to create a user that will authenticate with the older, though still secure, mysql_native_password plugin instead:
CREATE USER 'sammy'@'localhost' IDENTIFIED WITH mysql_native_password BY 'password';
If you aren't sure, you can always create a user that authenticates with caching_sha2_plugin and then ALTER it later on with this command:
ALTER USER 'sammy'@'localhost' IDENTIFIED WITH mysql_native_password BY 'password';
After creating your new user, you can grant them the appropriate privileges. The general syntax for granting user privileges is as follows:
GRANT PRIVILEGE ON database.table TO 'username'@'host';
The PRIVILEGE value in this example syntax defines what actions the user is allowed to perform on the specified database and table. You can grant multiple privileges to the same user in one command by separating each with a comma. You can also grant a user privileges globally by entering asterisks (*) in place of the database and table names. In SQL, asterisks are special characters used to represent “all” databases or tables.
To illustrate, the following command grants a user global privileges to CREATE, ALTER, and DROP databases, tables, and users, as well as the power to INSERT, UPDATE, and DELETE data from any table on the server. It also grants the user the ability to query data with SELECT, create foreign keys with the REFERENCES keyword, and perform FLUSH operations with the RELOAD privilege. However, you should only grant users the permissions they need, so feel free to adjust your own user's privileges as necessary.
You can find the full list of available privileges in the official MySQL documentation.
Run this GRANT statement, replacing sammy with your own MySQL user's name, to grant these privileges to your user:
GRANT CREATE, ALTER, DROP, INSERT, UPDATE, DELETE, SELECT, REFERENCES, RELOAD on *.* TO 'sammy'@'localhost' WITH GRANT OPTION;
Note: This statement also includes
WITH GRANT OPTION. This will allow your MySQL user to grant any that it has to other users on the system.
Warning: Some users may want to grant their MySQL user the ALL PRIVILEGES privilege, which will provide them with broad superuser privileges akin to the root user's privileges, like so:
GRANT ALL PRIVILEGES ON *.* TO 'sammy'@'localhost' WITH GRANT OPTION;
Such broad privileges should not be granted lightly, as anyone with access to this MySQL user will have complete control over every database on the server.
Following this, it's good practice to run the FLUSH PRIVILEGES command. This will free up any memory that the server cached as a result of the preceding CREATE USER and GRANT statements: ìFLUSH PRIVILEGES;`
Then you can exit the MySQL client: exit
In the future, to log in as your new MySQL user, you'd use a command like the following: mysql -u sammy -p
The -p flag will cause the MySQL client to prompt you for your MySQL user's password in order to authenticate.
Finally, let's test the MySQL installation. Regardless of how you installed it, MySQL should have started running automatically. To test this, check its status:
sudo systemctl status mysql.service
You'll see output similar to the following:
If MySQL isn't running, you can start it with sudo systemctl start mysql.
For an additional check, you can try connecting to the database using the mysqladmin tool, which is a client that lets you run administrative commands. For example, this command says to connect as a MySQL user named sammy (-u sammy), prompt for a password (-p), and return the version. Be sure to change sammy to the name of your dedicated MySQL user, and enter that user's password when prompted: sudo mysqladmin -p -u sammy version
You should see output similar to this:
Output
mysqladmin  Ver 8.0.19-0ubuntu5 for Linux on x86_64 ((Ubuntu))
Copyright (c) 2000, 2020, Oracle and/or its affiliates. All rights reserved.

Oracle is a registered trademark of Oracle Corporation and/or its
affiliates. Other names may be trademarks of their respective
owners.

Server version      8.0.19-0ubuntu5
Protocol version    10
Connection      Localhost via UNIX socket
UNIX socket     /var/run/mysqld/mysqld.sock
Uptime:         10 min 44 sec

Threads: 2  Questions: 25  Slow queries: 0  Opens: 149  Flush tables: 3  Open tables: 69  Queries per second avg: 0.038
This means MySQL is up and running.
To learn more about the basic syntax of SQL queries as well as some of the more commonly-employed functions and operators, look here.
Restrict access to a web page
In Apache 2.4 the authorization configuration setup has changed from previous versions. Satisfy, Order, Deny and Allow have all been deprecated and replaced with new Require directives.
If you wish to restrict access to portions of your site based on the host address of your visitors, this is most easily done using mod_authz_host.
The Require provides a variety of different ways to allow or deny access to resources. In conjunction with the RequireAll, RequireAny, and RequireNone directives, these requirements may be combined in arbitrarily complex ways, to enforce whatever your access policy happens to be.
The Allow, Deny, and Order directives, provided by mod_access_compat, are deprecated and will go away in a future version. You should avoid using them, and avoid outdated tutorials recommending their use.
The usage of these directives is:
Require host address
Require ip ip.address
In the first form, address is a fully qualified domain name (or a partial domain name); you may provide multiple addresses or domain names, if desired.
In the second form, ip.address is an IP address, a partial IP address, a network/netmask pair, or a network/nnn CIDR specification. Either IPv4 or IPv6 addresses may be used.
You can insert not to negate a particular requirement. Note, that since a not is a negation of a value, it cannot be used by itself to allow or deny a request, as not true does not constitute false. Thus, to deny a visit using a negation, the block must have one element that evaluates as true or false. For example, if you have someone spamming your message board, and you want to keep them out, you could do the following in the virtual host block:
<Directory /var/www/html>
    <RequireAll>
        Require all granted
        Require not ip 10.252.46.165
    </RequireAll>
</Directory>
Visitors coming from that address (10.252.46.165) will not be able to see the content covered by this directive. If, instead, you have a machine name, rather than an IP address, you can use that:
Require not host host.example.com
And, if you'd like to block access from an entire domain, you can specify just part of an address or domain name:
Require not ip 192.168.205
Require not host phishers.example.com moreidiots.example
Require not host gov
Use of the RequireAll, RequireAny, and RequireNone directives may be used to enforce more complex sets of requirements.
To enforce basic authentication, have a look at the documentaion.
Manage and configure containers
While virtualization is in many ways similar to containers, these are different and implemented via other solutions like LXD, systemd-nspawn, containerd and others.
LXD (pronounced lex-dee) is the lightervisor, or lightweight container hypervisor. LXC (lex-see) is a program which creates and administers “containers” on a local system. It also provides an API to allow higher level managers, such as LXD, to administer containers. In a sense, one could compare LXC to QEMU, while comparing LXD to libvirt.
Docker
Prerequisites:
- Docker Community Edition (CE) is installed as described in the offical doc
- a personal account on Docker Hub
Docker containers are built from Docker images. By default, Docker pulls these images from Docker Hub, a Docker registry managed by Docker, the company behind the Docker project. Anyone can host their Docker images on Docker Hub, so most applications and Linux distributions you'll need will have images hosted there.
If you want to avoid typing sudo whenever you run the docker command, add your username to the docker group: sudo usermod -aG docker ${USER}
To apply the new group membership, log out of the server and back in, or type the following: newgrp docker
To view all available subcommands, just type: docker
To view the options available to a specific command, type: docker [docker-subcommand] --help
To view system-wide information about Docker, use: docker info
To check whether you can access and download images from Docker Hub, type: docker run hello-world
You can search for images available on Docker Hub by using: docker search ubuntu
Once you've identified the image that you would like to use, you can download it to your computer using: docker pull ubuntu
After an image has been downloaded, you can then run a container using the downloaded image with the run subcommand. As you saw with the hello-world example, if an image has not been downloaded when docker is executed with the run subcommand, the Docker client will first download the image, then run a container using it.
To see the images that have been downloaded to your computer, type: docker images
After using Docker for a while, you'll have many active (running) and inactive containers on your computer. To view the active ones, use: docker ps
To view all containers — active and inactive: docker ps -a
To view the latest container you created: docker ps -l
To start a stopped container, use docker start, followed by the container ID or the container's name: docker start d9b100f2f636
To stop a running container, use docker stop, followed by the container ID or name: docker stop [sharp_volhard]
Once you've decided you no longer need a container anymore, remove it: docker rm [festive_williams]
Containers can be turned into images which you can use to build new containers.
When you start up a Docker image, you can create, modify, and delete files just like you can with a virtual machine. The changes that you make will only apply to that container. You can start and stop it, but once you destroy it with the docker rm command, the changes will be lost for good.
To this purpose, save the state of a container as a new Docker image committing the changes to a new Docker image instance using:
docker commit -m "What you did to the image" -a "Author Name" [container_id] [repository/new_image_name]
When you commit an image, the new image is saved locally on your computer.
Note: Listing the Docker images again will show the new image, as well as the old one that it was derived from.
Note: You can also build Images from a
Dockerfile, which lets you automate the installation of software in a new image.
The next logical step after creating a new image from an existing image is to share it by pushing the image to Docker Hub (or any other Docker registry).
To push your image, first log into Docker Hub: docker login -u docker-registry-username
Note: If your Docker registry username is different from the local username you used to create the image, you will have to tag your image with your registry username, e.g. :
docker tag [sammy/ubuntu-nodejs] [docker-registry-username/ubuntu-nodejs]
Then you may push your own image using: docker push [docker-registry-username/docker-image-name]
You can now use docker pull [docker-registry-username/docker-image-name] to pull the image to a new machine and use it to run a new container.
Manage and configure Virtual Machines
The default virtualization technology supported in Ubuntu is KVM, which add hypervisor capabilities to the kernel. For Intel and AMD hardware KVM requires virtualization extensions. But KVM is also available for IBM Z and LinuxONE, IBM POWER as well as for ARM64. Qemu is part of the KVM experience being the userspace backend for it, but it also can be used for hardware without virtualization extensions by using its TCG mode.
Qemu is a machine emulator that can run operating systems and programs for one machine on a different machine. Mostly it is not used as emulator but as virtualizer in collaboration with KVM kernel components. In that case it utilizes the virtualization technology of the hardware to virtualize guests.
libvirt is a toolkit to interact with virtualization technologies which abstracts away from specific versions and hypervisors.
Managing KVM can be done from both command line tools (virt-* and qemu-*) and graphical interfaces (virt-manager).
Before getting started with libvirt it is best to make sure your hardware supports the necessary virtualization extensions for KVM. Enter the following from a terminal prompt:
kvm-ok
# or alternatively, it should be enough to ensure this regex patter matches some lines in /proc/cpuinfo
egrep "vmx|svm" /proc/cpuinfo
Note: On many computers with processors supporting hardware assisted virtualization, it is necessary to activate an option in the BIOS to enable it.
Installation
To install the necessary packages, from a terminal prompt enter:
sudo apt update
sudo apt install qemu-kvm libvirt-daemon-system
After installing libvirt-daemon-system, the user used to manage virtual machines will need to be added to the libvirt group. This is done automatically for members of the sudo group, but needs to be done in additon for anyone else that should access system wide libvirt resources. Doing so will grant the user access to the advanced networking options.
In a terminal enter: sudo adduser $USER libvirt
You are now ready to install a Guest operating system. Installing a virtual machine follows the same process as installing the operating system directly on the hardware.
You either need:
- a way to automate the installation
- a keyboard and monitor will need to be attached to the physical machine.
- use cloud images which are meant to self-initialize (Multipass and UVTool)
In the case of virtual machines a Graphical User Interface (GUI) is analogous to using a physical keyboard and mouse on a real computer. Instead of installing a GUI, the virt-viewer or virt-manager application can be used to connect to a virtual machine's console using VNC.
virsh
There are several utilities available to manage virtual machines and libvirt. The virsh utility can be used from the command line.
To list running virtual machines: virsh list
To start a virtual machine: virsh start <guestname>
Similarly, to start a virtual machine at boot: virsh autostart <guestname>
Reboot a virtual machine with: virsh reboot <guestname>
The state of virtual machines can be saved to a file in order to be restored later. The following will save the virtual machine state into a file named according to the date: virsh save <guestname> save-my.state
Once saved the virtual machine will no longer be running. A saved virtual machine can be restored using: virsh restore save-my.state
To shutdown a virtual machine do: virsh shutdown <guestname>
A CDROM device can be mounted in a virtual machine by entering: virsh attach-disk <guestname> /dev/cdrom /media/cdrom
To change the definition of a guest virsh exposes the domain via virsh edit <guestname>
That will allow one to edit the XML representation that defines the guest and when saving it will apply format and integrity checks on these definitions.
Editing the XML directly certainly is the most powerful way, but also the most complex one. Tools like Virtual Machine Manager / Viewer can help unexperienced users to do most of the common tasks.
Note: If
virsh(or othervir*-tools) shall connect to something else than the default qemu-kvm/system hypervisor one can find alternatives for the connect option in man virsh or libvirt doc.
6. Storage Management - 13%
- List, create, delete, and modify physical storage partitions (./fdisk, gdisk)
- Manage and configure LVM storage
- Create and configure encrypted storage
- Configure systems to mount file systems at or during boot
- Configure and manage swap space
- Create and manage RAID devices
- Configure systems to mount file systems on demand
- Create, manage and diagnose advanced file system permissions
- Setup user and group disk quotas for filesystems
- Create and configure file systems
List, create, delete, and modify physical storage partitions
Lists information about all available or the specified block devices (including partitions and mount points): lsblk
Lists the partition tables for the specified devices (If no devices are given, those mentioned in /proc/partitions): sudo fdisk -l
Lists partitions the OS i uurently aware of: cat /proc/partitions
Reports on block devices attributes: blkid
Manipulate interactively a partition table according to its format with:
fdiskfor MBRgdiskfor GPT
Note: gdisk, cgdisk and sgdisk all have the same functionality but provide different user interfaces. gdisk is text-mode interactive, sgdisk is command-line, and cgdisk has a curses-based interface.
To create a new partition on the empty disk, provide it as argument to fdisk:
fdisk /dev/sdb

>Welcome to fdisk (util-linux 2.32.1).
>Changes will remain in memory only, until you decide to write them.
>Be careful before using the write command.
The fdisk utility awaits our commands. Ccreate a new partition, by typing "n".
>Command (m for help): n
you are to create a primary partition, so the answer to the next question is "p".
>Partition type
>   p   primary (0 primary, 0 extended, 4 free)
>   e   extended (container for logical partitions)
>Select (default p): p
The next questions are about partition number, first and last sector, which will determine the actual size of the partition. To create a single partition that will cover the disk, accept the defaults values for partition number, first available sector to start with, and last sector to end with:
>Partition number (1-4, default 1):
>First sector (2048-4194303, default 2048):
>Last sector, +sectors or +size{K,M,G,T,P} (2048-4194303, default 4194303):
>
>Created a new partition 1 of type 'Linux' and of size 2 GiB.
You are not limited to count in sectors when you define the end of the partition. As the utility hints, you can specify an exact size. For example, if you would like a partition of 1 GB in size, at the last sector you could provide:
>Last sector, +sectors or +size{K,M,G,T,P} (34-4194270, default 4194270): +1G
The partition is now complete, but as the utility points out on start, the changes are in-memory only until you write them out to the disk. This is on purpose and the warning is in place for a good reason: by writing out the changes to the disk, you destroy anything that resided on the sector range you cover with our new partition. If you are sure there will be no data loss, write the changes to disk:
>Command (m for help): w
>The partition table has been altered.
>Calling ioctl() to re-read partition table.
>Syncing disks.
Once done, inform the OS of partition table changes: partprobe
you can use the fdisk -l feature to be more specific by adding the device name you are interested in.
fdisk -l /dev/sdb

>Disk /dev/sdb: 2 GiB, 2147483648 bytes, 4194304 sectors
>Units: sectors of 1 * 512 = 512 bytes
>Sector size (logical/physical): 512 bytes / 512 bytes
>I/O size (minimum/optimal): 512 bytes / 512 bytes
>Disklabel type: dos
>Disk identifier: 0x29ccc11b
>
>Device     Boot Start     End Sectors Size Id Type
>/dev/sdb1        2048 4194303 4192256   2G 83 Linux
And in the output you can see that our disk now contains a new /dev/sdb1 partition that is ready to be used.
Deleting partition is basically the same process backwards. The utility is built in a logical way: you specify the device you would like to work on, and when you select partition deletion with the "d" command, it will delete our sole partition without any question, because there is only one on the disk:
fdisk /dev/sdb

>Welcome to fdisk (util-linux 2.32.1).
>Changes will remain in memory only, until you decide to write them.
>Be careful before using the write command.
>
>
>Command (m for help): d
>Selected partition 1
>Partition 1 has been deleted.
While this is quite convenient, note that this tooling makes it really easy to wipe data from disk with a single keypress. This is why all the warnings are in place, you have to know what you are doing. Safeguards are still in place, nothing changes on disk until you write it out:
>Command (m for help): w
>The partition table has been altered.
>Calling ioctl() to re-read partition table.
>Syncing disks.

partprobe

fdisk -l /dev/sdb
>Disk /dev/sdb: 2 GiB, 2147483648 bytes, 4194304 sectors
>Units: sectors of 1 * 512 = 512 bytes
>Sector size (logical/physical): 512 bytes / 512 bytes
>I/O size (minimum/optimal): 512 bytes / 512 bytes
>Disklabel type: dos
>Disk identifier: 0x29ccc11b
To create a GPT based partition layout, you'll use the gdisk (GPT fdisk) utility:
gdisk /dev/sdb

>GPT fdisk (gdisk) version 1.0.3
>
>Partition table scan:
>  MBR: MBR only
>  BSD: not present
>  APM: not present
>  GPT: not present
>
>
>***************************************************************
>Found invalid GPT and valid MBR; converting MBR to GPT format
>in memory. THIS OPERATION IS POTENTIALLY DESTRUCTIVE! Exit by
>typing 'q' if you don't want to convert your MBR partitions
>to GPT format!
>***************************************************************
>
>
>Command (? for help): n
>Partition number (1-128, default 1):
>First sector (34-4194270, default = 2048) or {+-}size{KMGTP}:
>Last sector (2048-4194270, default = 4194270) or {+-}size{KMGTP}:
>Current type is 'Linux filesystem'
>Hex code or GUID (L to show codes, Enter = 8300):
>Changed type of partition to 'Linux filesystem'
>
>Command (? for help): w
>
>Final checks complete. About to write GPT data. THIS WILL OVERWRITE EXISTING
>PARTITIONS!!
>
>Do you want to proceed? (Y/N): Y
>OK; writing new GUID partition table (GPT) to /dev/sdb.
>The operation has completed successfully.
From the point of commands you did the same, initiated creating a new partition with "n", accepted the defaults that cover the whole disk with the new partition, then written the changes to disk. Two new warnings appear, the first is there only because you partitioned the same disk with fdisk earlier, which was detected by gdisk. The last one is an additional "are you sure?" type of question, before you are allowed to finally overwrite that poor disk.
Note: Listing GPT partitions requires the same switch to gdisk: gdisk -l </dev/sdb>
Deleting the GPT partition you created is done similar as in the MBR case, with the additional sanity check added:
gdisk /dev/sdb

>GPT fdisk (gdisk) version 1.0.3
>
>Partition table scan:
>  MBR: protective
>  BSD: not present
>  APM: not present
>  GPT: present
>
>Found valid GPT with protective MBR; using GPT.
>
>Command (? for help): d
>Using 1
>
>Command (? for help): w
>
>Final checks complete. About to write GPT data. THIS WILL OVERWRITE EXISTING
>PARTITIONS!!
>
>Do you want to proceed? (Y/N): Y
>OK; writing new GUID partition table (GPT) to /dev/sdb.
>The operation has completed successfully.
Listing the disk now shows that we indeed deleted the GPT partition from the disk:
gdisk -l /dev/sdb

>GPT fdisk (gdisk) version 1.0.3
>
>Partition table scan:
>  MBR: protective
>  BSD: not present
>  APM: not present
>  GPT: present
>
>Found valid GPT with protective MBR; using GPT.
>Disk /dev/sdb: 4194304 sectors, 2.0 GiB
>Sector size (logical/physical): 512/512 bytes
>Disk identifier (GUID): 3AA3331F-8056-4C3E-82F3-A67254343A05
>Partition table holds up to 128 entries
>Main partition table begins at sector 2 and ends at sector 33
>First usable sector is 34, last usable sector is 4194270
>Partitions will be aligned on 2048-sector boundaries
>Total free space is 4194237 sectors (2.0 GiB)
>
>Number  Start (sector)    End (sector)  Size       Code  Name
Common partition type codes for Linux (specified as MBR/GPT):
- 82/8200: Linux swap
- 83/8300: Linux native partition
- ef/ef00: EFI System partition
- 8e/8e00: Linux Logical Volume Manager (LVM) partition
- fd/fd00: Linux raid partition with autodetect using persistent superblock
Manage and configure LVM storage
Logical Volumes Management (also known as LVM), which have become a default for the installation of most (if not all) Linux distributions, have numerous advantages over traditional partitioning management. Perhaps the most distinguishing feature of LVM is that it allows logical divisions to be resized (reduced or increased) at will without much hassle.
The structure of the LVM consists of:
- one or more entire hard disks or partitions which are configured as physical volumes (PVs)
- a volume group (VG) is created using one or more physical volumes
- multiple logical volumes (LVs) which can then be created from a volume group.
Each logical volume is somewhat equivalent to a traditional partition – with the advantage that it can be resized at will as said earlier.
Note: When combined with RAID, you can enjoy not only scalability (provided by LVM) but also redundancy (offered by RAID). In this type of setup, you will typically find LVM on top of RAID, that is, configure RAID first and then configure LVM on top of it.
Creating Physical Volumes, Volume Groups, and Logical Volumes
To create physical volumes on top of devices or single partitions: sudo pvcreate /dev/sdb /dev/sdc /dev/sdd
List the newly created PVs with: sudo pvs
Get detailed information about each PV with: sudo pvdisplay /dev/sd[x]
If you omit /dev/sd[x] as arg, you will get information about all the PVs.
To create a volume group named "vg00" using /dev/sdb and /dev/sdc (we will save /dev/sdd for later to illustrate the possibility of adding other devices to expand storage capacity when needed): sudo vgcreate vg00 /dev/sdb /dev/sdc
As it was the case with physical volumes, you can also view information about this volume group by issuing: sudo vgdisplay vg00
It is considered good practice to name each logical volume according to its intended use. For example, let's create two LVs named "vol_projects" (10 GB) and "vol_backups" (remaining space), which we can use later to store project documentation and system backups, respectively.
The -n option is used to indicate a name for the LV, whereas -L sets a fixed size and -l (lowercase L) is used to indicate a percentage of the remaining space in the container VG:
sudo lvcreate -n vol_projects -L 10G vg00
sudo lvcreate -n vol_backups -l 100%FREE vg00
Warning: If you see a message like "ext4 signature detected on at offset 1080. wipe it ?" when manipulating partitions, the mentioned signature is basically a sign that there's something there, and it is not empty, so it means: "There is already data here!...are you sure you want to go ahead?".
Note: LVs will be symlinked in /dev/mapper and /dev/[VG-name].
As before, you can view the list of LVs and basic information with: sudo lvs
And detailed information with: sudo lvdisplay
To view information about a single LV, use lvdisplay with the VG and LV as parameters, as follows: sudo lvdisplay vg00/vol_projects
Before each logical volume can be used, we need to create a filesystem on top of it.
We'll use ext4 as an example here since it allows us both to increase and reduce the size of each LV (as opposed to xfs that only allows to increase the size):
sudo mkfs.ext4 /dev/vg00/vol_projects
sudo mkfs.ext4 /dev/vg00/vol_backups
Resizing Logical Volumes and Extending Volume Groups
Due to the nature of LVM, it's very easy to reduce the size of the two LVs and allocate it for the other, while resizing (-r) each filesystem at the same time:
sudo lvreduce -L -2.5G -r /dev/vg00/vol_projects
sudo lvextend -l +100%FREE -r /dev/vg00/vol_backups
Note: If you don't use the (-r) switch, the filesytem must be resized apart, e.g for ext4 filesystems:
sudo resize2fs </dev/mapper/myvg-mylv>
It is important to include the minus (-) or plus (+) signs while resizing a logical volume. Otherwise, you're setting a fixed size for the LV instead of resizing it.
It can happen that you arrive at a point when resizing logical volumes cannot solve your storage needs anymore and you need to buy an extra storage device. Keeping it simple, you will need another disk. We are going to simulate this situation by adding the remaining PV from our initial setup (/dev/sdd).
To add /dev/sdd to vg00: sudo vgextend vg00 /dev/sdd
If you run vgdisplay vg00 before and after the previous command, you will see the increase in the size of the VG.
Mounting Logical Volumes on Boot and on Demand
Of course there would be no point in creating logical volumes if we are not going to actually use them! To better identify a logical volume we will need to find out what its UUID:
blkid /dev/vg00/vol_projects
blkid /dev/vg00/vol_backups
Create mount points for each LV:
sudo mkdir /home/projects
sudo mkdir /home/backups
Insert the corresponding entries in /etc/fstab:
UUID=b85df913-580f-461c-844f-546d8cde4646 /home/projects	ext4 defaults 0 0
UUID=e1929239-5087-44b1-9396-53e09db6eb9e /home/backups ext4	defaults 0 0
Then save the changes and mount the LVs:
sudo mount -a
mount | grep home
Create and configure encrypted storage
The following illustrates how to encrypt a secondary disk (source). For full-disk encryption, look here.
cryptsetup is a utility used to conveniently set up disk encryption based on the DMCrypt kernel module. These include plain dm-crypt volumes, LUKS volumes, loop-AES, TrueCrypt (including VeraCrypt extension) and BitLocker formats.
LUKS (Linux Unified Key Setup) is a standard for hard disk encryption. It standardizes a partition header, as well as the format of the bulk data. LUKS can manage multiple passwords, that can be revoked effectively and that are protected against dictionary attacks with PBKDF2.
Once you have physically connected the disk, find the unmounted disk in the system using lsblk (you can spot it by the size which should match the expexted one).
Note: Once created, the LUKS partition will have the FSTYPE set as "crypto_LUKS".
Double check disk info: sudo hdparm -i /dev/sdd
If this checks out, you have the device reference. Alternatively, list all drives in short format: sudo lshw -short -C disk
If the disk does not have an existing partition, create one: sudo fdisk /dev/sdd
Follow the instructions, hit all defaults to create one large partition: it will be something like "/dev/sdd1".
Note: If the disk is already partitioned, you can use an existing partition, but all data will be over-written.
Next step is to LUKS encrypt the target partition - in this case, /dev/sdd1: cryptsetup -y -v luksFormat /dev/sdd1
Note:
-yforces double entry from the user when interactively setting the passphrase - ask for it twice and complain if both inputs do not match.
Warning: Your kernel may not support the default encryption method used by cryptsetup. In that case, you can examine /proc/crypto to see the methods your system supports, and then you can supply a method, as in:
sudo cryptsetup luksFormat --cipher aes /dev/sdd1
The encrypted partition is accessed by means of a mapping. To create a mapping for the current session:
# open the LUKS partition and create a mapping called "backupSSD"
sudo cryptsetup luksOpen /dev/sdd1 backupSSD
# checks for its presence
ls -l /dev/mapper/backupSSD
lrwxrwxrwx 1 root root 7 Dec 17 15:48 /dev/mapper/backupSSD -> ../dm-6
Check mapping status:
sudo cryptsetup -v status backupSSD
>[sudo] password for <user>:
>/dev/mapper/backupSSD is active and is in use.
>  type:    LUKS1
>  cipher:  aes-xts-plain64
>  keysize: 256 bits
>  device:  /dev/sdd1
>  offset:  4096 sectors
>  size:    1953519024 sectors
>  mode:    read/write
>Command successful.
This mapping is not persistent. If you want to open the disk/partition automatically on boot, you will need to amend /etc/crypttab to set up a mapped device name (see below).
Do not omit this step - or the partition won't mount (-L denotes the partition label): sudo mkfs.ext4 /dev/mapper/backupSSD -L "Extra SSD 1TB"
Create a mount point and give the mount point appropriate ownership:
sudo mkdir /media/secure-ssd
sudo chown $USER:$USER /media/secure-ssd
To mount, you need to reference the mapper, not the partition:
sudo mount /dev/mapper/backupSSD /media/secure-ssd
To automount at boot:
- Edit /etc/fstab to reference the mapper to the decrypted volume:
/dev/mapper/backupSSD /media/secure-ssd ext4 defaults 0 2
- Declare a keyfile to decrypt the disk without typing the passphrase.
When you first run luksFormat, the initial password you supply is hashed and stored in key-slot 0 of the LUKS header. You can easily add an additional passphrase, and this can take the form of a keyfile. This means that the volume can be decrypted either with the initial passphrase or the keyfile.
Warning: To add a password to a LUKS partition, you need an unencrypted copy of the master key - so if the partition is not initialized, you will be prompted for the original passphrase. Because more than one password is possible under LUKS setups, the wording of the password prompt may seem confusing - it says: “Enter any passphrase”. This means enter any valid existing password for the partition.
Note: If you want multiple encrypted disks, you can use a passphrase only for the first one while decrypting the others with their keyfiles.
Create a keyfile:
# make an appropriate directory
sudo mkdir /root/.keyfiles
# make a keyfile of randomly sourced bytes
sudo dd if=/dev/urandom of=/root/.keyfiles/hdd-1.key bs=1024 count=4
# make this read-only by owner (in this case, root):
sudo chmod 0400 /root/.keyfiles/hdd-1.key
Set up a keyfile for the LUKS partition:
sudo cryptsetup luksAddKey /dev/sdd1 /root/.keyfiles/hdd-1.key
To automatically mount at boot, the mapping in /etc/crypttab should reference the keyfile:
backupSSD UUID=4f942e15-ff00-4213-aab1-089448b17850 /root/.keyfiles/hdd-1.key luks,discard
To unmount the LUKS partition:
umount /dev/mapper/backupSSD
cryptsetup luksClose backupSSD
To decrypt and remount:
cryptsetup luksOpen /dev/sdd1 backupSSD
mount /dev/mapper/backupSSD /media/secure-ssd
To check the passphrase:
sudo cryptsetup luksOpen --test-passphrase /dev/sdX && echo correct
# Prompts for password, echoes "correct" if successful
# Alternatively, specify the intended slot
cryptsetup luksOpen --test-passphrase --key-slot 0 /dev/sdX && echo correct
Configure systems to mount file systems at or during boot
There are broadly two aproaches:
- per-user mounting (usually under /media)
- systemwide mounting (anywhere, often under /mnt)
1. Per-user mounting
Per-user mounting does not require root access, it's just automating the desktop interface. Systemwide mounts (/etc/fstab) can allow access from before login, and are therefore much more suitable for access through a network, or by system services.
When you mount a disc normally with the file browser (e.g. Nautilus) it mounts disks by interacting with udisks behind the scenes. You can do the same thing on the command line with the udisks tool.
2. Systemwide mounting
Unlike DOS or Windows (where this is done by assigning a drive letter to each partition), Linux uses a unified directory tree where each partition is mounted at a mount point in that tree.
A mount point is a directory that is used as a way to access the filesystem on the partition, and mounting the filesystem is the process of associating a certain filesystem with a specific directory in the directory tree.
When providing just one parameter (either mout point or device) to the mount command, it will read the content of the /etc/fstab configuration file to check whether the specified file system is listed or not.
Usually when mounting a device with a common file system such as ext4 or xfs the mount command will auto-detect the file system type. However, some file systems are not recognized and need to be explicitly specified.
Use the -t option to specify the file system type: mount -t <fs-type> <device> <mount-point>
To specify additional mount options , use the -o option: mount -o <options> <device> <mount-point>
Multiple options can be provided as a comma-separated list.
The /etc/fstab file contains lines of the form <device> <location> <Linux type> <options> <dump> <pass>. Every element in this line is separated by whitespace (spaces and tabs):
# /etc/fstab: static file system information.
#
# Use 'blkid' to print the universally unique identifier for a
# device; this may be used with UUID= as a more robust way to name devices
# that works even if disks are added and removed. See fstab(5).
#
# <file system> <mount point>   <type>  <options>       <dump>  <pass>
# / was on /dev/sda2 during installation
UUID=a2db89ed-d599-4138-8838-0b950b6c3fbb /               ext4    errors=remount-ro 0       1
# /boot/efi was on /dev/sda1 during installation
UUID=AEF0-9F26  /boot/efi       vfat    defaults        0       1
# swap was on /dev/sda3 during installation
UUID=df17fdb9-57a4-4302-856e-3cd656848355 none            swap    sw              0       0
The first three fields are quite self-explanatory, while the others deserve a lenghtier explanation:
-
options: the fourth field, (fs_mntops), describes the mount options associated with the filesystem.
It is formatted as a comma separated list of options. It contains at least the type of mount plus any additional options appropriate to the filesystem type. For documentation on the available options for non-nfs file systems, see mount(8). For documention on all nfs-specific options have a look at nfs(5). Common for all types of file system are the options
noauto(do not mount whenmount -ais given, e.g., at boot time),user(allow a user to mount), andowner(allow device owner to mount), andcomment(e.g., for use by fstab-maintaining programs). Theownerandcommentoptions are Linux-specific. For more details, see mount(8).Most frequently used mount options include:
async: allows asynchronous I/O operations on the file system being mountedauto: marks the file system as enabled to be mounted automatically usingmount -a. It is the opposite of noautodefaults: this option is an alias forasync,auto,dev,exec,nouser,rw,suid
Note: Multiple options must be separated by a comma without any spaces. If by accident you type a space between options, mount will interpret the subsequent text string as another argument
loop: mounts an image (an .iso file, for example) as a loop device
Tip: This option can be used to simulate the presence of the disk's contents in an optical media reader
noexec: prevents the execution of executable files on the particular filesystem (the opposite ofexec)nouser: prevents any users (other than root) to mount and unmount the filesystem (the opposite ofuser)remount: mounts the filesystem again in case it is already mountedro: mounts the filesystem as read onlyrw: mounts the file system with read and write capabilitiesrelatime: makes access time to files be updated only if atime is earlier than mtimeuser_xattr: allow users to set and remote extended filesystem attributes
-
dump: the fifth field, (fs_freq), is used for these filesystems by the dump(8) command to determine which filesystems need to be dumped. If the fifth field is not present, a value of zero is returned and dump will assume that the filesystem does not need to be dumped.
-
pass: the sixth field, (fs_passno), is used by the fsck(8) program to determine the order in which filesystem checks are done at reboot time. The root filesystem should be specified with a fs_passno of 1, and other filesystems should have a fs_passno of 2. Filesystems within a drive will be checked sequentially, but filesystems on different drives will be checked at the same time to utilize parallelism available in the hardware. If the sixth field is not present or zero, a value of zero is returned and fsck will assume that the filesystem does not need to be checked.
So, to mount a filesystem/partition at boot, a common configuration is:
UUID=<uuid> <mount-point> <fs-type> defaults 0 0
Before you reboot the machine, you need to test your new fstab entry. Issue the following command to mount all filesystems mentioned in fstab:
sudo mount -a
Check if your filesystem was properly mounted:
mount | grep <mount-point>
If you see no errors, the fstab entry is correct and you're safe to reboot.
Mounting ISO Files
You can mount an ISO file using the loop device which is a special pseudo-device that makes a file accessible as a block device.
Start by creating the mount point, it can be any location you want: sudo mkdir /media/iso
Mount the ISO file to the mount point by typing the following command:
sudo mount /path/to/image.iso /media/iso -o loop
A common use case is when you want to use a loopback file in place of a fresh new partition for testing purposes:
sudo dd if=/dev/zero of=/imagefile bs=1M count=250
sudo mkfs -t ext4 -b 4096 -v /imagefile
sudo mkdir /mnt/tempdir
sudo mount -o loop /imagefile /mnt/tempdir
mount | grep tempdir
>/dev/loopX on /mnt/tempdir type ext4 (rw,relatime,seclabel,data=ordered)
Configure and manage swap space
One of the easiest way of guarding against out-of-memory errors in applications is to add some swap space to your server.
Warning: Although swap is generally recommended for systems utilizing traditional spinning hard drives, using swap with SSDs can cause issues with hardware degradation over time.
The information written to disk will be significantly slower than information kept in RAM, but the operating system will prefer to keep running application data in memory and use swap for the older data. Overall, having swap space as a fallback for when your system's RAM is depleted can be a good safety net against out-of-memory exceptions on systems with non-SSD storage available.
1. Checking the System for Swap Information
Before we begin, we can check if the system already has some swap space available. It is possible to have multiple swap files or swap partitions, but generally one should be enough.
We can see if the system has any configured swap by typing: sudo swapon --show
If you don't get back any output, this means your system does not have swap space available currently.
You can verify that there is no active swap using the free utility:
free -h
>Output
>              total        used        free      shared  buff/cache   available
>Mem:           985M         84M        222M        680K        678M        721M
>Swap:            0B          0B          0B
As you can see in the Swap row of the output, no swap is active on the system.
2. Checking Available Space on the Hard Drive Partition
Before we create our swap file, we'll check our current disk usage to make sure we have enough space:
df -h
>Output
>Filesystem      Size  Used Avail Use% Mounted on
>udev            481M     0  481M   0% /dev
>tmpfs            99M  656K   98M   1% /run
>/dev/vda1        25G  1.4G   23G   6% /
>tmpfs           493M     0  493M   0% /dev/shm
>tmpfs           5.0M     0  5.0M   0% /run/lock
>tmpfs           493M     0  493M   0% /sys/fs/cgroup
>/dev/vda15      105M  3.4M  102M   4% /boot/efi
>tmpfs            99M     0   99M   0% /run/user/1000
The device with / in the Mounted on column is our disk in this case. We have plenty of space available in this example (only 1.4G used). Your usage will probably be different.
Note: Modern machines probably does not need swap space at all (see here).
3. Creating a Swap File
Now that we know our available hard drive space, we can create a swap file on our filesystem. We will allocate a file of the swap size that we want called swapfile in our root (/) directory.
The best way of creating a swap file is with the fallocate program. This command instantly creates a file of the specified size:
sudo fallocate -l 1G /swapfile
4. Enabling the Swap File
First, we need to lock down the permissions of the file so that only the users with root privileges can read the contents. This prevents normal users from being able to access the file, which would have significant security implications.
Make the file only accessible to root by typing: sudo chmod 600 /swapfile
We can now mark the file as swap space by typing:
sudo mkswap /swapfile
>Output
>Setting up swapspace version 1, size = 1024 MiB (1073737728 bytes)
>no label, UUID=6e965805-2ab9-450f-aed6-577e74089dbf
After marking the file, we can enable the swap file, allowing our system to start utilizing it: sudo swapon /swapfile
Verify that the swap is available by typing:
sudo swapon --show
>Output
>NAME      TYPE  SIZE USED PRIO
>/swapfile file 1024M   0B   -2
We can check the output of the free utility again to corroborate our findings:
free -h
>Output
>              total        used        free      shared  buff/cache   available
>Mem:           985M         84M        220M        680K        680M        722M
>Swap:          1.0G          0B        1.0G
5. Making the Swap File Permanent
Our recent changes have enabled the swap file for the current session. However, if we reboot, the server will not retain the swap settings automatically. We can change this by adding the swap file to our /etc/fstab file.
Add the swap file information to the end of your /etc/fstab file by typing:
echo '/swapfile none swap sw 0 0' | sudo tee -a /etc/fstab
Tuning your Swap Settings
There are a few options that you can configure that will have an impact on your system's performance when dealing with swap:
-
swappiness, a parameter which configures how often your system swaps data out of RAM to the swap space, expressed as a percentage.We can see the current swappiness value by typing:
cat /proc/sys/vm/swappinessTip: For a Desktop, a swappiness setting of 60 is not a bad value. For a server, you might want to move it closer to 0.
We can set the swappiness to a different value by using the sysctl command.
For instance, to set the swappiness to 10, we could type:
sudo sysctl vm.swappiness=10This setting will persist until the next reboot. We can set this value automatically at restart by adding the line to our /etc/sysctl.conf file:
vm.swappiness=10 -
vfs_cache_pressure, a parameter which configures how much the system will choose to cache inode and dentry information over other data.Basically, this is access data about the filesystem. This is generally very costly to look up and very frequently requested, so it's an excellent thing for your system to cache. You can see the current value by querying the proc filesystem again:
cat /proc/sys/vm/vfs_cache_pressureAs it is currently configured, our system removes inode information from the cache too quickly. We can set this to a more conservative setting like 50 by typing:
sudo sysctl vm.vfs_cache_pressure=50Again, this is only valid for our current session. We can change that by adding it to our configuration file like we did with our swappiness setting:
vm.vfs_cache_pressure=50
Removing a Swap File
To deactivate and remove the swap file, start by deactivating the swap space by typing: sudo swapoff -v /swapfile
Next, remove the swap file entry /swapfile the /etc/fstab file.
Finally, remove the actual swapfile file: sudo rm /swapfile
Create and manage RAID devices
The technology known as Redundant Array of Independent Disks (RAID) is a storage solution that combines multiple hard disks into a single logical unit to provide redundancy of data and/or improve performance in read/write operations to disk.
Essential features of RAID are:
- mirroring, write the same data to more than one disk
- striping, splitting of data to more than one disk
- parity, extra data is stored to allow fault-tolerance, error detection and repair.
However, the actual fault-tolerance and disk I/O performance lean on how the hard disks are set up to form the disk array. Depending on the available devices and the faulttolerance/performance needs, different RAID levels are defined.
RAID LEVELS
- RAID 0: uses only striping, it does not allow fault tolerance but it has good performance
The total array size is n times the size of the smallest partition, where n is the number of independent disks in the array (you will need at least two drives). Run the following command to assemble a RAID 0 array using partitions /dev/sdb1 and /dev/sdc1:
mdadm --create --verbose /dev/md0 --level=stripe --raid-devices=2 /dev/sdb1 /dev/sdc1
Common uses: supporting real-time applications where performance is more important than fault-tolerance.
- RAID 1: uses only mirroring, good for recovery, at least 2 disks are required
The total array size equals the size of the smallest partition (you will need at least two drives). Run the following command to assemble a RAID 1 array using partitions /dev/sdb1 and /dev/sdc1:
mdadm --create --verbose /dev/md0 --level=1 --raid-devices=2 /dev/sdb1 /dev/sdc1
Common uses: Installation of the operating system or important subdirectories, such as /home.
- RAID 5: uses a rotating parity stripe, thus allowing fault tolerance and reliability, at least 3 disks are required
The total array size will be (n – 1) times the size of the smallest partition. The “lost” space in (n-1) is used for parity (redundancy) calculation (you will need at least three drives). Note that you can specify a spare device (/dev/sde1 in this case) to replace a faulty part when an issue occurs. Run the following command to assemble a RAID 5 array using partitions /dev/sdb1, /dev/sdc1, /dev/sdd1, and /dev/sde1 as spare:
mdadm --create --verbose /dev/md0 --level=5 --raid-devices=3 /dev/sdb1 /dev/sdc1 /dev/sdd1 --spare-devices=1 /dev/sde1
Common uses: Web and file servers.
- RAID 6: uses striped disks with dual parity, it is an evolution of RAID 5, allowing fault tolerance and performance, at least 4 disks are required
The total array size will be (ns)-2s, where n is the number of independent disks in the array and s is the size of the smallest disk. Note that you can specify a spare device (/dev/sdf1 in this case) to replace a faulty part when an issue occurs. Run the following command to assemble a RAID 6 array using partitions /dev/sdb1, /dev/sdc1, /dev/sdd1, /dev/sde1, and /dev/sdf1 as spare:
mdadm --create --verbose /dev/md0 --level=6 --raid-devices=4 /dev/sdb1 /dev/sdc1 /dev/sdd1 /dev/sde --spare-devices=1 /dev/sdf1
Common uses: File and backup servers with large capacity and high availability requirements.
- RAID 10: uses mirroring and striping, thus allowing redundancy and performance, at least 4 disk are required
The total array size is computed based on the formulas for RAID 0 and RAID 1, since RAID 1+0 is a combination of both. First, calculate the size of each mirror and then the size of the stripe. Note that you can specify a spare device (/dev/sdf1 in this case) to replace a faulty part when an issue occurs. Run the following command to assemble a RAID 1+0 array using partitions /dev/sdb1, /dev/sdc1, /dev/sdd1, /dev/sde1, and /dev/sdf1 as spare:
mdadm --create --verbose /dev/md0 --level=10 --raid-devices=4 /dev/sd[b-e]1 --spare-devices=1 /dev/sdf1
Common uses: Database and application servers that require fast I/O operations.
Assembling Partitions as RAID Devices
- Create the array using mdadm
RAID disks require RAID autodetect partitions. These can be made with fdisk:
sudo fdisk /dev/sdb
>d      # until all deleted
>n      # use defaults
>t      # change partition type
>fd     # Linux RAID autodetect type
If one of the partitions has been formatted previously, or has been a part of another RAID array previously, you will be prompted to confirm the creation of the new array. Assuming you have taken the necessary precautions to avoid losing important data that may have resided in them, you can safely type y and press Enter: mdadm --create --verbose /dev/md0 --level=stripe --raid-devices=2 /dev/sdb1 /dev/sdc1
- Check the array creation status
In order to check the array creation status, use the following commands – regardless of the RAID type:
cat /proc/mdstat
>Personalities : [linear] [multipath] [raid0] [raid1] [raid6] [raid5] [raid4] [raid10]
>md0 : active raid0 sdb[1] sda[0]
>      209584128 blocks super 1.2 512k chunks
>
>            unused devices: <none>
# or
mdadm --detail /dev/md0   # more detailed summary
- Format the RAID Device
Format the device with a filesystem as per your needs/requirement:
sudo mkfs.ext4 /dev/md0
sudo mkdir -p /mnt/myraid
sudo mount /dev/md0 /myraid
Check whether the new space is available by typing:
df -h -x devtmpfs -x tmpfs
>Output
>Filesystem      Size  Used Avail Use% Mounted on
>/dev/vda1        25G  1.4G   23G   6% /
>/dev/vda15      105M  3.4M  102M   4% /boot/efi
>/dev/md0        196G   61M  186G   1% /mnt/md0
- Save and Monitor the RAID Array
To make sure that the array is reassembled automatically at boot: sudo mdadm --detail --scan | sudo tee -a /etc/mdadm/mdadm.conf
Afterwards, you can update the initramfs, or initial RAM file system, so that the array will be available during the early boot process: sudo update-initramfs -u
Once the configuration file has been updated the array can be assembled: mdadm --assemble --scan
Note: This will assemble and start all arrays listed in the standard config file. This command will typically go in a system startup file.
mdadm provides the systemd service mdmonitor.service which can be useful for monitoring the health of your raid arrays and notifying you via email if anything goes wrong.
This service is special in that it cannot be manually activated like a regular service; mdadm will take care of activating it via udev upon assembling your arrays on system startup, but it will only do so if an email address has been configured for its notifications:
echo "MAILADDR user@domain" | sudo tee -a /etc/mdadm/mdadm.conf
Warning: Failure to configure an email address will result in the monitoring service silently failing to start.
Note: In order to send emails, a properly configured mail transfer agent is required.
Then, to verify that everything is working as it should, run the following command: mdadm --monitor --scan --oneshot --test
If the test is successful and the email is delivered, then you are done; the next time your arrays are reassembled, mdmonitor.service will begin monitoring them for errors.
Finally, add the new filesystem mount options to the /etc/fstab file for automatic mounting at boot:
echo '/dev/md0 /mnt/myraid ext4 defaults,nofail,discard 0 0' | sudo tee -a /etc/fstab
Recover from RAID Disk Failure
In RAID levels that support redundancy, replace failed drives when needed. When a device in the disk array becomes faulty, a rebuild automatically starts only if there was a spare device added when we first created the array.
Otherwise, we need to manually attach an extra physical drive to our system and run: mdadm /dev/md0 --add /dev/sdX1
Note:
</dev/md0>is the array that experienced the issue and</dev/sdX1>is the new device.
Depending on the type of RAID (for example, with RAID1), mdadm may add the device as a spare without syncing data to it. You can increase the number of disks the RAID uses by using --grow with the --raid-devices option. For example, to increase an array to four disks: mdadm --grow /dev/md0 --raid-devices=4
You can check the progress with: cat /proc/mdstat
Check that the device has been added with the command: mdadm --misc --detail /dev/md0
Note: For RAID0 arrays you may get the following error message: "mdadm: add new device failed for /dev/sdc1 as 2: Invalid argument". This is because the above commands will add the new disk as a "spare" but RAID0 does not have spares. If you want to add a device to a RAID0 array, you need to "grow" and "add" in the same command, as demonstrated here:
mdadm --grow /dev/md0 --raid-devices=3 --add /dev/sdX1
One can remove a device from the array after marking it as faulty:
mdadm --fail /dev/md0 /dev/sdX0
Now remove it from the array:
mdadm --remove /dev/md0 /dev/sdX0
To remove device permanently (for example, to use it individually from now on), see next session.
Disassemble a working array
You may have to do this if you need to create a new array using the devices.
Find the active arrays in the /proc/mdstat file by typing:
cat /proc/mdstat
>Output
>Personalities : [raid0] [linear] [multipath] [raid1] [raid6] [raid5] [raid4] [raid10]
>md0 : active raid0 sdc[1] sdd[0]
>      209584128 blocks super 1.2 512k chunks
>
>            unused devices: <none>
Unmount the array from the filesystem: sudo umount /dev/md0
Then, stop and remove the array by typing: sudo mdadm --stop /dev/md0
Find the devices that were used to build the array with the following command:
Warning: Keep in mind that the /dev/sd* names can change any time you reboot! Check them every time to make sure you are operating on the correct devices.
lsblk -o NAME,SIZE,FSTYPE,TYPE,MOUNTPOINT
>Output
>NAME     SIZE FSTYPE            TYPE MOUNTPOINT
>sda      100G                   disk
>sdb      100G                   disk
>sdc      100G linux_raid_member disk   # here it is
>sdd      100G linux_raid_member disk   # and this is the second one
>vda       25G                   disk
>├─vda1  24.9G ext4              part /
>├─vda14    4M                   part
>└─vda15  106M vfat              part /boot/efi
After discovering the devices used to create an array, zero their superblock to remove the RAID metadata and reset them to normal:
sudo mdadm --zero-superblock /dev/sdc
sudo mdadm --zero-superblock /dev/sdd
Warning: Do not issue this command on linear or RAID0 arrays or data loss will occur!
Warning: For the other RAID levels, reusing the removed disk without zeroing the superblock will cause loss of all data on the next boot. (After mdadm will try to use it as the part of the raid array).
You should remove any of the persistent references to the array. Edit the /etc/fstab file and comment out or remove the reference to your array:
sudo sed -i '/\/dev\/md0/d' /etc/fstab
Also, comment out or remove from the /etc/mdadm/mdadm.conf file the array definition:
ARRAY /dev/md0 metadata=1.2 name=mdadmwrite:0 UUID=7261fb9c:976d0d97:30bc63ce:85e76e91
Finally, update the initramfs again so that the early boot process does not try to bring an unavailable array online:
sudo update-initramfs -u
At this point, you should be ready to reuse the storage devices individually, or as components of a different array.
Configure systems to mount file systems on demand
One drawback of using /etc/fstab is that, regardless of how infrequently a user accesses the NFS mounted file system, the system must dedicate resources to keep the mounted file system in place. This is not a problem with one or two mounts, but when the system is maintaining mounts to many systems at one time, overall system performance can be affected. An alternative to /etc/fstab is to use the kernel-based automount utility. An automounter consists of two components:
- a kernel module that implements a file system, and
- a user-space daemon that performs all of the other functions.
The automount utility can mount and unmount NFS file systems automatically (on-demand mounting), therefore saving system resources. It can be used to mount other file systems including AFS, SMBFS, CIFS, and local file systems.
hese automatic mount points are mounted only when they are accessed, and unmounted after a certain period of inactivity. This on-demand behavior saves bandwidth and results in better performance than static mounts managed by /etc/fstab. While autofs is a control script, automount is the command (daemon) that does the actual auto-mounting.
1. Installation
Install the autofs package either by clicking here or entering the following in a terminal window: sudo apt install autofs
2. Configuration
autofs can be configured by editing configuration files. There are other ways to configure autofs on a network (see AutofsLDAP), but config files provide the simplest setup.
The master configuration file for autofs is /etc/auto.master by default. Unless you have a good reason for changing this, leave it as the default.
Here is the sample file provided by Ubuntu:
#
# $Id: auto.master,v 1.4 2005/01/04 14:36:54 raven Exp $
#
# Sample auto.master file
# This is an automounter map and it has the following format
# key [ -mount-options-separated-by-comma ] location
# For details of the format look at autofs(5).
#/misc   /etc/auto.misc --timeout=60
#/smb   /etc/auto.smb
#/misc  /etc/auto.misc
#/net    /etc/auto.net
Each of the lines in auto.master describes a mount and the location of its map. These lines have the following format:
mount-point [map-type[,format]:] map [options]
The map files are usually named using the convention auto.<X>, where <X> can be anything as long as it matches an entry in auto.master and is valid for a file-name.
3. EXAMPLE: Auto-mounting an NFS share
In this howto, we will configure autofs to auto-mount an NFS share, using a set of configuration files. This howto assumes that you are already familiar with NFS exports, and that you already have a properly-functioning NFS share on your network. Go to the NFS Setup Page to learn how to set up such a server.
3.11. Edit /etc/auto.master
The following step creates a mount point at /nfs and configures it according to the settings specified in /etc/auto.nfs (which we will create in the next step).
Type the following into a terminal: sudo vi /etc/auto.master
Add the following line at the end of /etc/auto.master: /nfs /etc/auto.nfs
3.2. Create /etc/auto.nfs
Now we will create the file which contains our automounter map: sudo vi /etc/auto.nfs
This file should contain a separate line for each NFS share. The format for a line is {mount point} [{mount options}] {location}. If you have previously configured static mounts in /etc/fstab, it may be helpful to refer to those. Remember, the mount points specified here will be relative to the mount point given in /etc/auto.master.
The following line is for shares using older versions of NFS (prior to version 4): server server:/
This creates a new mount point at /nfs/server/ and mounts the NFS root directory exported by the machine whose host-name is server.
3.2.1. NFSv4
If your NFS shares use NFSv4, you need to tell autofs about that. In such a case, the above line would appear as follows: server -fstype=nfs4 server:/
The client needs the same changes to /etc/default/nfs-common to connect to an NFSv4 server. In /etc/default/nfs-common we set:
NEED_IDMAPD=yes
NEED_GSSD=no # no is default
3.3. Unmount static mounts and edit /etc/fstab
If you have previously configured the NFS shares as static mounts, now is the time to unmount them: sudo umount /server
Next, remove (or comment out) their respective entries in /etc/fstab: #server:/ /server/ nfs defaults 0 0
3.4. Reload /etc/init.d/autofs
After entering your changes, run the following command to reload autofs: sudo systemctl restart autofs
3.5. Make sure it works
In order to access the share and verify that it is working properly, enter the following into a shell: ls /nfs/server
If you see your NFS share listed, congratulations! You have a functioning NFS mount via autofs! If you want to learn some more advanced information, keep reading here.
Create, manage and diagnose advanced file system permissions
POSIX Access Control Lists (ACLs) are more fine-grained access rights for files and directories. An ACL consists of entries specifying access permissions on an associated object. ACLs can be configured per user, per group or via the effective rights mask.
These permissions apply to an individual user or a group, and use the same as rwx found in regular permissions.
Before beginning to work with ACLs the file system must be mounted with ACLs turned on. This can be done in /etc/fstab for the changes to be permanent.
-
It may be necessary to install acl utilities from the repositories. In the Server Edition, this must be done, but in the desktop editions acl is installed by default:
sudo apt-get install acl -
Add the option acl to the partition(s) on which you want to enable ACL in /etc/fstab:
UUID=07aebd28-24e3-cf19-e37d-1af9a23a45d4 /home ext4 defaults,acl 0 2There is a possibility that the acl option is already active as default mount option on the filesystem. Btrfs does and Ext2/3/4 filesystems do too. Use the following command to check ext* formatted partitions for the option:
tune2fs -l /dev/sda1 | grep "Default mount options:"
>Default mount options:    user_xattr acl
You can set the default mount options of a filesystem using the tune2fs -o option partition command, for example:
tune2fs -o acl /dev/sda1Using the default mount options instead of an entry in /etc/fstab is very useful for external drives, such partition will be mounted with acl option also on other Linux machines. There is no need to edit /etc/fstab on every machine.
Note: "acl" is specified as default mount option when creating an ext2/3/4 filesystem. This is configured in /etc/mke2fs.conf.
-
If necessary, remount partition(s) on which ACLs were enabled for them to take effect:
sudo mount -o remount / -
Verify that ACLs are enabled on the partition(s):
mount | grep acl
ACL entries consist of a user (u), group (g), other (o) and an effective rights mask (m). An effective rights mask defines the most restrictive level of permissions. setfacl sets the permissions for a given file or directory. getfacl shows the permissions for a given file or directory.
Defaults for a given object can be defined.
ACLs can be applied to users or groups but it is easier to manage groups. Groups scale better than continuously adding or subtracting users.
You will notice that there is an ACL for a given file because it will exhibit a + (plus sign) after its Unix permissions in the output of ls -l:
ls -l /dev/audio
>crw-rw----+ 1 root audio 14, 4 nov.   9 12:49 /dev/audio
To list the ACLs for a given file or directory: getfacl <file-or-dir>
To set permissions for a user (user is either the user name or ID): setfacl -m "u:user:permissions" <file/dir>
To set permissions for a group (group is either the group name or ID): setfacl -m "g:group:permissions" <file/dir>
To set permissions for others: setfacl -m "other:permissions" <file/dir>
Removing a Group from an ACL: setfacl -x g:green /var/www
Transfer ACL attributes from a specification file:
echo "g:green:rwx" > acl
setfacl -M acl /path/to/dir
Output from getfacl is accepted as input for setfacl with -M (-b clear ACLs, -n do not recalculate effective rights mask, - read from stdin): getfacl dir1 | setfacl -b -n -M - dir2
To copy the ACL of a file to another: getfacl file1 | setfacl --set-file=- file2
Copying the access ACL into the Default ACL of the sam dir: getfacl --access dir | setfacl -d -M- dir
To allow all newly created files or directories to inherit entries from the parent directory (this will not affect files which were already present in the directory, use -R to modify also these files): setfacl -d -m "entry" <dir>
Set ACL permissions recursively: setfacl -Rm u:foo:r-x dir
To remove a specific entry: setfacl -x "entry" <file/dir>
To remove the default entries: setfacl -k <file/dir>
To remove all entries (entries of the owner, group and others are retained): setfacl -b <file/dir>
File Attributes
In Linux, file attributes are meta-data properties that describe the file's behavior. For example, an attribute can indicate whether a file is compressed or specify if the file can be deleted.
Some attributes like immutability can be set or cleared, while others like encryption are read-only and can only be viewed. The support for certain attributes depends on the filesystem being used.
The chattr command takes the following general form:
chattr <options> <operator> <attributes> file
The value of the <operator> part can be one of the following symbols:
+, to add the specified attributes to the existing ones-, to remove the specified attributes from the existing ones=, to set the specified attributes as the only attributes.
The operator is followed by one or more <attributes> flags that you want to add or remove from the file attributes:
a, append onlyc, compressedd, no dumpe, extent formati, immutablej, data journallings, secure deletiont, no tail-mergingu, undeletableA, no atime updatesC, no copy on writeD, synchronous directory updatesS, synchronous updatesT, top of directory hierarchy.
Note: By default, file attributes are not preserved when copying a file with commands like cp or rsync.
For example, if you want to set the immutable bit on some file, use the following command:
chattr +i /path/to/file
You can view the file attributes with the lsattr command:
lsattr /path/to/file
>--------------e----- file
As the ls -l command, the -d option with lsattr will list the attributes of the directory itself instead of the files in that directory:
lsattr -d script-test/
>-------------e-- script-test/
Setup user and group disk quotas for filesystems
Storage space is a resource that must be carefully used and monitored. To do that, quotas can be set on a file system basis, either for individual users or for groups.
Thus, a limit is placed on the disk usage allowed for a given user or a specific group, and you can rest assured that your disks will not be filled to capacity by a careless (or malicious) user.
1. Installing the Quota Tools
To set and check quotas, we first need to install the quota command line tools using apt. Let's update our package list, then install the package:
sudo apt update
sudo apt install quota
2. Installing the Quota Kernel Module
You can verify that the tools are installed by running the quota command and asking for its version information: quota --version
If you are on a cloud-based virtual server, your default Ubuntu Linux installation may not have the kernel modules needed to support quota management. To check, we will use find to search for the quota_v1 and quota_v2 modules in the /lib/modules/... directory:
find /lib/modules/uname -r -type f -name '*quota_v*.ko*'
If you get no output from the above command, install the linux-image-extra-virtual package: sudo apt install linux-image-extra-virtual
3. Updating Filesystem Mount Options
To activate quotas on a particular filesystem, we need to mount it with a few quota-related options specified. We do this by updating the filesystem's entry in the /etc/fstab configuration file. Open that file in your favorite text editor now: sudo vi /etc/fstab
This file's contents will be similar to the following:
LABEL=cloudimg-rootfs   /        ext4   defaults        0 0
LABEL=UEFI      /boot/efi       vfat    defaults        0 0
Update the line pointing to the root filesystem by replacing the defaults option with the following options:
LABEL=cloudimg-rootfs / ext4 usrquota,grpquota 0 0
This change will allow us to enable both user- (usrquota) and group-based (grpquota) quotas on the filesystem. If you only need one or the other, you may leave out the unused option. If your fstab line already had some options listed instead of defaults, you should add the new options to the end of whatever is already there, being sure to separate all options with a comma and no spaces.
Remount the filesystem to make the new options take effect:
sudo mount -o remount /
We can verify that the new options were used to mount the filesystem by looking at the /proc/mounts file. Here, we use grep to show only the root filesystem entry in that file:
cat /proc/mounts | grep ' / '
>/dev/vda1 / ext4 rw,relatime,quota,usrquota,grpquota,data=ordered 0 0
Note the two options that we specified. Now that we've installed our tools and updated our filesystem options, we can turn on the quota system.
4. Enabling Quotas
Before finally turning on the quota system, we need to manually run the quotacheck command once: sudo quotacheck -ugm /
This command creates the files /aquota.user and /aquota.group. These files contain information about the limits and usage of the filesystem, and they need to exist before we turn on quota monitoring. The quotacheck parameters we've used are:
(-u), specifies that a user-based quota file should be created(-g), indicates that a group-based quota file should be created(-m), disables remounting the filesystem as read-only while performing the initial tallying of quotas. Remounting the filesystem as read-only will give more accurate results in case a user is actively saving files during the process, but is not necessary during this initial setup.
We can verify that the appropriate files were created by listing the root directory: ls /aquota*
Now we're ready to turn on the quota system: sudo quotaon -v /
Our server is now monitoring and enforcing quotas, but we've not set any yet!
5. Configuring Quotas for a User
There are a few ways we can set quotas for users or groups. Here, we'll go over how to set quotas with both the edquota and setquota commands.
5.1 Using edquota to Set a User Quota
We use the edquota command to edit quotas. Let's edit our example sammy user's quota: sudo edquota -u sammy
The -u option specifies that this is a user quota we'll be editing. If you'd like to edit a group's quota instead, use the -g option in its place.
This will open up a file in your default text editor:
Disk quotas for user sammy (uid 1000):
  Filesystem                   blocks       soft       hard     inodes     soft     hard
  /dev/vda1                        40          0          0         13        0        0
This lists the username and uid, the filesystems that have quotas enabled on them, and the block- and inode-based usage and limits. Setting an inode-based quota would limit how many files and directories a user can create, regardless of the amount of disk space they use. Most people will want block-based quotas, which specifically limit disk space usage. This is what we will configure.
Note: The concept of a block is poorly specified and can change depending on many factors, including which command line tool is reporting them. In the context of setting quotas on Ubuntu, it's fairly safe to assume that 1 block equals 1 kilobyte of disk space.
In the above listing, our user sammy is using 40 blocks, or 40KB of space on the /dev/vda1 drive. The soft and hard limits are both disabled with a 0 value.
Each type of quota allows you to set both a soft limit and a hard limit. When a user exceeds the soft limit, they are over quota, but they are not immediately prevented from consuming more space or inodes. Instead, some leeway is given: the user has – by default – seven days to get their disk use back under the soft limit. At the end of the seven day grace period, if the user is still over the soft limit it will be treated as a hard limit. A hard limit is less forgiving: all creation of new blocks or inodes is immediately halted when you hit the specified hard limit. This behaves as if the disk is completely out of space: writes will fail, temporary files will fail to be created, and the user will start to see warnings and errors while performing common tasks.
Let's update our sammy user to have a block quota with a 100MB soft limit, and a 110MB hard limit:
Disk quotas for user sammy (uid 1000):
  Filesystem                   blocks       soft       hard     inodes     soft     hard
  /dev/vda1                        40       100M       110M         13        0        0
Save and close the file. To check the new quota we can use the quota command:
sudo quota -vs sammy
>Disk quotas for user sammy (uid 1000):
>     Filesystem   space   quota   limit   grace   files   quota   limit   grace
>      /dev/vda1     40K    100M    110M              13       0       0
The command outputs our current quota status, and shows that our quota is 100M while our limit is 110M. This corresponds to the soft and hard limits respectively.
Note: If you want your users to be able to check their own quotas without having sudo access, you'll need to give them permission to read the quota files we created in Step 4. One way to do this would be to make a users group, make those files readable by the users group, and then make sure all your users are also placed in the group.
5.2 Using setquota to Set a User Quota
Unlike edquota, setquota will update our user's quota information in a single command, without an interactive editing step. We will specify the username and the soft and hard limits for both block- and inode-based quotas, and finally the filesystem to apply the quota to:
sudo setquota -u sammy 200M 220M 0 0 /
The above command will double sammy's block-based quota limits to 200 megabytes and 220 megabytes. The 0 0 for inode-based soft and hard limits indicates that they remain unset. This is required even if we're not setting any inode-based quotas.
Once again, use the quota command to check our work:
sudo quota -vs sammy
>Disk quotas for user sammy (uid 1000):
>     Filesystem   space   quota   limit   grace   files   quota   limit   grace
>      /dev/vda1     40K    200M    220M              13       0       0
6. Generating Quota Reports
To generate a report on current quota usage for all users on a particular filesystem, use the repquota command:
>sudo repquota -s /
>Output
>*** Report for user quotas on device /dev/vda1
>Block grace time: 7days; Inode grace time: 7days
>                        Space limits                File limits
>User            used    soft    hard  grace    used  soft  hard  grace
>----------------------------------------------------------------------
>root      --   1696M      0K      0K          75018     0     0
>daemon    --     64K      0K      0K              4     0     0
>man       --   1048K      0K      0K             81     0     0
>nobody    --   7664K      0K      0K              3     0     0
>syslog    --   2376K      0K      0K             12     0     0
>sammy     --     40K    100M    110M             13     0     0
In this instance we're generating a report for the / root filesystem. The -s command tells repquota to use human-readable numbers when possible. There are a few system users listed, which probably have no quotas set by default. Our user sammy is listed at the bottom, with the amounts used and soft and hard limits.
Also note the Block grace time: 7days callout, and the grace column. If our user was over the soft limit, the grace column would show how much time they had left to get back under the limit.
7. Configuring a Grace Period for Overages
We can configure the period of time where a user is allowed to float above the soft limit. We use the setquota command to do so:
sudo setquota -t 864000 864000 /
The above command sets both the block and inode grace times to 864000 seconds, or 10 days. This setting applies to all users, and both values must be provided even if you don't use both types of quota (block vs. inode).
Note: The values must be specified in seconds.
Run repquota again to check that the changes took effect:
sudo repquota -s /
The changes should be reflected immediately in the repquota output.
Create and configure file systems
1. Create a Partition
Before creating a file system, make sure you have enough unallocated disk space (or free cylinders).
Check disk space: sudo fdisk -l
Create a partition on the hard drive which has enough free space:
sudo fdisk /dev/sda
>Press n
>Press p
>Press “Enter” for default starting cylinder”
>Enter 100MB+
>Now Change the partition type to 83 and finally reboot the system.
2. Set Disk Label on the partition
Set a disk label named datafiles for the disk partition:
sudo e2label /dev/sda3 datafiles
# or, equally
tune2fs -L datafiles /dev/sda3
3. Create a filesystem
In Linux, you can create filesystem using mkfs, mkfs.ext2, mkfs.ext3, mkfs.ext4, mke4fs or mkfs.xfs commands.
Create an ext4 filesystem on the '/dev/sda3' disk partition: sudo mkfs.ext4 /dev/sda3
4. Mounting a Filesystem
The most commonly used method for mounting the filesystem is either manually using mount command or by adding entries in /etc/fstab file, so that filesystem gets mounted during boot time: sudo mount /dev/sda3 /data
You can verify by executing the following command:
sudo mount | grep -i sda3
>/dev/sda3 on /data type ext4 (rw)
You can run df -h or lsblk command to get mounted device information such as mount point, filesystem size, etc.
5. Configure a filesystem
Note: It is not recommend to run tune2fs on a mounted file system.
To convert an ext2 file system to ext3, enter: tune2fs -j <block_device>
The most commonly used options to tune2fs are:
-c(max-mount-counts), to adjust the maximum mount count between two file system checks-C(mount-count), to set the number of times the file system has been mounted-i n[d|m|w](interval-between-checks), to adjust the maximum time between two file system checks-m(reserved-blocks-percentage), to set the percentage of reserved file system blocks-r(reserved-blocks-count) to set the number of reserved file system blocks-L(volume-label), to set the volume label of the filesystem.
Use the tune2fs command to adjust various tunable file system parameters on ext2, ext3, and ext4 file systems. Current values are displayed by using the -l option: tune2fs –l /dev/xvda1
Alternatively, use the dumpe2fs command to display file system parameters: dumpe2fs /dev/xvda1
Note: The xfs_admin command is the rough equivalent of tune2fs for XFS file systems.
7. Bonus/Miscellanea - 0%
- bash
- git
- vi(m) (WIP)
- tmux (WIP)
- Repair the GRUB from live CD or USB stick
- Install a CA certificate
- Create a self-signed SSL certificate for Apache web server
- Debugging TLS handshake issues
- DNS essentials
- Network-Manager
- SSH-tunneling
- Debugging corrupted character encoding issues
- How to test a microphone
- Automate login via SSH
- How to fix low screen resolution
- Chroot jails (WIP)
- How to use Linux's built-in USB attack protection (WIP)
- Repair a usb drive (WIP)
- Disable ssh-login as root via PAM (WIP)
- Makefile & GNU Autotools (WIP)
- Manage your dotfiles with GNU stow (WIP)
- Alpine e-mail setup (WIP)
- GPG & SSH keys (WIP)
- Troubleshooting networks (WIP)
- How to handle dynamic and static libraries in Linux (WIP)
- Non-Free Firmware for Debian
- How to fix Nvidia graphics card problems
- Making a Linux home server sleep on idle and wake on demand (WIP)
bash
Variables have a dual nature since eache variable is also an array.
To define a variable, simply: foo=42
To reference the value of a variable: echo $foo
To remove a variable= unset foo
To assign a value which contains spaces, quote it: foo="x j z"
Since every variable is an array, the variable itself is an implicit reference to the first index (0), so:
echo $foo
# equals to
echo ${foo[0]}
Note: Wrap the variable into curly braces for variable/array manipulation.
You can declare an array with explicitly or with parenthes:
declare -a array_name
array_name[index_1]=value_1
array_name[index_2]=value_2
array_name[index_n]=value_n
# or
array_name=(value_1, value_2, value_n)
To access all elements in an array:
echo ${array[@]}
# or
echo ${array[*]}
To copy an array: copy=("${array[@]}")
Note: double quotes are needed for values conaining white spaces.
Special variables for grabbing arguments in functions and scripts:
$0 # script or shell name
$[1-9] # print the nth arg (1 <= n <= 9)
$# # the number of args
$@ # all args passed
$* # same, but with a subtle difference, see below
$? # exit status of the previously run command (if !=0, it's an error)
$$ # PID of the current shell
$! # PID of the most recently backgrounded process
Note: To know if you are in a subshell:
echo $SHLVL
bash can operate on the value of a variable while deferencing that same variable:
foo="I'm a cat"
echo ${foo/cat/dog}
To replace all instances of a string: echo ${foo//cat/dog}
Note: a replacement operation does not modify the value of the variable.
To delete a substring: echo ${foo/cat}
# and ## remove the shortest and longest prefix of a variable matching a certain pattern:
path="/usr/bin:/bin:/sbin"
echo ${path#/usr} # prints out "/bin:/bin:/sbin"
echo ${path#*/bin} # prints out ":/bin:/sbin"
echo ${path##*/bin} # prints out ":/sbin"
Similarly, % is used for suffuxes.
bash operators operate on both strings and array, so avoid common mistakes such as:
echo ${#array} # wrong: prints out the length of the first element of the array (chars in a string)
echo ${#array[@]} # right: prints out the size of the array
To slice strings and arrays:
echo ${string:6:3} # the first num is the start index, the second one is the size of slice
echo ${array[@]:3:2}
Existence testing operators:
echo ${username-defualt} # prints "default" if username var in unset
echo ${username:-defualt} # checks both for existence and emptiness
echo ${unsetvar:=resetvar} # like "-", but sets the var if it doesn't have a value
echo ${foo+42} # prints "42" if foo is set
echo ${foo?failure: no args} # crashes the program with the given message, if the var is unset
! operator is used for indirect lookup or (indirect reference):
foo=bar
bar=42
echo ${!foo} # print $bar, that is "42"
similarly, with arrays:
letters=(a b c d e)
char=letters[1]
echo ${!char} # prints "b"
As to string declaration, you can use:
- single quotes (
') for literal strings - double quotes (
") for interpolated strings
Mathematical expressions can be declared as follows:
echo $((3 + 3))
# or
((x = 3 + 3)); echo $x
To explicitly declare an integer variable:
declare -i number
number=2+4*10
To dump textual content directly into stdin:
# a file
grep [pattern] < myfile.txt
# a string
grep [pattern] <<< "this is a string"
# a here-document
grep [pattern] <<EOF
first line
second line
etc
EOF
The notation M>&N redirects the output of channel M to channel N, e.g. to redirect stderr to stdout: 2>&1
Note: in bash,
&>equals to2>&1.
Note:
>is the same as1>.
To learn more about redirections, look here.
Capturing stdout can be accomplished as:
echo `date`
# or
echo $(date)
Process substitution involves expanding output of a command into a temporary file which can be read from a command which expects a file to be passed:
cat <(uptime)
# which works as
uptime | cat
wait command waits for a PID's associated process to terminate, but without a PID it waits for all child processes to finish (e.g, it can be used after multiple processes are launched in a for loop):
time-consuming-command &
pid=$!
wait $pid
echo Process $pid finished!
for f in *.jpg
do
convert $f ${f%.jpg}.png &
done
wait
echo All images have been converted!
Glob patterns are automatically expanded to an array of matching strings:
*, any string?, a single char[aGfz], any char between square brackets[a-d], any char betweenaandd
Brace expansion is used to expand elements inside curly braces into a set or sequence:
mkdir /opt/{zotero, skype, office}
# or
echo {0..10}
Control Structures
Conditions are expressed as a command (such as test) whose exit status is mapped to true/false (0/non-zero):
if http -k start
then
echo OK
else
echo KO
fi
# or
if [ "$1" = "-v" ]
then
echo "switching to verbose output"
fi
Note: An alternative syntax for
test [args]is[args].
Tip: Double brackets are safer than single brackets:
[ $a = $b ] # will fail if one of the two variables is empty or contains a whitespace
[ "$a" = "$b" ] # you have to double-quote them to avoid this problem
[[ $a = $b ]] # this instead won't fail
Tip: Additionally, double brackets support:
[[ $a = ?at ]] # glob patterns
[[ $a < $b ]] # lexicographical comparison
[[ $a =~ ^.at ]] # regex patterns with the operator "=~"
To learn more, look here.
Iterations are declared as follows.
while [command]; do [command]; done
# or
for [var] in [array]; do [command]; done
Subroutine (functions) act almost like a separate script. They can see and modify variable defined in the outer scope:
funcion <name> {
# commands
}
# or
<name> () {
# commands
}
Array syntax
arr=() # creates an empty array
arr=(1 2 3) # creates and initializes an array
${arr[2]} # retrieves the 3rd element
${arr[@]} # retrieves all element
${!arr[@]} # retrieves array indices
${#arr[@]} # get array size
arr[0]=3 # overwrites first element
arr+=(4) # appends a value
arr=($(ls)) # saves ls output as an array of filenames
${arr[@]:s:n} # retieves [n] elements starting at index [s]
Note: Beware of array quirks when using
@vs.*:
*combines all args into a single string, while@requotes the individual args- if the var IFS (internal field separator) is set, then elements in
$*are separated by this deimiter value.
Test flag operators
# boolean conditions
-a # &&
-o # ||
# integer comparison
-eq # "equals to"
-ne # "not equal"
-gt # >
-ge # >=
-lt # <
-le # <=
# string comparison
=
== # the pattern is literal if within double brackets and variables/string are within double quotes
!=
< # alphabetical order
> # must be escaped if within single brackets, e.g. "\>"
-z # string is null
-n # string is not null
# file test
-e # file exists
-f # file is a regular file
-d # is a directory
-h/-L # is a symlink
-s # is not zero-size
-r # has read permissions
-w # has write permissions
-x # has execute permissions
-u # SUDI bit is active
-g # SGID bit is active
-k # sticky bit is active
-nt/ot # is newer/older than
To create a simple script:
- put a shebang at the very first line:
#!/bin/bash - write your stuff afterwards
- execute the script from its path (i.e
./script.sh) or sourcing it (i.e.source script.sh)
Note: When you execute the script you are opening a new shell, type the commands in the new shell, copy the output back to your current shell, then close the new shell. Any changes to environment will take effect only in the new shell and will be lost once the new shell is closed. When you
sourcethe script you are typing the commands in your current shell. Any changes to the environment will take effect and stay in your current shell.
Note: source is a synonym for dot operator (i.e. '.') in bash, but not in POSIX sh, so for maximum compatibility use the period: so,
source filename [arguments]is just like. filename [arguments]
References and further reading:
- This refresher is mostly based on a nice guide written by Matt Might.
- You can find here a huge collection of bash gems.
- For the source vs dot operator, see here
git
General
Initialize a directory as a git repository hosted on GitHub:
touch README.md
git init
git add README.md
git commit -m "first commit"
git remote add origin https://github.com/{user-name}/{repository-name}.git
git push -u origin main
Create a minimal configuration for git in your ~/.gitconfig:
[user]
name = [username]
email = [email-address]
# choose a difftool
[diff]
guitool = meld
[difftool "meld"]
cmd = meld \"$REMOTE\" \"$LOCAL\" --label \"DIFF (ORIGINAL MY)\"
# choose a mergetool
[merge]
tool = meld
[mergetool "meld"]
cmd = meld \"$LOCAL\" \"$MERGED\" \"$REMOTE\" --output \"$MERGED\"
# store your credentials in a plain-text file
[credential]
helper = store --file ~/.gitcredentials
# choose a default editor
[core]
editor = vi
Show all configuration settings and their location: git config --show-origin --list
Undo
Undo an already pushed commit recording a new commit: git revert [<commit>]
Note that it only reverts that specific commit and not commits after that. If you want to revert a range of commits, you can do it like this:
git revert [<oldest_commit_hash>]^..[<latest_commit_hash>]
Note: The
^in the previous command is required as the first end of the interval is not inclusive.
To undo a pushed merge: git revert -m 1 [<merge-commit-hash>]
The -m 1 option tells Git that we want to keep the left side of the merge (which is the branch we had merged into). When you view a merge commit in the output of git log, you will see its parents listed on the line that begins with Merge:
commit 8f937c683929b08379097828c8a04350b9b8e183
Merge: 8989ee0 7c6b236
Author: Ben James <ben@example.com>
Date: Wed Aug 17 22:49:41 2011 +0100
Merge branch 'gh-pages'
In this situation, git revert 8f937c6 -m 1 will get you the tree as it was in 8989ee0, and git revert -m 2 will reinstate the tree as it was in 7c6b236.
Reverting a revert commit may seem unlikely, but it's actually common when you need for example to create a PR of a feature branch which was merged but then reverted:
# fix your code in the feature branch
$ git commit -m "fixed issues in feature-branch'
# create a new branch tracking the target branch of the PR (e.g. develop)
$ git checkout -b revert-the-revert-branch -t develop
# revert the reversion commit by its hash
# you can find find it by inspecting the changelog
# e.g.: 'git log | grep -C5 revert | head'
$ git revert <revert-commit-hash>
# checkout the original feature branch
$ git checkout feature-branch
# merge the revert branch into it
$ git merge revert-the-revert-branch
# resolve the eventual conflicts, commit and recreate the PR
To throw away not yet pushed changes in your working directory, use instead:
git reset [--soft | --mixed | --hard ] [<commit>]

Typically, to discard all recent changes resetting the HEAD to the previous commit: git reset --hard HEAD^
Alternatively, to reset the current local branch to a particular point in time:
git reset --hard master@{"10 minutes ago"}
Remove a file from the staging area: git restore --staged [<filepath>]
Undo modifications on the working tree (restore files from latest commited version): git checkout -- index.html
Restore file from a custom commit (in current branch): git checkout 6eb715d -- index.html
Remove files from the working tree and the index: git rm index.html
Remove file only from the index: git rm --cached index.html
If you have inadvertently pushed sensitive data or something else that you regret, you can clean up those files with BFG, a faster alternative to git-filter-branch.
Branch
Show all branches (including the remote ones): git branch -l -a
Create and switch to a new branch:git checkout -b [branchname]
Move to branch: git checkout [branchname]
Checkout to new branch tracking a remote one: git checkout --track origin/[branchname]
Rename branch: git branch -m [branchname] [new-branchname]
Delete merged branch (only possible if not HEAD): git branch -d [branch-to-delete]
Delete not merged branch: git branch -D [branch-to-delete]
Delete remote branch: git push origin --delete [branch-to-delete]
List branches merged into the HEAD (i.e. tip of current branch): git branch --merged [branchname]
List branches that have not been merged:git branch --no-merged [branchname]
Note: By default this applies to only the local branches. The
-aflag will show both local and remote branches, and the-rflag shows only the remote branches.
Return to the previous branch (just as cd -): git checkout -
Merge
Merge branchname into the cuurent branch: git merge [branchname]
Stop merge (in case of conflicts): git merge --abort
Merge only one specific commit: git cherry-pick [073791e7]
Review the recent history interactively choosing if deleting some of the latest commits: git rebase -i HEAD~[N]
Stash
Show stash history: git stash list
Put a specific file into the stash: git stash push -m ["welcome_cart"] [app/views/cart/welcome.html]
View the content of the most recent stash commit: git stash show -p
View the content of an arbitrary stash: git stash show -p stash@{1}
Extract a single file from a stash commit:
git show stash@{0}:[full filename] > [newfile]
git show stash@{0}:[./relative filename] > [newfile]
Apply this stash commit on top of the working tree and remove it from the stash: git stash pop stash@{0}
Apply this stash commit on top of the working tree but do not remove it: git stash apply stash@{0}
Delete custom stash item: git stash drop stash@{0}
Delete complete stash: git stash clear
Log
Show commit logs: git log
Note: git log shows the current
HEADand its ancestry. That is, it prints the commitHEADpoints to, then its parent, its parent, and so on. It traverses back through the repo's ancestry, by recursively looking up each commit's parent.git reflogdoesn't traverseHEAD's ancestry at all. Thereflogis an ordered list of the commits thatHEADhas pointed to: it's undo history for your repo. The reflog isn't part of the repo itself (it's stored separately to the commits themselves) and isn't included in pushes, fetches or clones: it's purely local. Aside: understandingreflogmeans you can't really lose data from your repo once it's been committed. If you accidentally reset to an older commit, or rebase wrongly, or any other operation that visually "removes" commits, you can usereflogto see where you were before andgit reset --hardback to that ref to restore your previous state. Remember, refs imply not just the commit but the entire history behind it. (source)
Show only custom commits:
git log --author="Sven"
git log --grep="Message"
git log --until=2013-01-01
git log --since=2013-01-01
Show stats and summary of commits: git log --stat --summary
Show history of commits as graph-summary: git log --oneline --graph --all --decorate
A nice trick is to add some aliases in your ~/.gitconfig for using git log with a good combination of options, like:
[alias]
lg1 = log --graph --abbrev-commit --decorate --format=format:'%C(bold blue)%h%C(reset) - %C(bold green)(%ar)%C(reset) %C(white)%s%C(reset) %C(dim white)- %an%C(reset)%C(bold yellow)%d%C(reset)' --all
lg2 = log --graph --abbrev-commit --decorate --format=format:'%C(bold blue)%h%C(reset) - %C(bold cyan)%aD%C(reset) %C(bold green)(%ar)%C(reset)%C(bold yellow)%d%C(reset)%n'' %C(white)%s%C(reset) %C(dim white)- %an%C(reset)' --all
lg = !"git lg1"
Followh the commit history of a single file: git log --oneline -M --stat --follow -- src/somefile.ts
Compare
See lastest changes in a file: git diff [filename]
Compare modified files and highlight changes only: git diff --color-words [filename]
Compare modified files within the staging area: git diff --staged [filename]
Compare branches showing differences line by line: git diff [branch1]..[branch2]
Note: This command combined with the two-dot operator will show you all the commits that “branch2” has that are not in “branch1”. While if used with three dots it will compare the top of the right branch with the common ancestor of the two branches (see here).
Compare lines in a file bewtween two branches:
git diff [mybranch]..[master] -- [myfile.cs]
Get only the name of the files which are different in the two branches:
git diff –-name-only [mybranch]..[master]
To see the commit differences between two branches, use git log and specify the branches that you want to compare.
git log [branch1]..[branch2]
Note: This won't show you the actual file differences between the two branches but only the commits.
Compare commits:
git diff 6eb715d
git diff 6eb715d..HEAD
git diff 6eb715d..537a09f
Compare commits of file:
git diff 6eb715d [filename]
git diff 6eb715d..537a09f [filename]
Compare without caring about whitespaces:
git diff -b 6eb715d..HEAD
git diff --ignore-space-change 6eb715d..HEAD
This ignores differences even if one line has whitespace where the other line has none:
git diff -w 6eb715d..HEAD
git diff --ignore-all-space 6eb715d..HEAD
Show what revision and author last modified each line of a file: git blame -L10,+1 [filename]
Collaborate
Clone: git clone https://github.com/user/project.git
Clone to local folder: git clone https://github.com/user/project.git ~/dir/folder
Get everything ready to commit: git add .
Get custom file ready to commit: git add index.html
Commit changes: git commit -m "Message"
Commit changes with title and description: git commit -m "Title" -m "Description..."
Add and commit in one step: git commit -a -m "Message"
Rewrite the most recent not-pushed commit message: git commit --amend -m "New Message"
If the commit was pushed, it will take more steps to rewrite it:
- use
git rebase -i HEAD~nto display a list of the last nn commits in your default text editor - replace
pickwithrewordbefore each commit message that needs to be changed - save and close the commit list file
- in each resulting commit file, type the new commit message, save the file, and close it
- force push the amended commits using
git push --force.
Fetch all changes from the remote and remove deleted branches: git fetch -a -p
Push to a branch and set it as the default upstream: git push -u origin [master]
Pull a specific branch: git pull origin [branchname]
Resolve conflicts after attempted merge by means of a mergetool (see the config file above in the 'General' section): git mergetool
Sync a fork with original repository:
# Add a new remote repository with 'upstream' alias
git remote add upstream https://github.com/ORIGINAL_OWNER/ORIGINAL_REPOSITORY.git
# Sync your fork
git fetch upstream
git checkout master
git merge upstream/master
Ignore
Add a .gitignore file at the root of the repository to instruct git to not track specific file types or filepaths: vi .gitignore
You can create your own file from an online template generator: https://www.toptal.com/developers/gitignore
To check what gitignore rule is causing a particular path to be ignored, run git check-ignore:
git check-ignore -v [path/to/check]
Signing commits
Sign individual commits with:
git commit -s [..], to add aSigned-off-bytrailer by the committer at the end of the commit log message,git commit -S [<keyid>] [..], to sign the commit with a GPG key.
For the second option you will need to upload the public key to your git hosting service (e.g. GitHub) and configure git locally to use a default key:
git config [--global] user.signingkey <keyid>
git config [--global] commit.gpgsign true
To retrieve the id of an existing GPG key, run: gpg --list-secret-keys --keyid-format LONG. The key id is the alphanumeric string after the string sec rsaXXXX/ in the command output. Then you can use hte id to print out the public key: gpg --armor --export <keyid>.
Archive
Create a zip-archive: git archive --format zip --output filename.zip master
Security
To encrypt your private data inside a git repo: https://git-secret.io/
Large File Storage
To version large files (.wav, .pdf, etc) in a git repository: https://git-lfs.github.com/ (it's not free)
Add current branch name to bash prompt
Put the following lines in your .bashrc:
parse_git_branch() {
git branch 2> /dev/null | sed -e '/^[^*]/d' -e 's/* \(.*\)/(\1)/'
}
export PS1='\[\e]0;\u@\h: \w\a\]\[\033[01;32m\]\u@\h\[\033[00m\]:\[\033[01;34m\]\w\[\e[91m\]$(parse_git_branch)\[\033[00m\]\$ '
This should modify the prompt as follows:

PS1 is the primary prompt (in bash) which is displayed before each command, thus it is the one most people customize. In the lines above PS1 is set to a string composed of backslash-escaped characters that are expanded dynamically every time the prompt shows up.
Warning: Using double quotes (
") instead of single quotes (') will result in the functionparse_git_branchto be evaluated only once (when you first enter the git dir).
Resources to learn more:
Repair the GRUB from live CD or USB stick
-
Insert the bootable device and boot into Try Ubuntu mode
-
Find out you root partition by typing:
sudo fdisk -lorsudo blkid -
Mount you main partition:
sudo mount [/dev/sda2] /mnt
Note: If you have separate partitions for /boo, /var and /usr, repeat steps 2 and 3 to mount them to /mnt/boot, /mnt/var and /mnt/usr respectively
- Bind-mount pseudo-filesystems:
for i in /sys /proc /run /dev; do sudo mount --bind "$i" "/mnt/"$i"; done
Note: A bind mount is an alternate view of a directory tree. Classically, mounting creates a view of a storage device as a directory tree. A bind mount instead takes an existing directory tree and replicates it under a different point. The directories and files in the bind mount are the same as the original.
-
If Ubuntu was installed in EFI mode, use
sudo fdisk -l | grep -i efito find your EFI partition and then mount it:sudo mount [/dev/sda1] /mnt/boot/efi -
sudo chroot /mnt -
update-grub
If this doesnt't fix the GRUB, go on:
-
grub-install /dev/sda; update-grub -
I fthe EFI partition ha changed, you may need to update it in /etc/fstab accordingly
-
sudo reboot -
At this point, you should be able to boot normally (remember to unplug the bootable media).
Install a CA certificate
The PEM (originally, Privacy Enhanced Mail) format is the de facto file format for storing and sending cryptographic keys, certificates and other sensitive data:
-----BEGIN [label]-----
[base64-encoded binary data]
-----END [label]-----
PEM data is commonly stored in files with a .pem suffix, a .cer or .crt suffix (for certificates), or a .key suffix (for public or private keys). The label inside a PEM file ("CERTIFICATE", "CERTIFICATE REQUEST", "PRIVATE KEY" and "X509 CRL") represents the type of the data more accurately than the file suffix, since many different types of data can be saved in a .pem file:
A PEM file may contain multiple instances. For instance, an operating system might provide a file containing a list of trusted CA certificates, or a web server might be configured with a "chain" file containing an end-entity certificate plus a list of intermediate certificates.
Note: A certification authority (CA) is an entity that issues digital certificates (usually encoded in X.509 standard). A CA acts as a trusted third party—trusted both by the subject (owner) of the certificate and by the party relying upon the certificate.
Note: X.509 is a series of standards, while PEM is just X.509 object representation in a file (encoding). Literally any data can be represented in PEM format. Anything that can be converted to a byte array (and anything can be, because RAM is a very large byte array) can be represented in PEM format.
To install a new CA certificate in a server:
-
Get the root certificate in PEM format and name it with a .crt file extension.
-
Add the .crt file to the folder /usr/local/share/ca-certificates/.
-
Run:
update-ca-certificates -
Check if the .crt file has been concatenated to /etc/ssl/certs/ca-certificates.crt.
You can import CA certificates in one line by running:
sudo bash -c "echo -n | openssl s_client -showcerts -connect ${hostname}:${port} \
2>/dev/null | sed -ne '/-BEGIN CERTIFICATE-/,/-END CERTIFICATE-/p' \
>> `curl-config --ca`"
Note: You may need to install the following package: ``sudo apt-get install libcurl4-openssl-dev`
Chances are that you will face common issues like server certificate verification failed. CAfile: /etc/ssl/certs/ca-certificates.crt CRLfile: none when cloning a repository.
To solve such problems, first make sure first that you have certificates installed in /etc/ssl/certs.
If not, reinstall them: sudo apt-get install --reinstall ca-certificates
Since that package does not include root certificates, add them:
sudo mkdir /usr/local/share/ca-certificates/cacert.org
sudo wget -P /usr/local/share/ca-certificates/cacert.org http://www.cacert.org/certs/root.crt http://www.cacert.org/certs/class3.crt
sudo update-ca-certificates
Make sure your git configuration does reference those CA certs: git config --global http.sslCAinfo /etc/ssl/certs/ca-certificates.crt
Alternatively, to temporarily disable SSL: git config --global http.sslverify false
Note: Another cause of this problem might be that your clock might be off. Certificates are time sensitive. You might consider installing NTP to automatically sync the system time with trusted internet timeservers from the global NTP pool (see NTP guide in this repo).
Create a self-signed SSL certificate for Apache web server
- Prerequisites:
sudo apt install apache2
sudo ufw allow "Apache Full"
sudo a2enmod ssl
sudo systemctl restart apache2
- Generate the certificate:
sudo openssl req -x509 -nodes -days 365 -newkey rsa:2048 -keyout [/etc/ssl/private/apache-selfsigned.key] -out [/etc/ssl/certs/apache-selfsigned.crt]
Note:
-nodesis for skipping passphrase,-keyoutis for the private key destination, while-outfor the certificate destination.
- Configure Apache to use SSL:
vi /etc/apache2/sites-available/[your-domain-or-ip].conf
Insert into it:
<Virtual Host *:443>
ServerName [your-domain-or-ip]
DocumentRoot [/var/www/your-domain-or-ip]
SSLEngine on
SSLCertificateFile [/etc/ssl/certs/apache-selfsigned.crt]
SSLCertificateKeyFIle [/etc/ssl/private/apache-selfsigned.key]
</Virtual Host>
Note:
ServerNamemust match the Common Name you choose when creating the certificate.
- Add a stub web page:
mkdir [/var/www/your-domain-or-ip]
echo "<h1>it worked</h1>" > /var/www/[your-domain-or-ip]/index.html
- Enable the configuration:
sudo a2ensite [your-domain-or-ip].conf
sudo apache2ctl configtest
# if it prints out "syntax ok"
sudo systemctl reload apache2
-
Try to connect to your site with a browser: you should receive a warning since your certificate is not signed by any of its known certificate authorities.
-
Redirect http to https, adding to
[your-domain-or-ip].conf:
<Virtual Host *:80>
ServerName [your-domain-or-ip]
Redirect / https://[your-domain-or-ip]/
</Virtual Host>
- Re-test your configuration an restart apache daemon:
sudo apache2ctl configtest
sudo systemctl reload apache2
Debugging TLS handshake issues
TLS handshakes are a mechanism by which a client and server establish the trust and logistics required to secure their connection over the network.
Note: SSL is now-deprecated predecessor of TLS, but some people still tend to refer to the current implementation of the protocol with SSL for historical reasons.
This is a very orchestrated procedure and understanding the details of this can help understand why it often fails, which we intend to cover in the next section.
Typical steps in an TLS handshake are:
- Client provides a list of possible TLS version and cipher suites to use
- Server agrees on a particular TLS version and cipher suite, responding back with its certificate
- Client extracts the public key from the certificate responds back with an encrypted “pre-master key”
- Server decrypts the “pre-master key” using its private key
- Client and server compute a “shared secret” using the exchanged “pre-master key”
- Client and server exchange messages confirming the successful encryption and decryption using the “shared secret”
While most of the steps are the same for any SSL handshake, there is a subtle difference between one-way and two-way TLS: in the latter both the client and server must present and accept each other's public certificates before a successful connection can be established.
If you have issues with TLS handshakes while trying to comunicate with a server from a client app, e.g. a Java application, first find out what the server supports:
nmap --script ssl-enum-ciphers -p 443 my.server.com
To see then what your JVM supports, try to run you app with the VM argument -Djavax.net.debug=ssl:handshake:verbose
Comparing the outputs, you could see that the server and the JVM share some cipher suites, but they fail to agree on the TLS version. You can then either configure the server to support a cipher suite and the protocol version that the JVM supports too or instruct the JVM to use what the server expects: e.g you can run your Java application with a specific TLS version by means of -Dhttps.protocols=TLSv1.2.
TLS handshake failures in Java
Private and public keys are used in asymmetric encryption. A public key can have an associated certificate. A certificate is a document that verifies the identity of the person, organization or device claiming to own the public key. A certificate is typically digitally signed by the verifying party as proof.
In most cases, we use a keystore and a truststore when our application needs to communicate over SSL/TLS.
In disussions about Java the two terms like keystore and truststore are often used interchangeably since the same file can act as keystore as well as truststore: it's just a matter of pointing javax.net.ssl.keyStore and javax.net.ssl.trustStore properties to that file but there is a difference between keystore and truststore. Generally speaking, keystores hold keys that our application owns that we can use to prove the integrity of a message and the authenticity of the sender, say by signing payloads. A truststore is the opposite – while a keystore typically holds onto certificates that identify us, a truststore holds onto certificates that identify others.
Usually, these are password-protected files that sit on the same file system as our running application. The default format used for these files is JKS until Java 8.
Since Java 9, though, the default keystore format is PKCS12. The biggest difference between JKS and PKCS12 is that JKS is a format specific to Java, while PKCS12 is a standardized and language-neutral way of storing encrypted private keys and certificates.
Not only Java, but also Web browsers and and application servers (e.g. Tomcat) have a truststore which collects CA certificates which is queried each time a SSL/TLS connection is established: if the server doesn't respond with a certificate issued by a recognized authority an exception is thrown (e.g javax.net.ssl.SSLHandshakeException). If you trust its certificate nevertheless, you can import it into the client truststore. For example, Java has bundled a truststore called cacerts and it resides in the $JAVA_HOME/jre/lib/security directory:
-
get the root certificate in PEM format
-
convert it to the DER format:
openssl x509 -in [ca.pem] -inform pem -out [ca.der] -outform der -
validate the root certificate content:
keytool -v -printcert -file [ca.cert] -
import the root certificate into the JVM truststore:
keytool -importcert -alias [startssl] -keystore $JAVA_HOME/jre/lib/security/cacerts -storepass [changeit] -file [ca.der]
Note:
changeitis the default password for the JVM truststore, you should use a new one for a application deployed in production.
- verify that the root certificate has been imported:
keystore -keystore $JAVA_HOME/jre/lib/security/cacerts -storepass [changeit] -list | grep [startssl]
You can learn more on the most frequent handshake failure scenarios in Java here.
How DNS Works
DNS is a global system for translating IP addresses to human-readable domain names. When a user tries to access a web address like "example.com", their web browser or application performs a DNS Query against a DNS server, supplying the hostname. The DNS server takes the hostname and resolves it into a numeric IP address, which the web browser can connect to.
A component called a DNS Resolver is responsible for checking if the hostname is available in local cache, and if not, contacts a series of DNS Name Servers, until eventually it receives the IP of the service the user is trying to reach, and returns it to the browser or application. This usually takes less than a second.
DNS Types: 3 DNS Query Types
There are three types of queries in the DNS system:
- Recursive Query
In a recursive query, a DNS client provides a hostname, and the DNS Resolver "must" provide an answer—it responds with either a relevant resource record, or an error message if it can't be found. The resolver starts a recursive query process, starting from the DNS Root Server, until it finds the Authoritative Name Server (for more on Authoritative Name Servers see DNS Server Types below) that holds the IP address and other information for the requested hostname.
- Iterative Query
In an iterative query, a DNS client provides a hostname, and the DNS Resolver returns the best answer it can. If the DNS resolver has the relevant DNS records in its cache, it returns them. If not, it refers the DNS client to the Root Server, or another Authoritative Name Server which is nearest to the required DNS zone. The DNS client must then repeat the query directly against the DNS server it was referred to.
- Non-Recursive Query
A non-recursive query is a query in which the DNS Resolver already knows the answer. It either immediately returns a DNS record because it already stores it in local cache, or queries a DNS Name Server which is authoritative for the record, meaning it definitely holds the correct IP for that hostname. In both cases, there is no need for additional rounds of queries (like in recursive or iterative queries). Rather, a response is immediately returned to the client.
DNS Types: 3 Types of DNS Servers
The following are the most common DNS server types that are used to resolve hostnames into IP addresses:
- DNS Resolver
A DNS resolver (recursive resolver), is designed to receive DNS queries, which include a human-readable hostname such as "www.example.com", and is responsible for tracking the IP address for that hostname
- DNS Root Server
The root server is the first step in the journey from hostname to IP address. The DNS Root Server extracts the Top Level Domain (TLD) from the user's query — for example, www.example.com —... provides details for the .com TLD Name Server. In turn, that server will provide details for domains with the .com DNS zone, including "example.com".
There are 13 root servers worldwide, indicated by the letters A through M, operated by organizations like the Internet Systems Consortium, Verisign, ICANN, the University of Maryland, and the U.S. Army Research Lab.
- Authoritative DNS Server
Higher level servers in the DNS hierarchy define which DNS server is the "authoritative" name server for a specific hostname, meaning that it holds the up-to-date information for that hostname.
The Authoritative Name Server is the last stop in the name server query—it takes the hostname and returns the correct IP address to the DNS Resolver (or if it cannot find the domain, returns the message NXDOMAIN).
DNS Types: 10 Top DNS Record Types
DNS servers create a DNS record to provide important information about a domain or hostname, particularly its current IP address. The most common DNS record types are:
- Address Mapping record (A Record)—also known as a DNS host record, stores a hostname and its corresponding IPv4 address.
- IP Version 6 Address record (AAAA Record)—stores a hostname and its corresponding IPv6 address.
- Canonical Name record (CNAME Record)—can be used to alias a hostname to another hostname. When a DNS client requests a record that contains a CNAME, which points- to another hostname, the DNS resolution process is repeated with the new hostname.
- Mail exchanger record (MX Record)—specifies an SMTP email server for the domain, used to route outgoing emails to an email server.
- Name Server records (NS Record)—specifies that a DNS Zone, such as "example.com" is delegated to a specific Authoritative Name Server, and provides the address- of the name server.
- Reverse-lookup Pointer records (PTR Record)—allows a DNS resolver to provide an IP address and receive a hostname (reverse DNS lookup).
- Certificate record (CERT Record)—stores encryption certificates—PKIX, SPKI, PGP, and so on.
- Service Location (SRV Record)—a service location record, like MX but for other communication protocols.
- Text Record (TXT Record)—typically carries machine-readable data such as opportunistic encryption, sender policy framework, DKIM, DMARC, etc.
- Start of Authority (SOA Record)—this record appears at the beginning of a DNS zone file, and indicates the Authoritative Name Server for the current DNS zone,- contact details for the domain administrator, domain serial number, and information on how frequently DNS information for this zone should be refreshed.
DNS Can Do Much More
Now that's we've covered the major types of traditional DNS infrastructure, you should know that DNS can be more than just the "plumbing" of the Internet. Advanced DNS solutions can help do some amazing things, including:
- Global server load balancing (GSLB): fast routing of connections between globally distributed data centers
- Multi CDN: routing users to the CDN that will provide the best experience
- Geographical routing: identifying the physical location of each user and ensuring they are routed to the nearest possible resource
- Data center and cloud migration: moving traffic in a controlled manner from on-premise resources to cloud resources
- Internet traffic management: reducing network congestion and ensuring traffic flows to the appropriate resource in an optimal manner
DNS search domains
A search domain is a domain used as part of a domain search list. The domain search list, as well as the local domain name, is used by a resolver to create a fully qualified domain name (FQDN) from a relative name. For this purpose, the local domain name functions as a single-item search list.
DNS search domains are used to go from a machine name to a Fully Qualified Domain Name.
DNS searches can only look at a Fully Qualified Domain Name, such as mymachine.example.com. But, it's a pain to type out mymachine.example.com, you want to be able to just type mymachine.
Using Search Domains is the mechanism to do this. If you type a name that does not end with a period, it knows it needs to add the search domains for the lookup. So, lets say your Search Domains list was: example.org, example.com.
With mymachine it would try first mymachine.example.org, not find it, then try mymachine.example.com, found it, now done.
With mymachine.example.com it would try mymachine.example.com.example.org (remember, it doesn't end with a period, still adds domains), fail, then mymachine.example.com.example.com, not find it, fall back to mymachine.example.com, found it, now done.
mymachine.example.com. ends with a period, no searching, just do mymachine.example.com.
So, if you have your own DNS domain such as example.com, put it there. If not, ignore it. It really is more corporate than a home setting.
Network-Manager
The point of NetworkManager is to make networking configuration and setup as painless and automatic as possible. If using DHCP, NetworkManager is intended to replace default routes, obtain IP addresses from a DHCP server and change nameservers whenever it sees fit. In effect, the goal of NetworkManager is to make networking Just Work.
The computer should use the wired network connection when it's plugged in, but automatically switch to a wireless connection when the user unplugs it and walks away from the desk. Likewise, when the user plugs the computer back in, the computer should switch back to the wired connection. The user should, most times, not even notice that their connection has been managed for them; they should simply see uninterrupted network connectivity.
NetworkManager is composed of two layers:
- a daemon running as root:
network-manager. - a front-end:
nmcliandnmtui(enclosed in package network-manager),nm-tray,network-manager-gnome(nm-applet),plasma-nm.
Start network manager: sudo systemctl start network-manager
Enable starting the network manager when the system boots: sudo systemctl enable network-manager
Depending on the Netplan backend in use (desktop or server:
sudo systemctl [start|restart|stop|status] [network-manager|system-networkd]
Use nmcli to manage the former, and networkctl for the latter.
Establish a wifi connection:
nmcli d # determine the name of the wifi interface
nmcli r wifi on # make sure wifi radio is on
nmcli d wifi list # list available wifi connections
nmcli d wifi connect <some-wifi> password <pwd> # connect to an access point
SSH-tunneling
SSH-tunneling (or port forwarding, PF) is a method for creating an encrypted SSH connection between a client and a server machine through which services port can be relayed. There are three types of SSH-tunneling:
- local (LPF), allows you to forward a port on the local (ssh client) machine to a port on the remote (ssh server) machine, which is then forwarded to a port on the destination machine, and is mostly used to connect to a service (e.g. a database) available on an internal network
- remote (RPF), allows you to forward a port on the remote (ssh server) machine to a port on the local (ssh client) machine, which is then forwarded to a port on the destination machine, and is often used to give access to an internal service to someone from the outside (e.g. to show a preview of a webappp hosted on your local machine to your colleague)
- dynamic (DPF), allows you to create a socket on the local (ssh client) machine, which acts as a SOCKS proxy server.
Local Port-Forwarding (LPF)
To create a LPF:
ssh -L [local-ip:]local-port:destination-ip:destination-port [user@]ssh-server
# if local-ip is omitted, it defaults to localhost
# e.g
# ssh -L 3336:db-hostname:3336 user@intermediate-host
# but if the destination host is the same as the ssh server used to access it, simply
# ssh -L 3336:localhost:3336 -N -f user@db-hostname
# -L, specifies that connections to the given TCP port or Unix socket on the local (client) host are to be forwarded to the given host and port, or Unix socket, on the remote side
# -N, disallows execution of remote commands, useful for just forwarding ports
# -f, forks the process to background
Note: Make sure 'AllowTcpForwarding' is not set to 'no' in the remote ssh server configuration.
Remote Port-Forwarding (RPF)
To create a RPF:
ssh -R [remote-ip:]remote-port:dest-ip:dest-port [user@]ssh-server
# e.g.
# ssh -R 8080:localhost:3000 -N -f user@ssh-server-ip
# -R, specifies that connections to the given TCP port or Unix socket on the remote (server) host are to be forwarded to the local side
# -N, disallows execution of remote commands, useful for just forwarding ports
# -f, forks the process to background
The ssh server will listen on 8080, tunneling all traffic from this port to your local port 3000, so that your colleagues can access your webapp at ssh-server-ip:8080.
Note: Make sure 'GatewayPorts' is set to 'yes' in the remote ssh server configuration.
Dynamic Port-Forwarding (DPF)
In this configuration, the SSH server acts as a SOCKS proxy, relaying all relevant traffic (including DNS name resolution) through the SSH connection. This is particularly useful when the client is on a network with limited access to the internet, for example, due to a VPN filtering your traffic (e.g. music streaming services suc as YouTube).
For this to happen, the client (e.g. a browser) needs to be SOCKS-aware.
To create a DPF:
ssh -D local-port -q -C -N -f [user@]ssh-server
# e.g.
# ssh -D 1080 -q -C -N -f user@ssh-server-ip
# -D 1080, opens a SOCKS proxy on local port 1080
# -C, compresses data in the tunnel, saves bandwidth
# -q, quiet mode, don’t output anything locally
# -N, disallows execution of remote commands, useful for just forwarding ports
# -f, forks the process to background
Then you can configure your client to use the SOCKS proxy. For example, you can configure proxy access to the internet in Firefox from the Setting menu as follows:
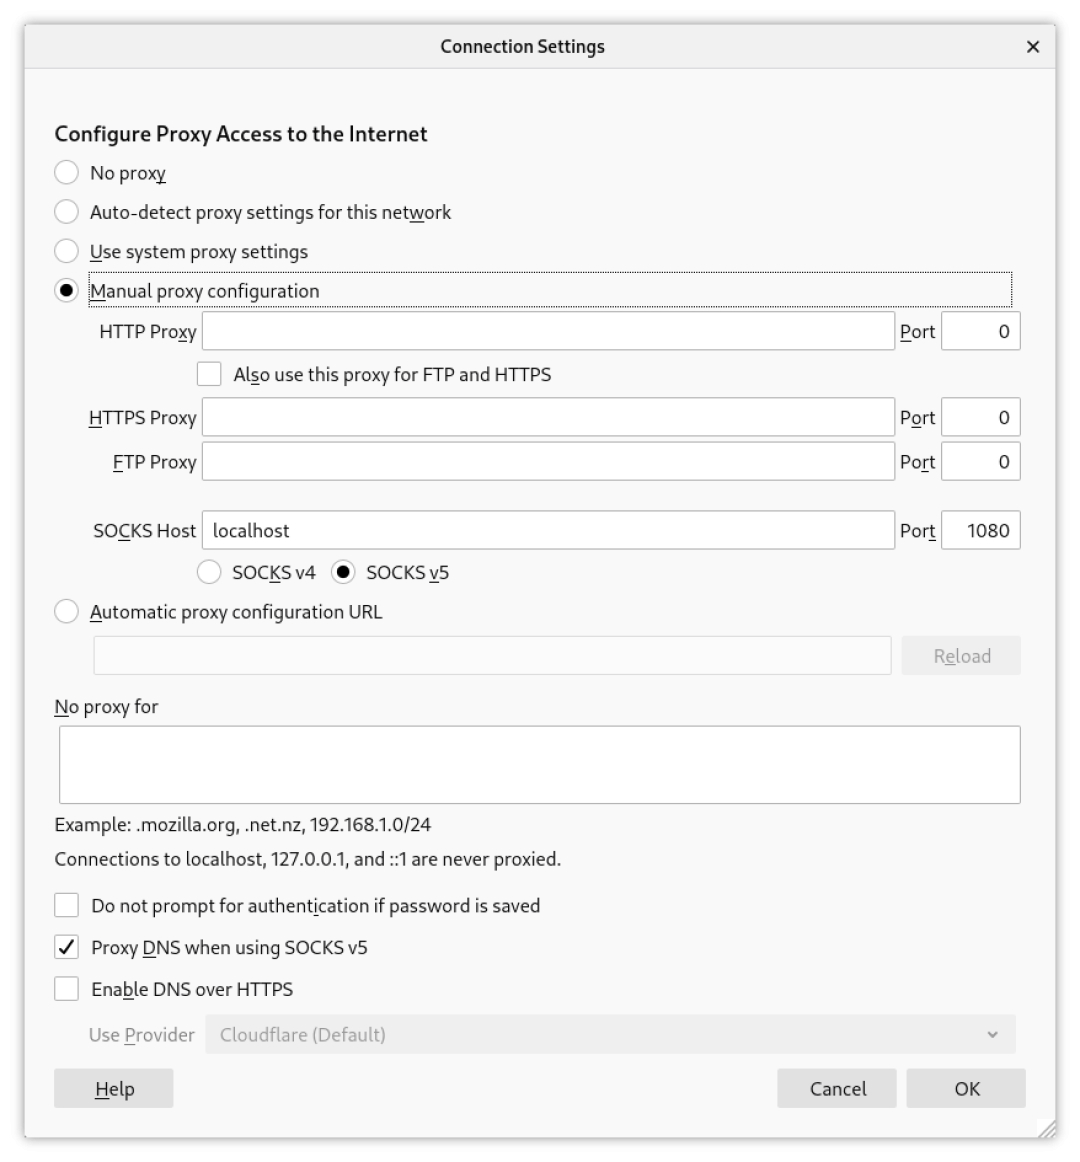
If you need to use this configuration often, you'd better off creating a specific browser profile in the Firefox Settings so that it's not necessary to constantly switch between proxy configurations. A new profile can be created by passing the -P flag to the firefox command, launching the Profile Manager:
$ firefox -P $PROXY_PROFILE_NAME
References:
- Create a SOCKS proxy on a Linux server with SSH to bypass content filters
- How to set up SSH dynamic port forwarding on Linux
Debugging corrupted character encoding issues
It may happen that you see corrupted text: scrambled, garbled, or displayed as "garbage" characters. Let's say, your application (server) receives a JSON request with some corrupted chars. For example, it could use a different character encoding (UTF-8 vs. ISO-8859-1) than the client it is communicating with.
It can be useful to generate a hexadecimal view of such request, usually referred to as hex dump, (using commands like hexdump, od or xxd) in order to debug such issues looking at the lower-level representation of a text:
:~$ xxd -p <<<{"badv":[],"bcat":[],"device":{"dnt":0,"geo":{"city":"WICHITA","country":"USA","lat":37.68978,"lon":-97.34148,"metro":"678","region":"KS","type":2,"zip":"67212"},"ip":"68.107.183.251","language":"es","os":"WINDOWS","osv":"WINDOWS7","ua":"Mozilla/5.0 (Windows NT 6.1; WOW64; rv:39.0) Gecko/20100101 Firefox/39.0"},"id":"WpkAxTdf5ThP","imp":[{"banner":{"battr":[],"btype":[],"ext":{},"h":250,"pos":3,"topframe":0,"w":300},"bidfloorcur":"USD","id":"WpkAxTdf5ThP","instl":0,"secure":0,"tagid":"302868"}],"site":{"cat":[],"domain":"diario.mx","id":"100017","keywords":"diari,hrs,york,local,tim,new,nacional,chihuahu,paso,vide,the,reform,duart,ciudad,servic,puent,news,mexican,medi,espectacul,york_tim,new_york,the_new,tim_news,servic_21,news_servic,septiembr_2015,ju�_rez,diari_18,associated_press,victor_orozc","page":"http://diario.mx/Nvo_Casas_Grandes/2015-10-01_f2c710fc/realizan-el-segundo-computo-de-las-candidatas/","pagecat":["IAB20"],"publisher":{"domain":"diario.mx","id":"558393"},"ref":"http://diario.mx/Nvo_Casas_Grandes/"},"tmax":125,"user":{"ext":{},"id":"xutRfr-GoxxU-RAOQ_ehzA"}}| tr -d '\n'
7b626164763a5b5d2c626361743a5b5d2c6465766963653a7b646e743a302c67656f3a7b636974793a574943484954412c636f756e7472793a5553412c6c61743a33372e36383937382c6c6f6e3a2d39372e33343134382c6d6574726f3a3637382c726567696f6e3a4b532c747970653a322c7a69703a36373231327d2c69703a36382e3130372e3138332e3235312c6c616e67756167653a65732c6f733a57494e444f57532c6f73763a57494e444f5753372c75613a4d6f7a696c6c612f352e30202857696e646f7773204e5420362e313b20574f5736343b2072763a33392e3029204765636b6f2f32303130303130312046697265666f782f33392e307d2c69643a57706b4178546466355468502c696d703a5b7b62616e6e65723a7b62617474723a5b5d2c62747970653a5b5d2c6578743a7b7d2c683a3235302c706f733a332c746f706672616d653a302c773a3330307d2c626964666c6f6f726375723a5553442c69643a57706b4178546466355468502c696e73746c3a302c7365637572653a302c74616769643a3330323836387d5d2c736974653a7b6361743a5b5d2c646f6d61696e3a64696172696f2e6d782c69643a3130303031372c6b6579776f7264733a64696172692c6872732c796f726b2c6c6f63616c2c74696d2c6e65772c6e6163696f6e616c2c63686968756168752c7061736f2c766964652c7468652c7265666f726d2c64756172742c6369756461642c7365727669632c7075656e742c6e6577732c6d65786963616e2c6d6564692c6573706563746163756c2c796f726b5f74696d2c6e65775f796f726b2c7468655f6e65772c74696d5f6e6577732c7365727669635f32312c6e6577735f7365727669632c7365707469656d62725f323031352c6a75efbfbd5f72657a2c64696172695f31382c6173736f6369617465645f70726573732c766963746f725f6f726f7a632c706167653a687474703a2f2f64696172696f2e6d782f4e766f5f43617361735f4772616e6465732f323031352d31302d30315f66326337313066632f7265616c697a616e2d656c2d736567756e646f2d636f6d7075746f2d64652d6c61732d63616e646964617461732f2c706167656361743a5b49414232305d2c7075626c69736865723a7b646f6d61696e3a64696172696f2e6d782c69643a3535383339337d2c7265663a687474703a2f2f64696172696f2e6d782f4e766f5f43617361735f4772616e6465732f7d2c746d61783a3132352c757365723a7b6578743a7b7d2c69643a7875745266722d476f7878552d52414f515f65687a417d7d0a
In this way it's also easier to share or manipulate a piece of text without any additional loss of information.
You can read it back to plain text by using the -r flag:
:~$ xxd -p -r <<< 7b2262616476223a5b5d2c2262636174223a5b5d2c22646576696365223a7b22646e74223a302c2267656f223a7b2263697479223a2257494348495441222c22636f756e747279223a22555341222c226c6174223a33372e36383937382c226c6f6e223a2d39372e33343134382c226d6574726f223a22363738222c22726567696f6e223a224b53222c2274797065223a322c227a6970223a223637323132227d2c226970223a2236382e3130372e3138332e323531222c226c616e6775616765223a226573222c226f73223a2257494e444f5753222c226f7376223a2257494e444f575337222c227561223a224d6f7a696c6c612f352e30202857696e646f7773204e5420362e313b20574f5736343b2072763a33392e3029204765636b6f2f32303130303130312046697265666f782f33392e30227d2c226964223a2257706b417854646635546850222c22696d70223a5b7b2262616e6e6572223a7b226261747472223a5b5d2c226274797065223a5b5d2c22657874223a7b7d2c2268223a3235302c22706f73223a332c22746f706672616d65223a302c2277223a3330307d2c22626964666c6f6f72637572223a22555344222c226964223a2257706b417854646635546850222c22696e73746c223a302c22736563757265223a302c227461676964223a22333032383638227d5d2c2273697465223a7b22636174223a5b5d2c22646f6d61696e223a2264696172696f2e6d78222c226964223a22313030303137222c226b6579776f726473223a2264696172692c6872732c796f726b2c6c6f63616c2c74696d2c6e65772c6e6163696f6e616c2c63686968756168752c7061736f2c766964652c7468652c7265666f726d2c64756172742c6369756461642c7365727669632c7075656e742c6e6577732c6d65786963616e2c6d6564692c6573706563746163756c2c796f726b5f74696d2c6e65775f796f726b2c7468655f6e65772c74696d5f6e6577732c7365727669635f32312c6e6577735f7365727669632c7365707469656d62725f323031352c6a75e35f72657a2c64696172695f31382c6173736f6369617465645f70726573732c766963746f725f6f726f7a63222c2270616765223a22687474703a2f2f64696172696f2e6d782f4e766f5f43617361735f4772616e6465732f323031352d31302d30315f66326337313066632f7265616c697a616e2d656c2d736567756e646f2d636f6d7075746f2d64652d6c61732d63616e646964617461732f222c2270616765636174223a5b224941423230225d2c227075626c6973686572223a7b22646f6d61696e223a2264696172696f2e6d78222c226964223a22353538333933227d2c22726566223a22687474703a2f2f64696172696f2e6d782f4e766f5f43617361735f4772616e6465732f227d2c22746d6178223a3132352c2275736572223a7b22657874223a7b7d2c226964223a227875745266722d476f7878552d52414f515f65687a41227d7d
{"badv":[],"bcat":[],"device":{"dnt":0,"geo":{"city":"WICHITA","country":"USA","lat":37.68978,"lon":-97.34148,"metro":"678","region":"KS","type":2,"zip":"67212"},"ip":"68.107.183.251","language":"es","os":"WINDOWS","osv":"WINDOWS7","ua":"Mozilla/5.0 (Windows NT 6.1; WOW64; rv:39.0) Gecko/20100101 Firefox/39.0"},"id":"WpkAxTdf5ThP","imp":[{"banner":{"battr":[],"btype":[],"ext":{},"h":250,"pos":3,"topframe":0,"w":300},"bidfloorcur":"USD","id":"WpkAxTdf5ThP","instl":0,"secure":0,"tagid":"302868"}],"site":{"cat":[],"domain":"diario.mx","id":"100017","keywords":"diari,hrs,york,local,tim,new,nacional,chihuahu,paso,vide,the,reform,duart,ciudad,servic,puent,news,mexican,medi,espectacul,york_tim,new_york,the_new,tim_news,servic_21,news_servic,septiembr_2015,ju�_rez,diari_18,associated_press,victor_orozc","page":"http://diario.mx/Nvo_Casas_Grandes/2015-10-01_f2c710fc/realizan-el-segundo-computo-de-las-candidatas/","pagecat":["IAB20"],"publisher":{"domain":"diario.mx","id":"558393"},"ref":"http://diario.mx/Nvo_Casas_Grandes/"},"tmax":125,"user":{"ext":{},"id":"xutRfr-GoxxU-RAOQ_ehzA"}}
Please, note the corrupted char in ju�_rez.
You can test that this JSON is encoded in ISO-8859-1 by using file:
:~$ xxd -p -r <<< 7b2262616476223a5b5d2c2262636174223a5b5d2c22646576696365223a7b22646e74223a302c2267656f223a7b2263697479223a2257494348495441222c22636f756e747279223a22555341222c226c6174223a33372e36383937382c226c6f6e223a2d39372e33343134382c226d6574726f223a22363738222c22726567696f6e223a224b53222c2274797065223a322c227a6970223a223637323132227d2c226970223a2236382e3130372e3138332e323531222c226c616e6775616765223a226573222c226f73223a2257494e444f5753222c226f7376223a2257494e444f575337222c227561223a224d6f7a696c6c612f352e30202857696e646f7773204e5420362e313b20574f5736343b2072763a33392e3029204765636b6f2f32303130303130312046697265666f782f33392e30227d2c226964223a2257706b417854646635546850222c22696d70223a5b7b2262616e6e6572223a7b226261747472223a5b5d2c226274797065223a5b5d2c22657874223a7b7d2c2268223a3235302c22706f73223a332c22746f706672616d65223a302c2277223a3330307d2c22626964666c6f6f72637572223a22555344222c226964223a2257706b417854646635546850222c22696e73746c223a302c22736563757265223a302c227461676964223a22333032383638227d5d2c2273697465223a7b22636174223a5b5d2c22646f6d61696e223a2264696172696f2e6d78222c226964223a22313030303137222c226b6579776f726473223a2264696172692c6872732c796f726b2c6c6f63616c2c74696d2c6e65772c6e6163696f6e616c2c63686968756168752c7061736f2c766964652c7468652c7265666f726d2c64756172742c6369756461642c7365727669632c7075656e742c6e6577732c6d65786963616e2c6d6564692c6573706563746163756c2c796f726b5f74696d2c6e65775f796f726b2c7468655f6e65772c74696d5f6e6577732c7365727669635f32312c6e6577735f7365727669632c7365707469656d62725f323031352c6a75e35f72657a2c64696172695f31382c6173736f6369617465645f70726573732c766963746f725f6f726f7a63222c2270616765223a22687474703a2f2f64696172696f2e6d782f4e766f5f43617361735f4772616e6465732f323031352d31302d30315f66326337313066632f7265616c697a616e2d656c2d736567756e646f2d636f6d7075746f2d64652d6c61732d63616e646964617461732f222c2270616765636174223a5b224941423230225d2c227075626c6973686572223a7b22646f6d61696e223a2264696172696f2e6d78222c226964223a22353538333933227d2c22726566223a22687474703a2f2f64696172696f2e6d782f4e766f5f43617361735f4772616e6465732f227d2c22746d6178223a3132352c2275736572223a7b22657874223a7b7d2c226964223a227875745266722d476f7878552d52414f515f65687a41227d7d | file -i -
/dev/stdin: text/plain; charset=iso-8859-1
You can read correctly the corrupted char by executing:
:~$ xxd -p -r <<< 7b2262616476223a5b5d2c2262636174223a5b5d2c22646576696365223a7b22646e74223a302c2267656f223a7b2263697479223a2257494348495441222c22636f756e747279223a22555341222c226c6174223a33372e36383937382c226c6f6e223a2d39372e33343134382c226d6574726f223a22363738222c22726567696f6e223a224b53222c2274797065223a322c227a6970223a223637323132227d2c226970223a2236382e3130372e3138332e323531222c226c616e6775616765223a226573222c226f73223a2257494e444f5753222c226f7376223a2257494e444f575337222c227561223a224d6f7a696c6c612f352e30202857696e646f7773204e5420362e313b20574f5736343b2072763a33392e3029204765636b6f2f32303130303130312046697265666f782f33392e30227d2c226964223a2257706b417854646635546850222c22696d70223a5b7b2262616e6e6572223a7b226261747472223a5b5d2c226274797065223a5b5d2c22657874223a7b7d2c2268223a3235302c22706f73223a332c22746f706672616d65223a302c2277223a3330307d2c22626964666c6f6f72637572223a22555344222c226964223a2257706b417854646635546850222c22696e73746c223a302c22736563757265223a302c227461676964223a22333032383638227d5d2c2273697465223a7b22636174223a5b5d2c22646f6d61696e223a2264696172696f2e6d78222c226964223a22313030303137222c226b6579776f726473223a2264696172692c6872732c796f726b2c6c6f63616c2c74696d2c6e65772c6e6163696f6e616c2c63686968756168752c7061736f2c766964652c7468652c7265666f726d2c64756172742c6369756461642c7365727669632c7075656e742c6e6577732c6d65786963616e2c6d6564692c6573706563746163756c2c796f726b5f74696d2c6e65775f796f726b2c7468655f6e65772c74696d5f6e6577732c7365727669635f32312c6e6577735f7365727669632c7365707469656d62725f323031352c6a75e35f72657a2c64696172695f31382c6173736f6369617465645f70726573732c766963746f725f6f726f7a63222c2270616765223a22687474703a2f2f64696172696f2e6d782f4e766f5f43617361735f4772616e6465732f323031352d31302d30315f66326337313066632f7265616c697a616e2d656c2d736567756e646f2d636f6d7075746f2d64652d6c61732d63616e646964617461732f222c2270616765636174223a5b224941423230225d2c227075626c6973686572223a7b22646f6d61696e223a2264696172696f2e6d78222c226964223a22353538333933227d2c22726566223a22687474703a2f2f64696172696f2e6d782f4e766f5f43617361735f4772616e6465732f227d2c22746d6178223a3132352c2275736572223a7b22657874223a7b7d2c226964223a227875745266722d476f7878552d52414f515f65687a41227d7d | iconv -f iso-8859-1 -t utf-8 -
{"badv":[],"bcat":[],"device":{"dnt":0,"geo":{"city":"WICHITA","country":"USA","lat":37.68978,"lon":-97.34148,"metro":"678","region":"KS","type":2,"zip":"67212"},"ip":"68.107.183.251","language":"es","os":"WINDOWS","osv":"WINDOWS7","ua":"Mozilla/5.0 (Windows NT 6.1; WOW64; rv:39.0) Gecko/20100101 Firefox/39.0"},"id":"WpkAxTdf5ThP","imp":[{"banner":{"battr":[],"btype":[],"ext":{},"h":250,"pos":3,"topframe":0,"w":300},"bidfloorcur":"USD","id":"WpkAxTdf5ThP","instl":0,"secure":0,"tagid":"302868"}],"site":{"cat":[],"domain":"diario.mx","id":"100017","keywords":"diari,hrs,york,local,tim,new,nacional,chihuahu,paso,vide,the,reform,duart,ciudad,servic,puent,news,mexican,medi,espectacul,york_tim,new_york,the_new,tim_news,servic_21,news_servic,septiembr_2015,juã_rez,diari_18,associated_press,victor_orozc","page":"http://diario.mx/Nvo_Casas_Grandes/2015-10-01_f2c710fc/realizan-el-segundo-computo-de-las-candidatas/","pagecat":["IAB20"],"publisher":{"domain":"diario.mx","id":"558393"},"ref":"http://diario.mx/Nvo_Casas_Grandes/"},"tmax":125,"user":{"ext":{},"id":"xutRfr-GoxxU-RAOQ_ehzA"}}
Please, note now the a with tilde in juã_rez correctly encoded.
This conversion is possible because UTF-8 (which is multi-byte) is capable of encoding any Unicode code points, while ISO-8859-1 (which is single-byte) can handle only a subset of them. So, transcoding from ISO-8859-1 to UTF-8 is not a problem. Instead, going backwards from UTF-8 to ISO-8859-1 will cause replacement characters (e.g. �) to appear in the text when unsupported characters are found.
Debugging this kind of issues can be tricky: make sure you know at least the absolute minimum about character encoding.
How to test the microphone
List the available microphone devices on your system:
:~# arecord -l
**** List of CAPTURE Hardware Devices ****
card 0: PCH [HDA Intel PCH], device 0: ALC255 Analog [ALC255 Analog]
Subdevices: 1/1
Subdevice #0: subdevice #0
Select one of the audio-input devices from the list and use it to record a 10-second audio clip to see if it's working:
:~# arecord -f cd -d 10 --device="hw:0,0" /tmp/test-mic.wav
hw:0,0 is used to specify which microphone device to use: the first digit specifies the card, while the second digit specifies the device.
Play what you have just recorded:
:~# aplay /tmp/test-mic.wav
Playing WAVE '/tmp/test-mic.wav' : Signed 16 bit Little Endian, Rate 44100 Hz, Stereo
Automate Login via SSH
You can use expect for automating the interaction with CLI prompts. It uses expectations captured in the form of regular expressions, which it can respond to by sending out responses without any user intervention.
Let's say you want to automate the login into a home server for which you have to provide the passphrase of your public key (id_rsa). If so, you just need a simple script like the following:
#!/usr/bin/expect
set timeout 60
spawn ssh YOUR_USERNAME_HERE@[lindex $argv 0]
expect "Are you sure you" {
send "yes\r"
}
expect "*?assphrase" {
send "YOUR_PASSWORD_HERE\r"
}
interact
In the above script:
lindexgets the individual elements from a positional argument list$argv 0should be the IP address of your server
spawninvokes a new process or sessionexpectwaits for the spawned process output in the expected patternsendwrites to the spawned process' stdininteractgives the control back to the current process so that stdin is sent to the current process, and subsequently, stdout and stderr are returned.
If your home server doesn't have a static IP address, you could automate the IP discovery by scanning your own home network with an alias in your .bash_aliases:
alias sshlogin='for ip in $(nmap -sn 192.168.1.1/24 | grep -Po "(?<=Nmap scan report for )\d+\.\d+\.\d+\.\d+"); do ./ABOVE_SCRIPT_NAME.sh $ip; done'
Note: Also the generation of such script can be automated with autoexpect.
Note: The script above contains the password in plain text. This can be safe only at home, provided that you really configured your home network and home devices in a secured way that protexts you from any security threats. Using an encrypted file to store you password should be much safer.
How to fix low screen resolution
Sometimes when you connect a device to a monitor (external or integrated), you may experience an unexpected low resolution that you cannot change via system setting GUI of your desktop environment: only lower resolutions could be available.
This can happen especially if you are using a VGA-to-HDMI converter to connect an old pc to a newer monitor. If the comunication is unidirectional, from input (e.g., a mini pc supporting only VGA) to output (e.g. an external monitor supporting only HDMI), the monitor won't be able to send EDID data packets which containts info regarding its capabilities.
In such cases, you can have to grab the EDID data from another pc connected to this monitor or online, if you are lucky enough to find it.
Firstly, you should verify that the graphic card(s) of your pc can match the recommended resolution of your monitor: typically, 1920x1080 at 60 refresh rate (a standard also know as 1080p, Full HD or FHD,). For Intel cards, see here.
Once this is verified, you may try to just add the the intended resolution (let's tick to the default scenario, i.e. 1920x1080) with xrandr:
# show available resolutions for common display types (VGA, HDMI, etc.)
xrandr
# generate correct params for the target resolution
cvt 1920 1080 60
# pass the above params to the next command
xrandr --newmode "1920x1080_60.00" 173.00 1920 2048 2248 2576 1080 1083 1088 1120 -hsync +vsync
# make available the new resolution for the intended display type
xrandr --addmode VGA-1 "1920x1080_60.00"
xrandr --output VGA-1 --mode "1920x1080_60.00"
# go to the system settings GUI and select the resolution you have just configured if it's not still active after last command is executed
If this solved your problem, you have just to put these commands in an executable file sourced when the X session starts. Put this file in one of the following directories:
~/.profile/etc/profile.d
If this did not solve the problem for you, some extra work is needed: you will have to manually retrieve the EDID file and set it in a Xorg config file or append it to the kernel parameters in the boot loader's boot selection menu.
To parse EDID info, install the read-edid package: apt install read-edid
To retrieve the EDID file, you have two options:
- find it in the EDID repository of the The Linux Hardware Project by searching for the model name of your monitor
- grab it from another pc connected to the monitor by running the following command (substitute
card1-HDMI-A-1with the DRM device found on this second pc)::~$ edid-decode </sys/class/drm/card1-HDMI-A-1/edid edid-decode (hex): 00 ff ff ff ff ff ff 00 09 d1 51 79 45 54 00 00 1f 1d 01 03 80 35 1e 78 2a 05 61 a7 56 52 9c 27 0f 50 54 a5 6b 80 d1 c0 81 c0 81 00 81 80 a9 c0 b3 00 d1 cf 01 01 02 3a 80 18 71 38 2d 40 58 2c 45 00 0f 28 21 00 00 1e 00 00 00 ff 00 31 38 4b 30 30 30 33 33 30 31 51 0a 20 00 00 00 fd 00 30 4b 1e 53 15 00 0a 20 20 20 20 20 20 00 00 00 fc 00 42 65 6e 51 20 45 57 32 34 38 30 0a 20 01 ba 02 03 44 f1 4f 90 1f 05 14 04 13 03 12 07 16 15 01 06 11 02 23 09 07 07 83 01 00 00 e2 00 d5 68 03 0c 00 30 00 38 44 00 67 d8 5d c4 01 78 80 00 68 1a 00 00 01 01 30 4b e6 e3 05 c3 01 e6 06 05 01 61 5a 26 02 3a 80 18 71 38 2d 40 58 2c 45 00 0f 28 21 00 00 1e 01 1d 00 72 51 d0 1e 20 6e 28 55 00 0f 28 21 00 00 1e 8c 0a d0 8a 20 e0 2d 10 10 3e 96 00 0f 28 21 00 00 18 00 00 00 00 00 e8 ---------------- Block 0, Base EDID: EDID Structure Version & Revision: 1.3 Vendor & Product Identification: Manufacturer: BNQ Model: 31057 Serial Number: 21573 Made in: week 31 of 2019 [...]
Once you have it, use the first hexadecimal block at the beginning of the output of the command to generate the binary file:
$ HEXSTR="\
00 ff ff ff ff ff ff 00 09 d1 51 79 45 54 00 00\
1f 1d 01 03 80 35 1e 78 2a 05 61 a7 56 52 9c 27\
0f 50 54 a5 6b 80 d1 c0 81 c0 81 00 81 80 a9 c0\
b3 00 d1 cf 01 01 02 3a 80 18 71 38 2d 40 58 2c\
45 00 0f 28 21 00 00 1e 00 00 00 ff 00 31 38 4b\
30 30 30 33 33 30 31 51 0a 20 00 00 00 fd 00 30\
4b 1e 53 15 00 0a 20 20 20 20 20 20 00 00 00 fc\
00 42 65 6e 51 20 45 57 32 34 38 30 0a 20 01 ba";
$ echo -en $(echo "$HEXSTR" | sed -E 's/([0-9abcdef][0-9abcdef])[[:space:]]?/\\x\1/g') > edid.bin
# check that the file is readable
$ edid-decode edid.bin
In order to apply it only to a specific connector with a specific resolution, force this kernel mode setting (KMS) by copying the file (edid.bin in the example) into /usr/lib/firmware (create it if it does not exists) with a proper name and parent folder according to the following pattern: CONNECTOR:edid/RESOLUTION.bin (e.g. /usr/lib/firmware/VGA-1:edid/1920x1080.bin).
You now have two options to make this file available to the display manager (e.g. SDDM):
- adding a config file to the
xorg.conf.ddirectory with the relevant info, as described here - modifying the Linux Kernel parameters to include a directive for reading the EDID file at boot time.
The first option is lengthy and requires you to understand how to properly configure Xorg.
The second is quicker but error-prone, so be extra-careful if going through the following steps:
- reboot the system, wait for the system to restart and then press and hold the
Esckey until the GRUB menu appears - if it doesn't appear at all after multiple retries, chanches are that you must set a longer timeout for the GRUB
- press
ewhen the menu appears and add thedrm.edid_firmwareargument to the end of the line starting withlinux:
linux /boot/vmlinuz-linux root=UUID=0a3407de-014b-458b-b5c1-848e92a327a3 rw [...] drm.edid_firmware=VGA-1:edid/1920x1080.bin
Boot the system to verify if the change had the desired effect.
If so, make the change permanent by editing the /etc/default/grub to set GRUB_CMDLINE_LINUX_DEFAULT option to the new parameter (e.g. GRUB_CMDLINE_LINUX_DEFAULT="drm.edid_firmware=VGA-1:edid/your_edid.bin") and then regenerating the GRUB config with: grub-mkconfig -o /boot/grub/grub.cfg.
Reboot to verify that the change works across system restarts.
References:
- Unable to set my screen resolution higher
- Fix Broken EDID Guide
- RepairEDID
- Kernel parameters
- Kernel mode setting
Non-Free Firmware for Debian
After installing, you may need to install non-free firmware to get the drivers required by your hardware: e.g. to enable wireless connection.
First, allow apt to download packages from contrib and non-free sources:
apt-add-repository contrib
apt-add-repository non-free
Add some common firmware:
apt install firmware-linux-nonfree
apt install firmware-misc-nonfree
# if you have Realtek hardware in your machine
apt install firmware-realtek
For the specific wifi drivers you need, read the Debian docs online. For example, for Intel cards you will need iwlwifi:
apt update && apt install firmware-iwlwifi
# reload kernel module
modprobe -r iwlwifi ; modprobe iwlwifi
For nvidia GPUs, use nvidia-detect to find out the appropriate drivers, e.g.:
apt install nvidia-driver
Check if the nvidia modules are loaded with lsmod | grep nvidia. If not, verify that you had already disabled Secure/Fast Boot in the BIOS/UEFI settings.
How to fix Nvidia graphics card problems
Unfortunately the FOSS project nouveau is long from being able to replace the infamous proprietary nvidia drivers. Chances are you are going to install them to have basic stuff working, such as simply connecting an external monitor to your laptop.
See the article on non-free firmware to understand how to install them.
The drivers aren't going to completely save your time, tough.
In fact, even if they blacklist nouveau, to configure a dual-monitor setup with your desktop environment you may need anyway to:
- force the appropriate kernel modules to be loaded at boot-time in the kernel boot parameters
nvidia-drm.modeset=1
- and, after rebooting, do some magic trick with xrandr:
xrandr --setprovideroutputsource NVIDIA-G0 modesetting && xrandr --auto
as explained in the nvidia documentation.
If in trouble, consult or ask for help in their online forum and study Xorg and the related tooling.
Recover from a failed installation
For some reasons the installation process may fail unexpectedly leaving the system in an inconsistent state.
At reboot you will be presented with the GRUB shell.
To rebooting from the USB stick and retry the installation you will have to manually locate the GRUB EFI binary (grubx64.efi) and boot from this file.
In order to do so, type ls to list all the devices in the system:
grub> ls
(hd0) (hd0,msdos1) (hd1) (hd1,gpt2) (hd1,gpt1) (cd0,msdos1)
Note: The keyboard layout may be different from the usual one (default is US English). You will need to guess where is the character you need.
Inspect every device to find the EFI path (i.e. /efi/boot/grubx64.efi):
grub> ls (cd0,msdos1)/
efi
grub> ls (cd0,msdos1)/EFI
boot
grub> ls (cd0,msdos1)/EFI/boot
grubx64.efi
Once done, chain-load the bootloader at this path:
grub> chainloader /efi/boot/grubx64.efi
Then, simply boot into it:
grub> boot
The installer will opens up once again and you will be able to restart the installation from scratch.
Mapping Hosts and Ports Locally
Add an entry to /etc/hosts mapping a given domain name to 127.0.0.1:
$ head -n3 /etc/hosts
127.0.0.1 localhost
127.0.1.1 yourmachinehostname.homenet.isp.com
127.0.0.1 registry.io
Usually this is the first source (it depends on your Name Service Switch (NSS) configuration file, /etc/nsswitch.conf) checked by an application that needs to perform name resolution via C library routines such as getaddrinfo. The next step should be sending DNS queries to the servers listed in the /etc/resolv.conf file.
Note: some programming languages as Go can use a custom resolver with their own logic as well.
This works fine but if you want to redirect the traffic to a specific port, you will also need to setup a reverse proxy: you can configure the Apache HTTP Server (with the mod_rewrite module) or nginx (with the proxy_pass directive) to proxy the incoming requests to the right destination port.
To configure nginx, you could put the snippet below in /etc/nginx/conf.d/registry.conf:
server {
listen 80;
server_name registry.io;
location / {
proxy_pass http://127.0.0.1:5000/;
}
}
And you would be able to redirect registry.io to 127.0.0.1:5000:
$ curl http://registry.io/v2/_catalog
{"repositories":["debian","alpine"]}
If all you need is just to make a simple HTTP call for a one-shot test, you can instruct curl to resolve a hostname to specific IP address:
$ curl --resolve registry.io:5000:127.0.0.1 http://registry.io:5000/v2/_catalog
{"repositories":["debian","alpine"]}
In fact, the documentation for the flag says:
--resolve <[+]host:port:addr[,addr]...>
Provide a custom address for a specific host and port pair. Using this, you can make the curl requests(s) use a specified address and prevent the otherwise normally resolved address to be used. Consider it a sort of /etc/hosts alternative provided on the command line. The port number should be the number used for the specific protocol the host will be used for. It means you need several entries if you want to provide address for the same host but different ports.
It even allows you to specify both a replacement name and a port number when a specific name and port number is used to connect:
curl --connect-to registry.io:80:127.0.0.1:5000 http://registry.io/v2/_catalog
{"repositories":["debian","alpine"]}
Otherwise if you don't want to clutter your hosts file, you can install on your Linux distribution the nss-myhostname package: it automatically resolves any subdomains of localhost to the 127.0.0.1, so that you can simply refer to a server running locally by adding .localhost as a suffix along with its port, e.g.:
$ curl http://registry.localhost:5000/v2/_catalog
{"repositories":["debian","alpine"]}
In this way (almost) everything works with zero configuration on your local environment, and so it's even better than using dnsmasq which requires a bit of configuration to get the same result.
That said, your are still in need of specifying the target port. You will probably need iptables (or ssh) to setup a port forwarding if that is crucial for you.
References:
- Apache Module mod_rewrite
- NGINX Reverse Proxy
- Iptables Tutorial
- Name resolve tricks (curl)
- nss-myhostname(8)
- Use dnsmasq instead of /etc/hosts
Tips & tricks
-
When entering a password in a terminal, if you realize there's a typo, type
ctrl + uto undo the password just entered and enter it again. -
Escaping strings in bash using
!:q(TODO) -
reverse search (TODO)
-
Hiding passwords in scripts (TODO)
-
Create a simple chat with
netcat(TODO) -
Bash allows you to ignore history entries that begin with a space if you set the
HISTCONTROLvariable toignorespace. Type a space before a command before running it in the bash shell and the command will run normally, but won't appear in your history if you have this variable enabled. This allows you to keep your history a bit cleaner, choosing to run commands without them appearing in your history. Bash also allows you to ignore duplicate commands that can clutter your history. To do so, setHISTCONTROLtoignoredups. To use both the ignorespace and ignoredups feature, set theHISTCONTROLvariable toignoreboth. -
Always check if a piece of hardware is compatible with Linux, before buying it. For printers, have a look at this list or check the OpenPrinting database. A recent project which aims help people to collaboratively debug hardware related issues, check for Linux-compatibility and find drivers is Hardware for Linux. If you are currently not able to write your own printer driver but you have some interest in it, consider starting from here.
-
Find out neighbours in your local network:
sudo nmap -sn 192.168.1.0/24 -
Use floating-point arithmetich in bash:
bc <<< 'scale=2; 61/14' -
Encrypt your emails with GnuPG to protect yourself from mass surveillance.
-
Capture (unencrypted) HTTP traffic on localhost with nc, e.g.:
# listen fon incoming communication on a specific port in a shell
:~$ nc -l 8080
# send a request to this port from another shell in your machine
:~$ curl -X POST -H "Content-Type: application/json" -d '{"hello": "world"}' http://localhost:8080
# return to the main shell to see the received request
:~$ nc -l 8080
POST / HTTP/1.1
Host: localhost:8080
User-Agent: curl/7.68.0
Accept: */*
Content-Type: application/json
Content-Length: 18
{"hello": "world"}
- Beware of commands with the same name, especially command shell built-in vs external command as
time:
:~$ type -a time
time is a shell keyword
time is /usr/bin/time
time is /bin/time
Use the full path to execute to not execute the built-in command:
/usr/bin/time [OPTIONS] COMMAND [ARG]...
#or
/bin/time [OPTIONS] COMMAND [ARG]...
-
Take a screenshot from the command line on a X Window System (with
imagemagick):sleep 5; xwd -root | convert xwd:- test.png -
Cat without cat:
echo "$(<file.txt)"(credits @jarv) -
On bash, you can relaunch a command along with its args and flags by using the esclamation mark, e.g.:
!gccwill re-execute the last occurence ofgccin the shell history.
20 Again, on bash, !! will re-execute the very last command in shell history. That's very handy, especially when you just forget to prefix a command with sudo: in this case you can simply run sudo !!.
References
- LFS201 course material
- UNIX & LINUX Sysadmin Handbook
- Ubuntu Server guide
- CommunityHelpWiki1
- Tecmint
- DigitalOcean
- Unix&Linux
- AskUbuntu
- ServerFault
- Linuxize
- LinuxConfig
- LinuxBabe
- LinOxide
- HowToGeek
- TheGeekDiary
- UNIX toolbox
- Arch wiki
- OpsSchool
- Debian Handbook
- CompTIA Linux+ (XK0-004) course
- EnableSysadmin
- OpenSource
-
beware, not always up to date ↩